

When Is The Voting For 2019 Saveur Blog Awards
The post GREEK APPLE BREAD – MILÓPITA appeared first on ful-filled.
]]>
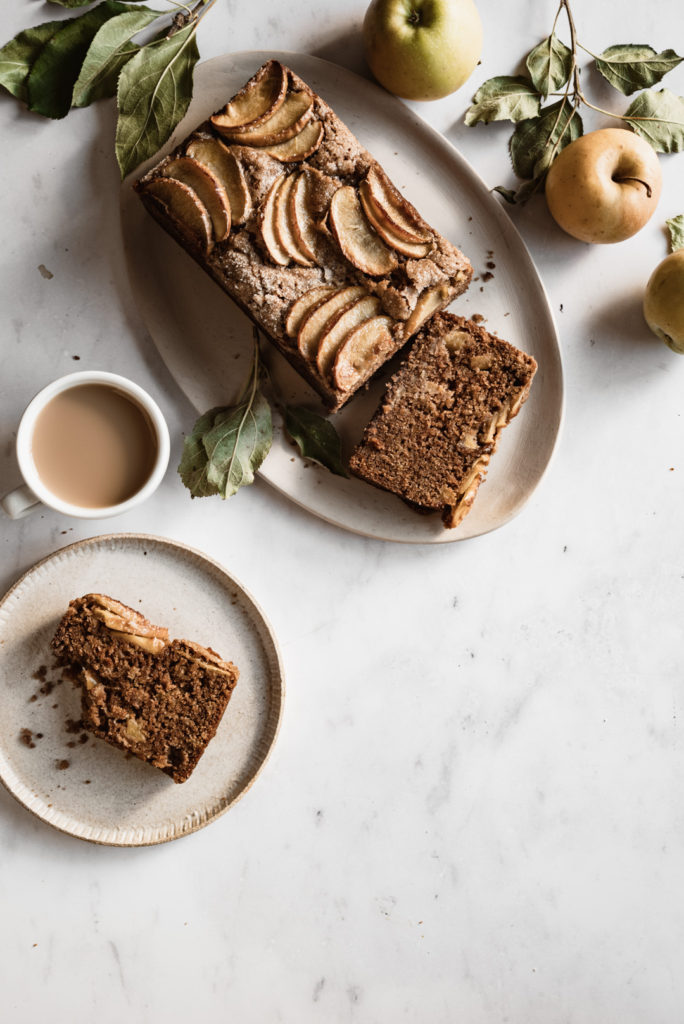
It's hard to believe that such a long time has passed since my last blog post. And SO much has transpired in our life since then. But I finally feel like I am in a place to share here once again. The predominant concern of the last 2+ years of our life has been my mother-in-law, who has dementia. And while it was a deeply difficult journey, I am so grateful to report that she is *finally receiving the care that she needs and deserves. I had the chance yesterday to see her for the first time since she moved into her care home. Thankfully, she still remembered me even after not seeing each other for over 6 weeks. I brought her a piece of this Greek apple bread – milópita. And as I watched her thoroughly enjoy each bite, down to the last crumb, my heart was truly full.


This isn't the first time that I have shared a recipe for Greek apple bread. Also known as milópita, this apple-filled baked good is something my mother-in-law used to make quite often. As I wrote in my original milópita post, this is our least favorite baked good that my mother-in-law used to make. The recipe itself wasn't horrible. It was her execution that lacked in the care necessary to yield a desirable end result. When I originally told my hubby that I was going to make Greek apple bread he begged me not to. That is how much he disliked it. But once he tasted my re-imagined recipe he was converted into a milópita lover!
KEYS TO THE PERFECT GREEK APPLE BREAD:
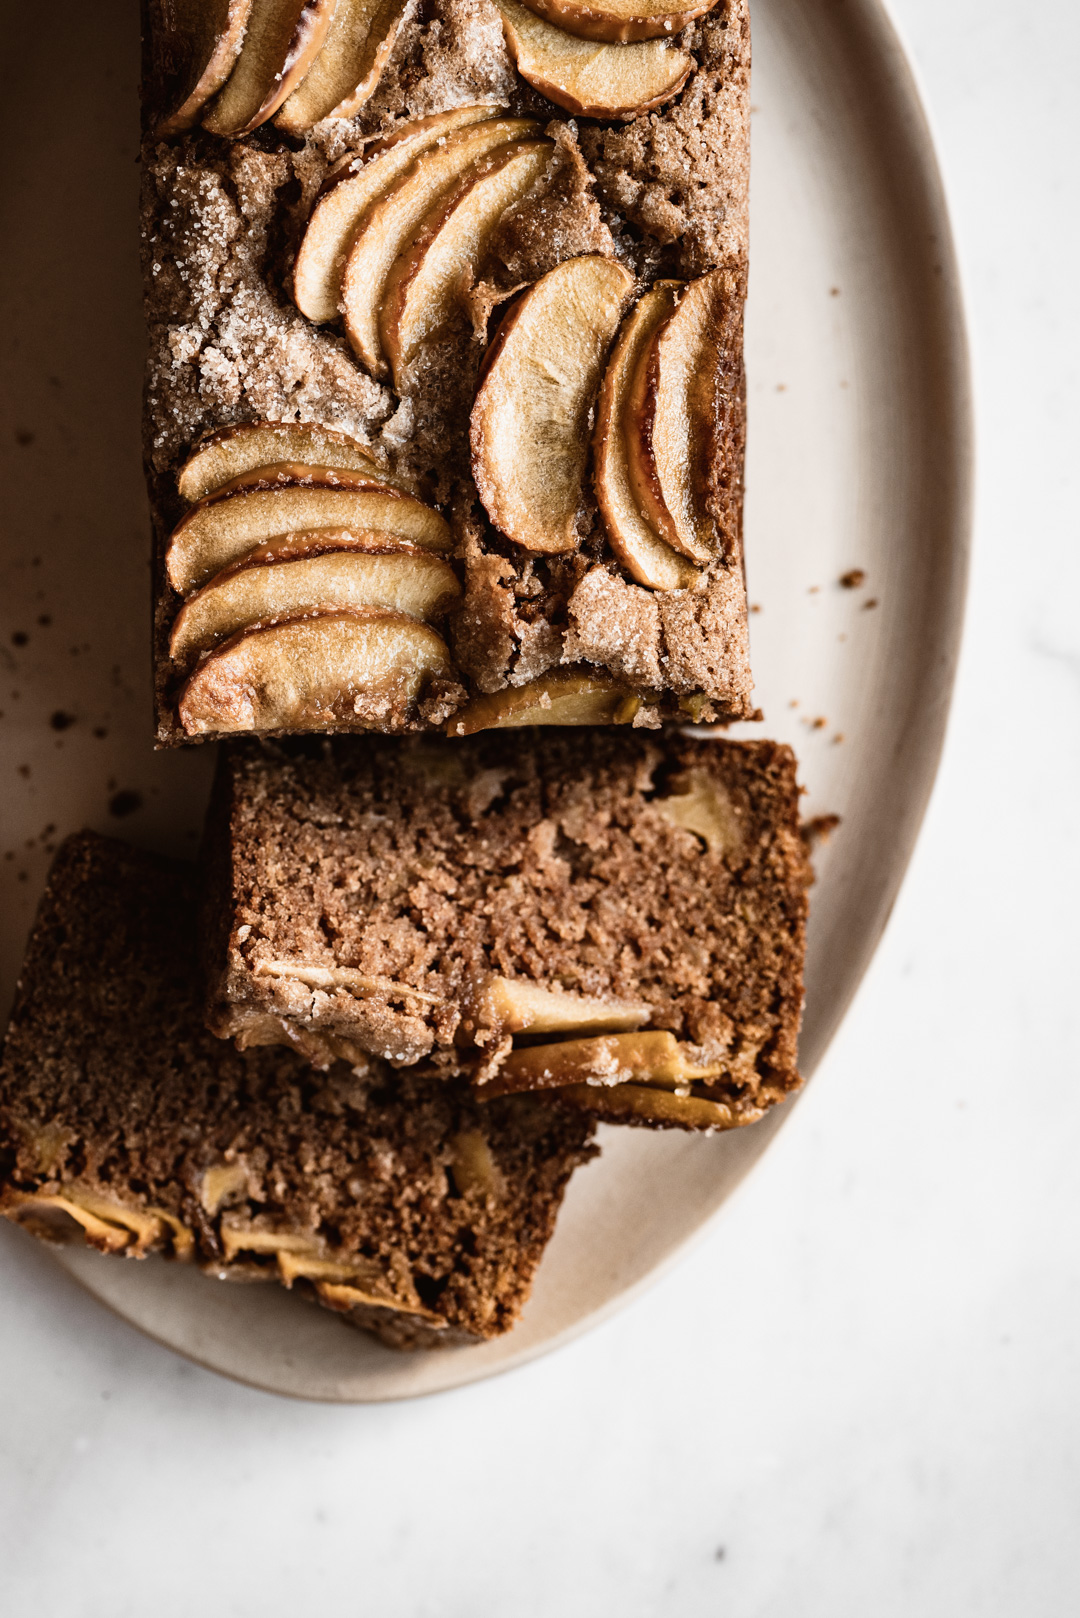
- APPLES THREE WAYS: This is the most crucial element of Greek apple bread – milópita. In order to achieve the maximum apple flavor and the most intriguing blend of textures, the recipe must include finely chopped, grated, and sliced apples.
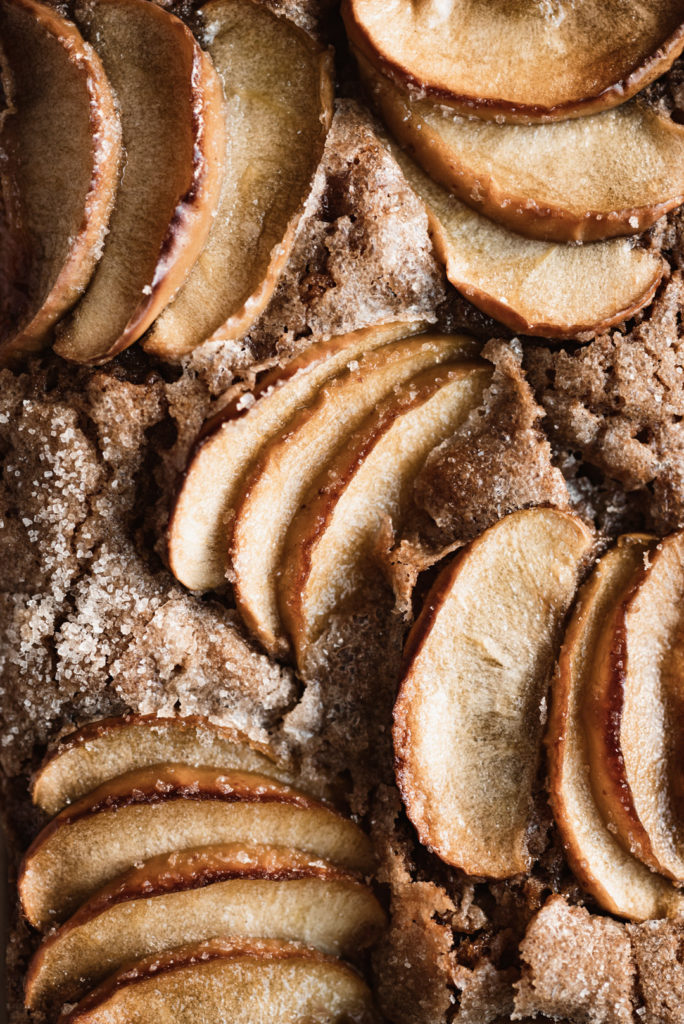
- SPICE IS NICE: There are a ton of recipes for apple bread or cake on the internet. One of the keys that sets Greek apple bread apart is the spices. A good amount of cinnamon, a touch of allspice & a smidge of cardamom makes for a beautifully aromatic result. *Added bonus: your house will smell incredible while this bakes.
- MILD GREEK OLIVE OIL in baked goods is truly SO delicious. You don't want to use olive oil that is peppery or acidic, use a nice buttery extra virgin olive oil, which is most common in Greece. It will yield a super moist crumb with a lovely aroma that compliments the apples perfectly.

A GREEK APPLE BREAD WORTH POSTING ABOUT AGAIN…
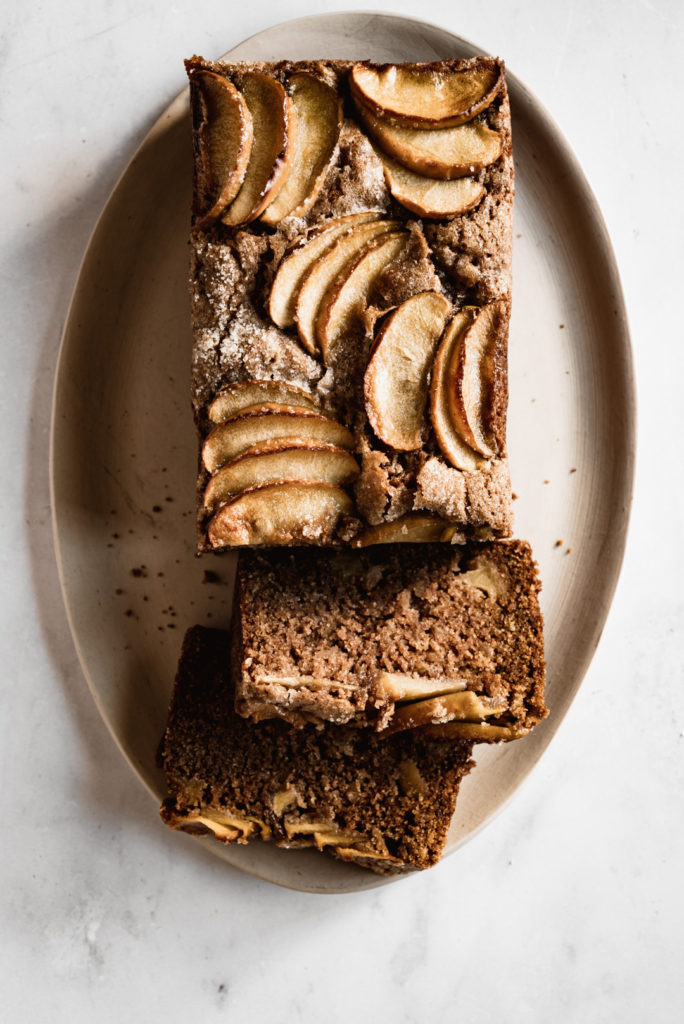
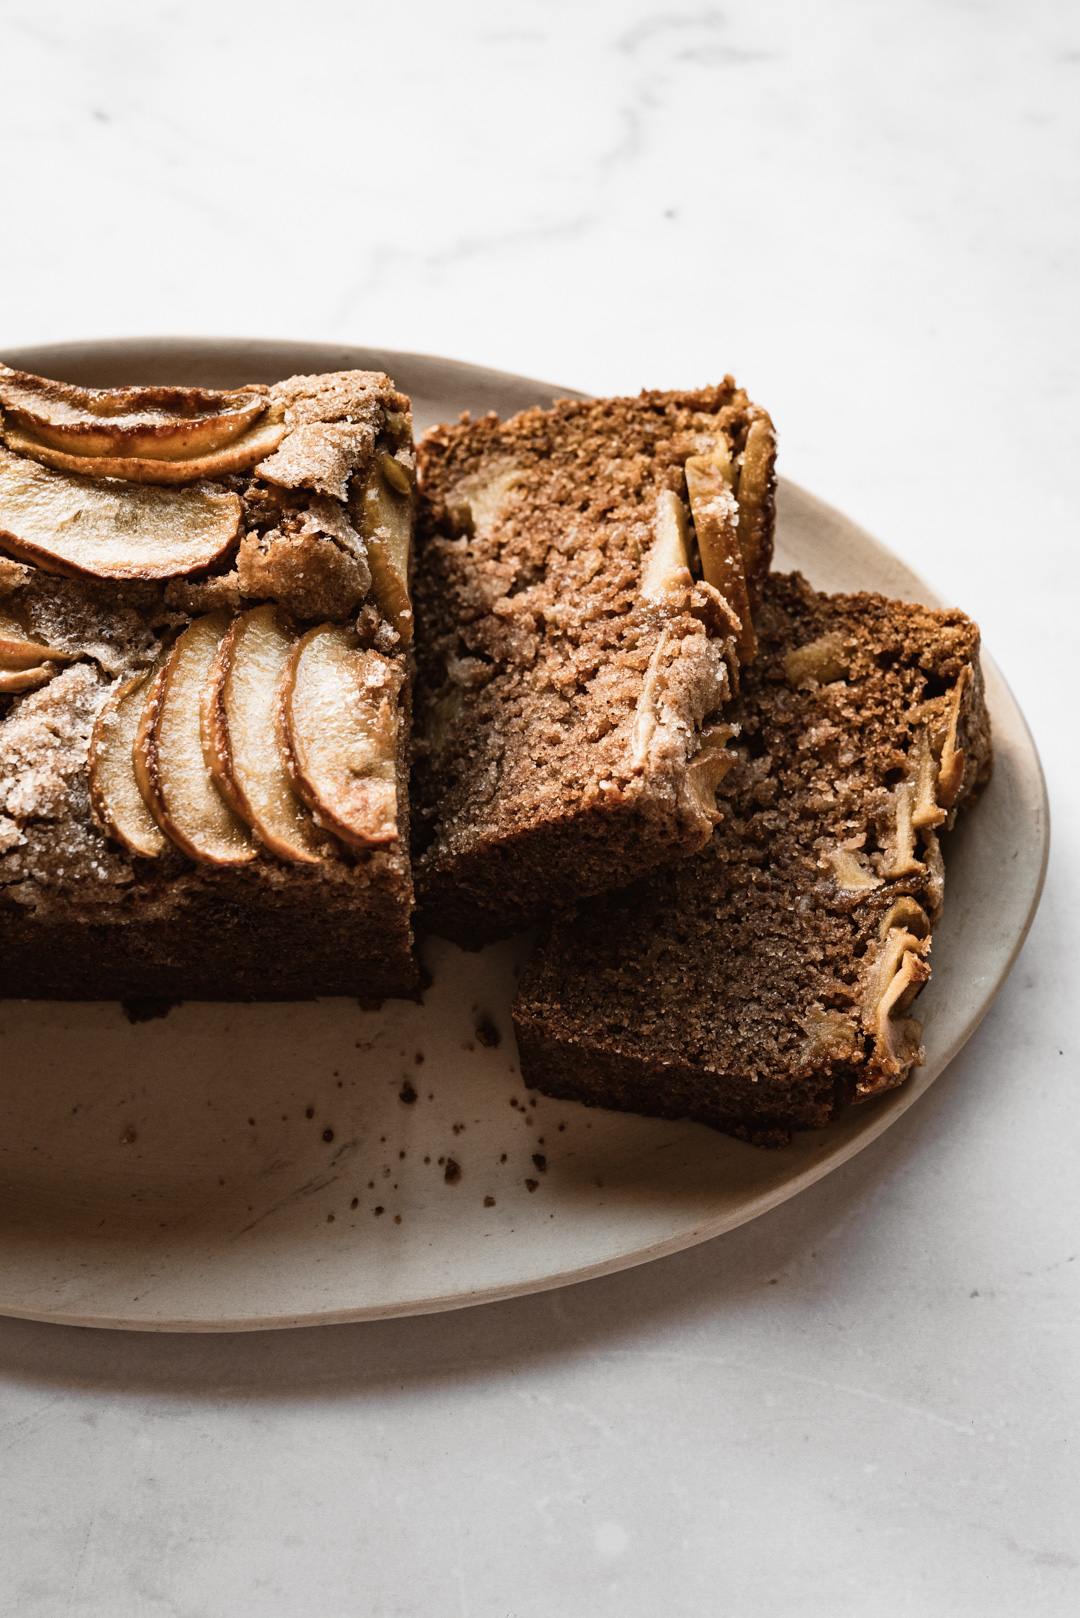
You may be wondering why I would share a second recipe for Greek apple bread here on Ful-filled. The simple reason is that I wanted to experiment with adapting my original milópita recipe into a loaf pan, similar to how sweet cake-like breads are typically prepared in America. And I could not be happier with the result. It's interesting how you can experience the same ingredients differently solely based on the shape of the pan. Do we prefer one more than the other? I wouldn't say so, I think it just depends on your mood as to which shape you choose for your Greek apple bread – milópita. One thing I love about the loaf pan version is that the topping gets a bit crisper due to the longer baking time.
This Greek apple bread – milópita is incredibly moist thanks to all of the apple and olive oil. It is full of warm spices that are synonymous with this time of year. It's a truly special recipe, if not for its flavor & texture, but for the fact that it was redeemed from being the outcast of Greek desserts for our household. Another added bonus: it is dairy-free and easily made vegan by using ground flaxseed in place of an egg. I truly hope you add this Greek apple bread to your baking roster this fall 
GREEK APPLE BREAD - MILÓPITA
Total Time
1 hour, 30 minutes
Notes
**When it comes to the spices, you can adjust them based on your personal preference. Greek baked goods tend to be pretty generously spiced, so feel free to take the liberty of leaving out the all spice and cardamom if you prefer your desserts less spiced. But we absolutely love the cardamom & all spice in this cake ;)
Ingredients
- 1 cup all-purpose flour + 1/2 cup whole-wheat flour (or 1 1/2 cups gluten free flour blend)
- 1 1/2 tsp cinnamon
- 1/2 tsp ground cardamom
- 1/4 tsp ground all spice (or use ground cloves)
- 1 1/2 tsp baking powder
- 1/2 tsp baking soda
- 1/2 tsp salt
- 1 tsp vanilla extract
- 1/2 cup brown sugar
- 1/2 cup sugar
- 1 egg (or substitute with 1 tbsp flax mixed with 3 tbsp water)
- 2/3 cup Greek extra virgin olive oil
- 1/3 cup water or apple cider (whichever you have on hand)
- 1 cup grated apple (about one small apple)
- 1 cup finely chopped apple (about one small apple)
- 1 apple, skin-on & thinly sliced
- 1 tbsp olive oil + 1 tbsp sugar for topping
Instructions
- Preheat oven to 350F. Line your loaf pan (8"x4" standard loaf pan or 9"x4" pullman pan with a sheet of parchment. Set aside.
- Whisk flour with cinnamon, cardamom, clove, baking powder, baking soda and salt in a medium bowl.
- Whisk egg (or flax egg) with sugars, 2/3 cup oil and water or cider in a large bowl. The mixture will emulsify and look homogenous.
- With a spatula, stir flour mixture into wet mixture. Fold in grated apples and then fold in chopped apples. Scrape batter into the prepared pan and smooth the top. Arrange overlapping apple slices on the top of the bread. Brush apple slices with a bit of olive oil and then sprinkle the top with sugar.
- Bake in center of oven until a tester inserted into cake comes out clean, about 70 min.
- Transfer to a rack to cool. Let cool completely, about 1 hour.
- Keeps well at room temperature for up to 3 days.
The post GREEK APPLE BREAD – MILÓPITA appeared first on ful-filled.
]]>The post CAULIFLOWER RICE STUFFED PEPPERS | <span style=''font-size:12px;'>GREEK GEMISTÁ</span> appeared first on ful-filled.
]]>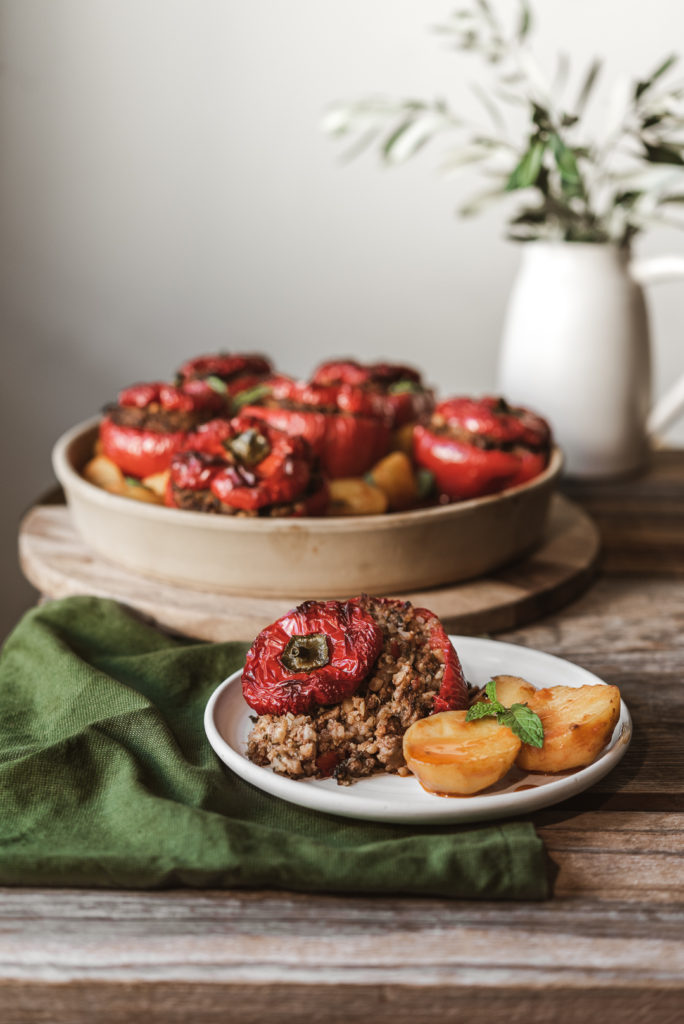
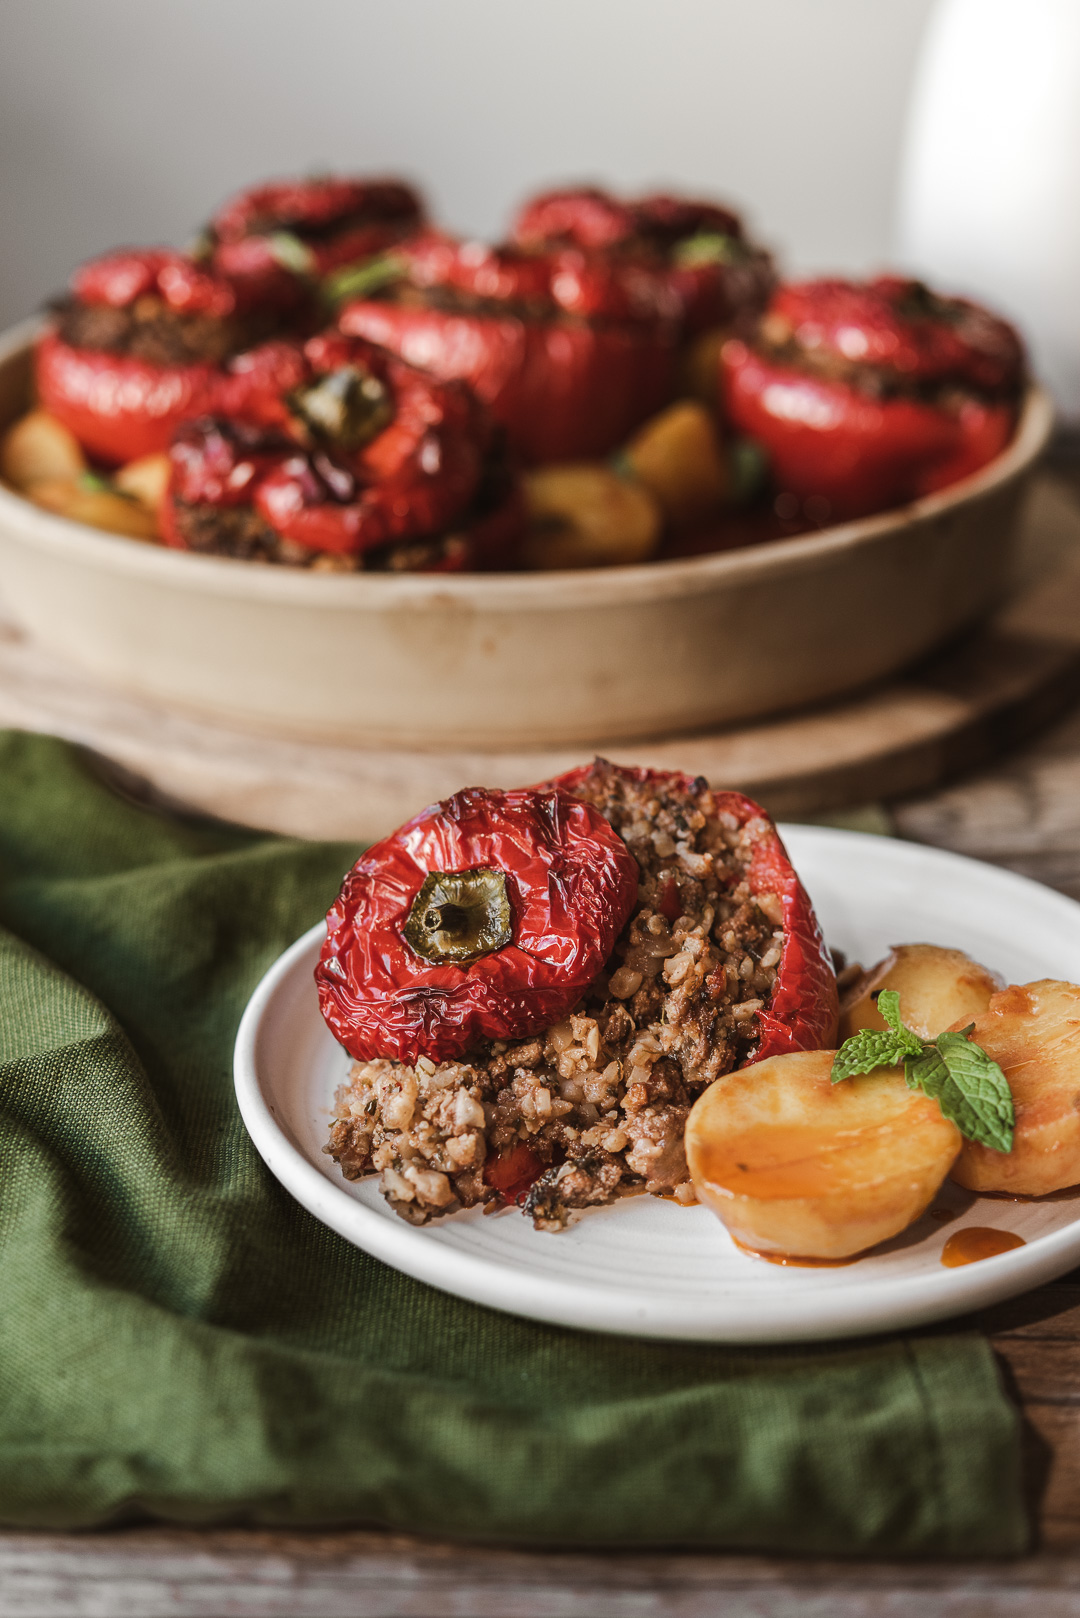
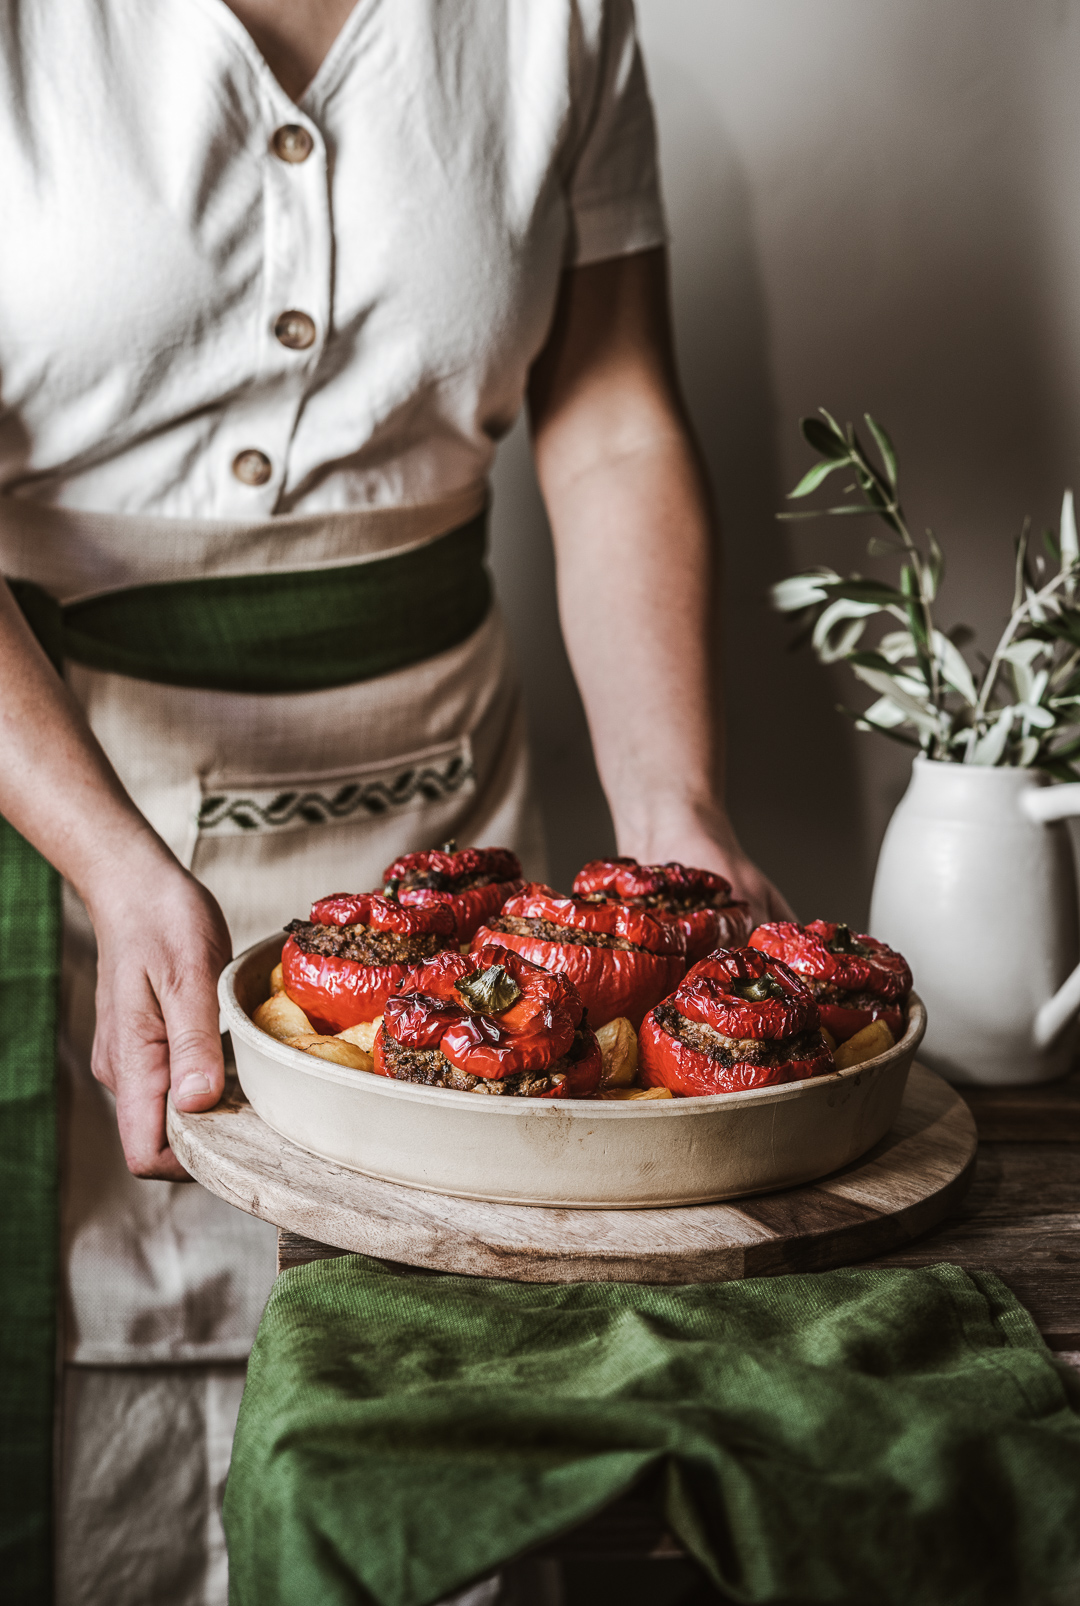
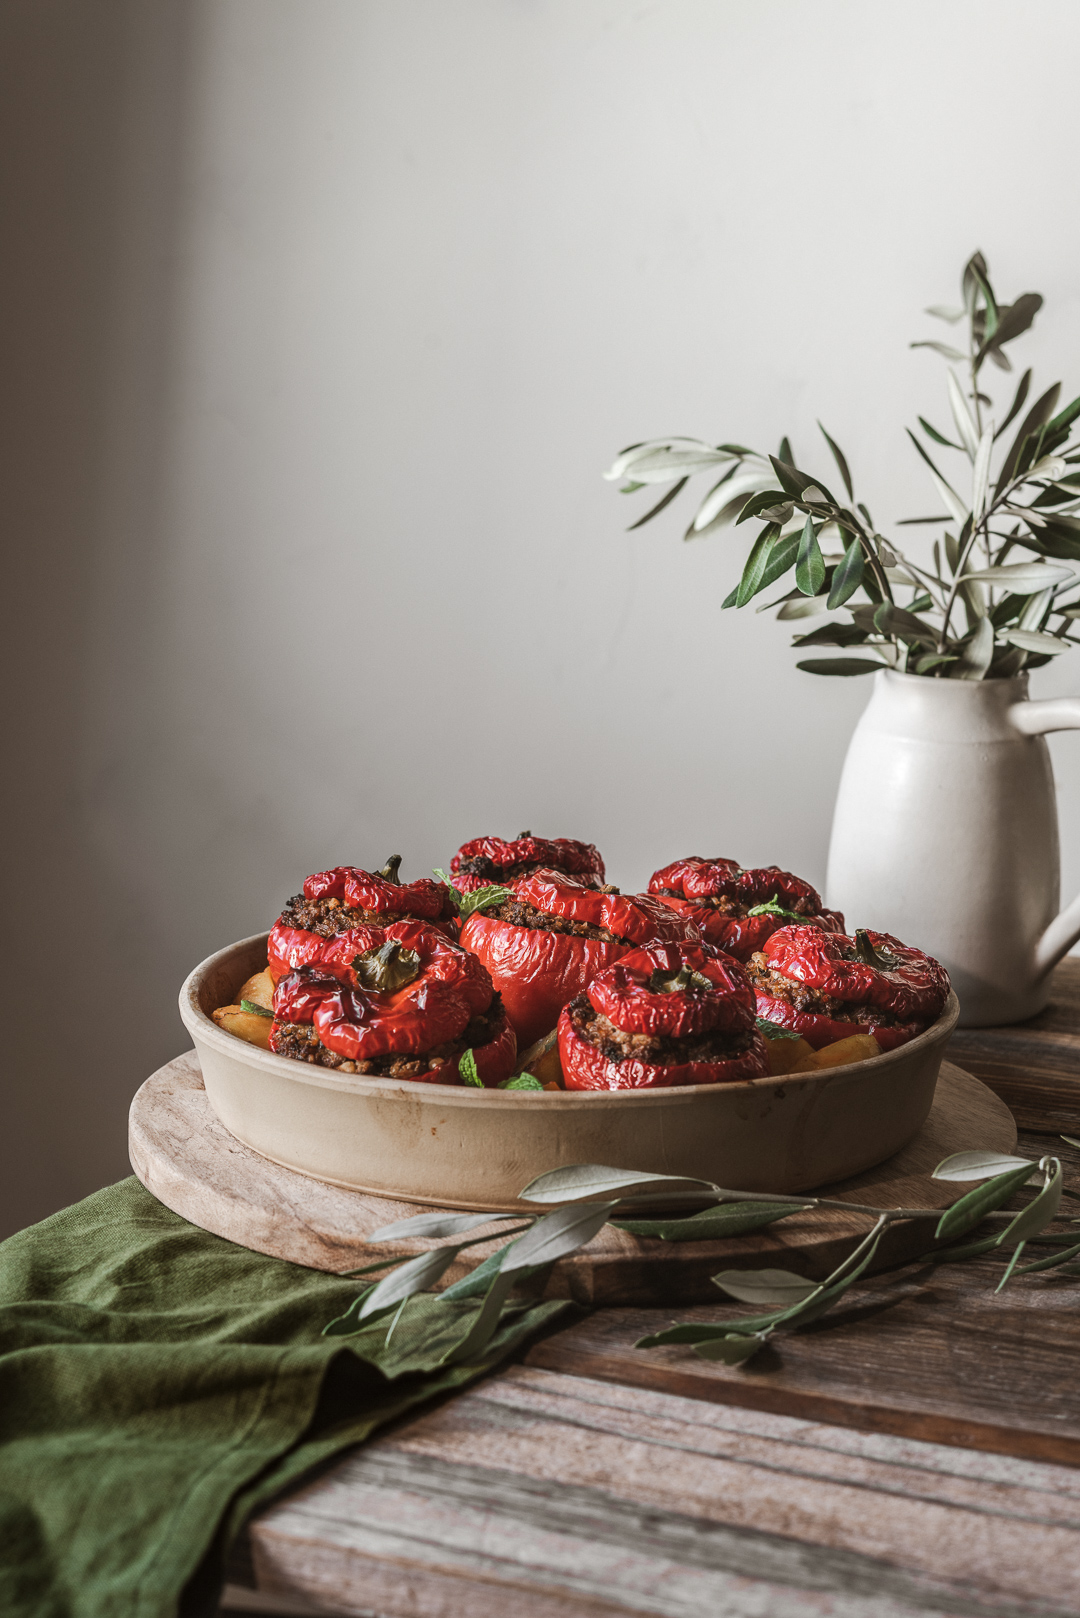
Stuffed vegetables are a beloved food to so many different cultures in the Mediterranean, Balkans & Middle East. In Greece, we call them gemistá (pronounced: yeh-mee-STAH) and they are a warm-season staple. Out of all of the vegetables that get stuffed and baked, red peppers are our absolute favorite. Gemistá typically have a rice-based filling, but today I share our favorite version, which features ground lamb & cauliflower rice. And trust me, while we love traditional gemistá, these cauliflower rice stuffed peppers have stolen our hearts.
KEY FEATURES OF STUFFED PEPPERS
Stuffed peppers are delicious no matter which way you choose to fill them. Of all the various ways we have eaten them, the following key features are what makes for perfect cauliflower rice stuffed peppers.
- LOTS OF HERBS: Most of the flavor in gemistá comes from the bounty of fresh herbs that are used in the filling. The main herbs used throughout Greece are a combination of parsley, mint, dill, and oregano.
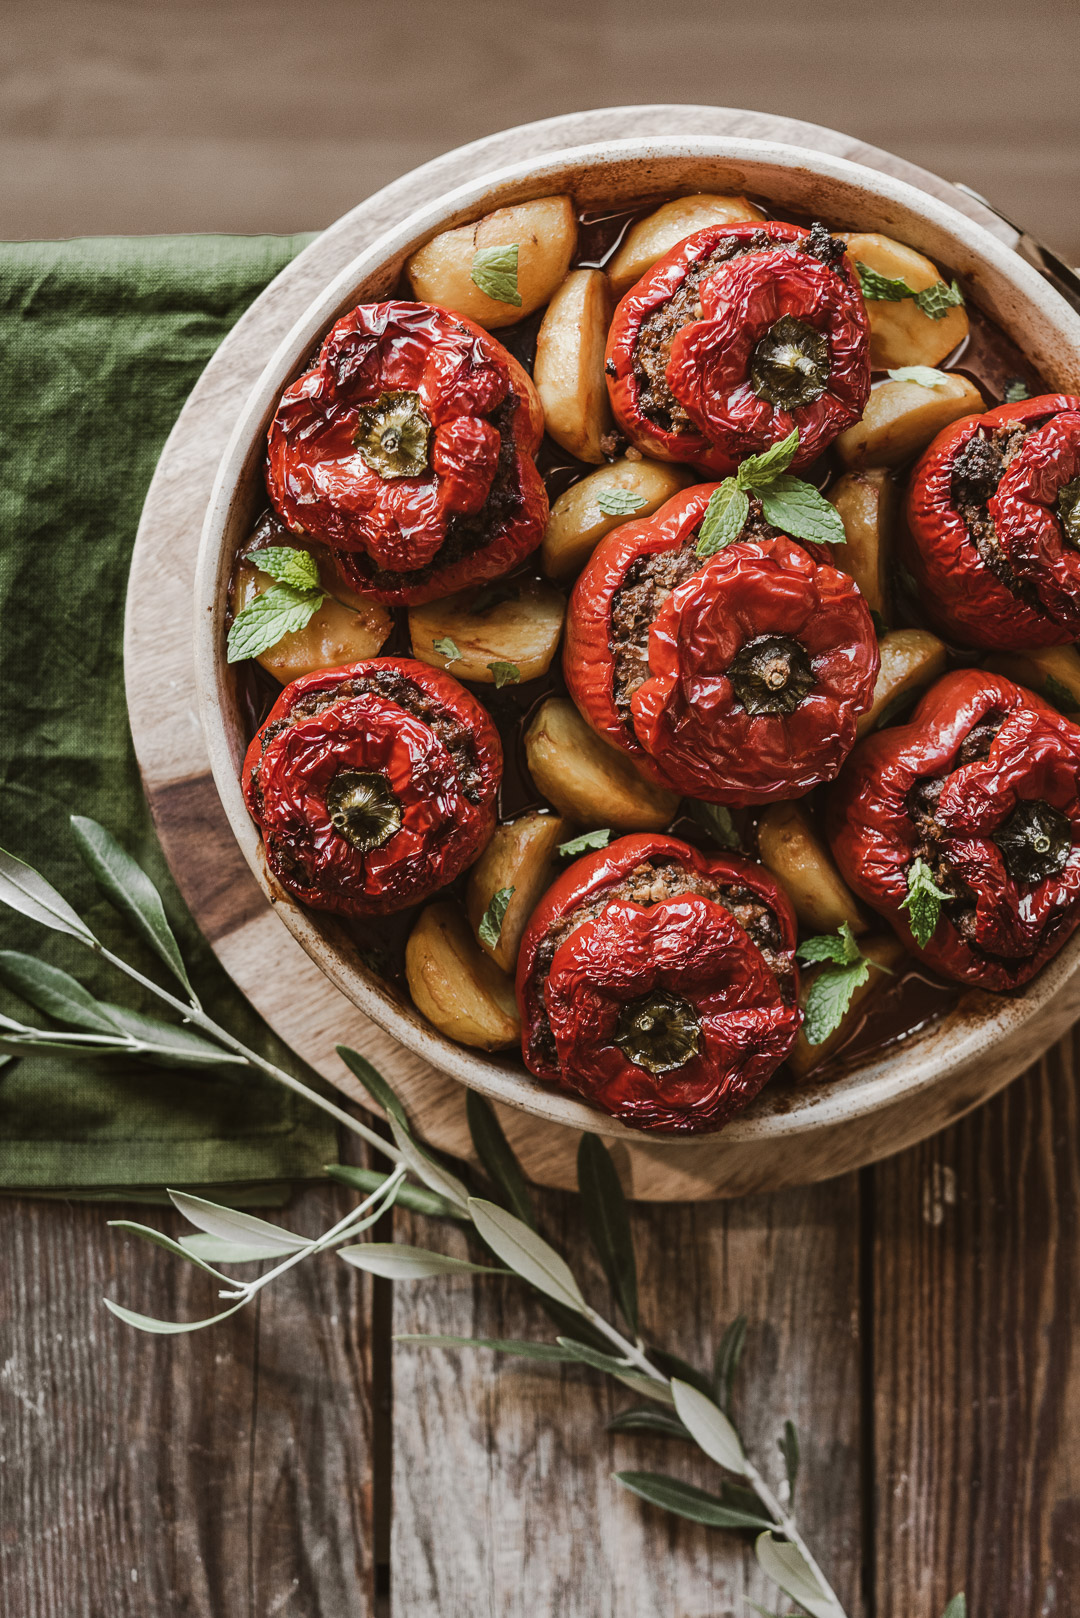
- LONG ROASTING TIME: Especially when you are using bell peppers as your vessel, a long roasting time is key. Adequately roasted peppers develop a deep concentrated flavor & should be so soft that yield to a fork when they are done.
- LETTING THEM REST: Once finished roasting, the peppers are best eaten when they have been allowed to rest until cooled to almost room temperature. The wait is difficult but SO worth it. The cauliflower rice absorbs so much flavor as the peppers cool down.
While we haven't yet tried to make these cauliflower rice stuffed peppers vegetarian, they are incredible with ground lamb. The richness of lamb pairs so well with the riced cauliflower and the bounty of herbs used in the filling. Especially with the mint, which our garden is just bursting with at the moment. If you aren't a fan of lamb, or can't easily procure it, ground beef is a good substitute.
THOUGHTS ON WHAT WE SHARE…
In closing, I couldn't help but think about current events in Palestine & Israel. In Greek we call these stuffed peppers Gemistá, in Arab they are Mahshi, in Hebrew they are Memulaim. The heaviness in my heart was lifted as I meditated on just how much we have in common. While every culture on earth is unique & different in its own ways, our similarities PROVE that we are all INEXTRICABLY CONNECTED TO ONE ANOTHER. And it is this inherent connectedness that we must hold on to. We must look each other in the eye, human to human, and choose to FOCUS ON WHAT WE SHARE together as humanity, rather than the politically contrived diversions that are meant only to create division and hatred.
The way that we choose to share our work with the world MATTERS and actually can make an INCREDIBLE DIFFERENCE. Take the gorgeous apron that I am wearing in the photo above. It was created as a collaboration by my friend Haifa from fufuskitchen.com and non-profit Darzah.org. This handmade apron comes all the way from Palestine. It was stitched & embroidered by Palestinian women in the West Bank. By wearing this apron, we are not only supporting the Palestinian women whose hands created it, but we are holding onto an olive branch. The Tatreez hand-stitched embroidery of the olive branch on this apron is an ancient symbol of peace. Peace, something we almost uniformly profess to desire, but WHY IS PEACE SO ELUSIVE? Perhaps…
"We have not peace because we have forgotten that we belong to each other."
Mother Theresa
CAULIFLOWER RICE STUFFED PEPPERS
May 31, 2021
by Bella Karragiannidis
Total Time
1 hour, 30 minutes
Notes
If you cannot procure riced cauliflower, you can pulse cauliflower florets in a food processer until you achieve a small, rice-like texture.
Ingredients
- 7 medium-sized red bell peppers (If your peppers are larger, you may only need 5)
- 6 tbsp olive oil, divided
- 1 large yellow onion, finely diced
- 1 lb. ground lamb (or use ground beef or vegan ground meat substitute)
- 4 cloves garlic, minced
- 1 tsp salt
- 1/2 tsp black pepper
- 1/4 cup fresh mint, finely chopped (or substitute with 1 tbsp dried mint)
- 1/4 cup fresh parsley, finely chopped (or substitute with 1 tbsp dried parsley)
- 2 tbsp fresh oregano, finely chopped (or substitute with 2 tsp dried oregano)
- 2 tbsp fresh dill, finely chopped (or substitute with 1 tsp dried dill)
- 1 lb. riced cauliflower *see note
- 3/4 cup (6 oz. can) tomato paste, divided
- 1/2 cup chicken broth
- yellow potatoes, peeled & sliced into wedges (enough to fill gaps around peppers)
Instructions
- Preheat the oven to 375°F
- Heat 2 tbsp of olive oil in a medium-sized pan and sauté finely diced onion for 5-7 min, until they start to soften.
- Add the meat to the pan, brown it, and season with salt and pepper to taste. Add the garlic and herbs & cook for a few minutes until the garlic is nice and fragrant.
- Add in the riced cauliflower & cook for a few minutes. Next, add in the tomato paste and stir until the tomato paste is well distributed. Remove pan from heat and set aside.
- Meanwhile clean and cut the tops off the peppers and remove the seeds and ribs.
- Prepare your pan or casserole dish. Mix the chicken broth with the remaining tomato paste and pour onto the bottom of your dish. Place the peppers into the pan cut side up so that they are ready to fill.
- Generously fill each pepper with the filling. Put the tops on the peppers and arrange the prepared potatoes around the peppers (if using)
- Drizzle the remaining 4 tbsp olive oil over the peppers & potatoes and season with salt and pepper.
- Roast for 1 hour or until the edges of the peppers are slightly charred, softened and withered.
- Remove from oven, and allow to cool as long as you can possibly wait. Serve peppers along with potatoes and some sauce from the bottom of the pan.
MORE SEASONAL GREEK RECIPE INSPIRATION
- MELITZANOSALATA
- ROSEWATER MASTIHA NO-CHURN ICE CREAM
- GREEK SQUASH BLOSSOMS WITH RICE
The post CAULIFLOWER RICE STUFFED PEPPERS | <span style=''font-size:12px;'>GREEK GEMISTÁ</span> appeared first on ful-filled.
]]>The post DOLMADES GIALANTZI – STUFFED GRAPE LEAVES appeared first on ful-filled.
]]>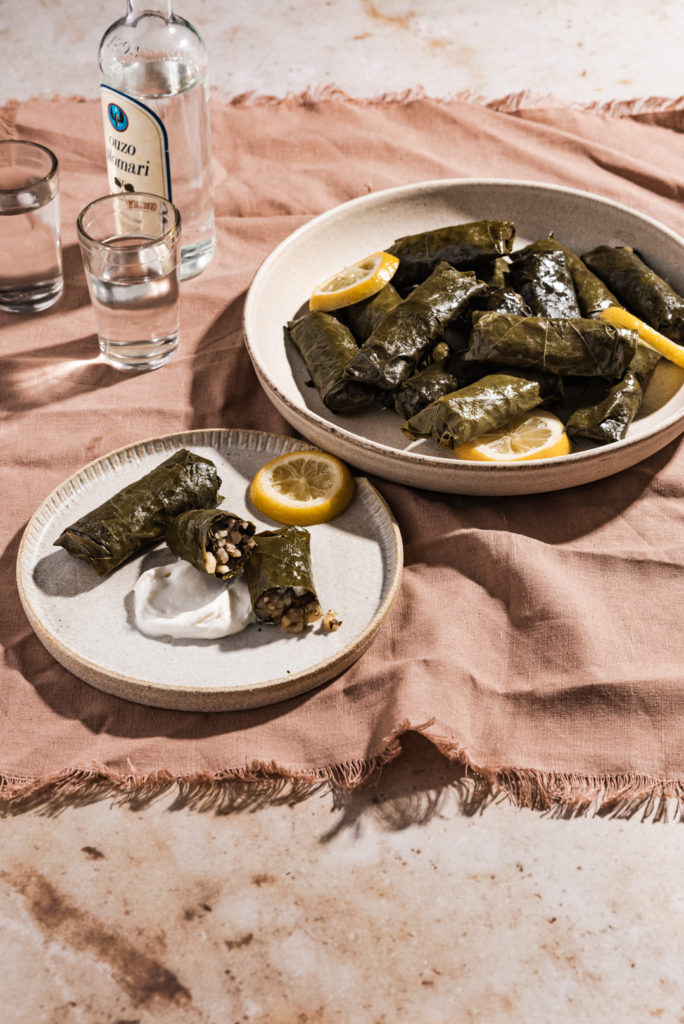
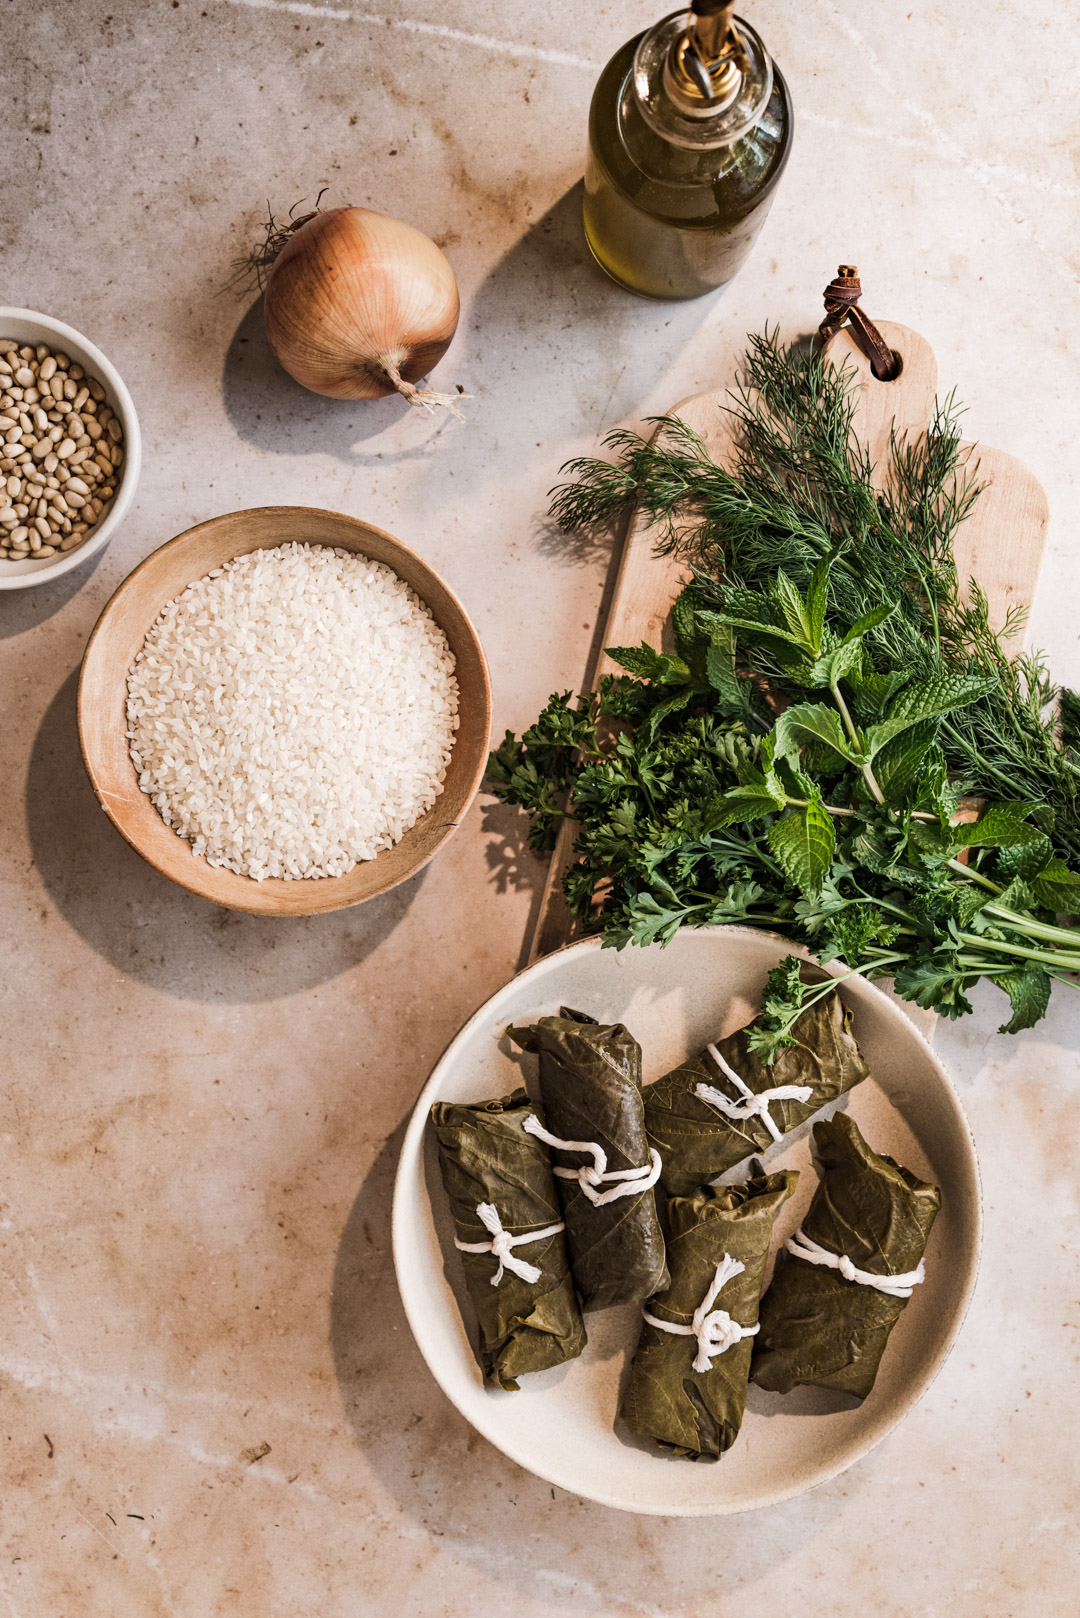
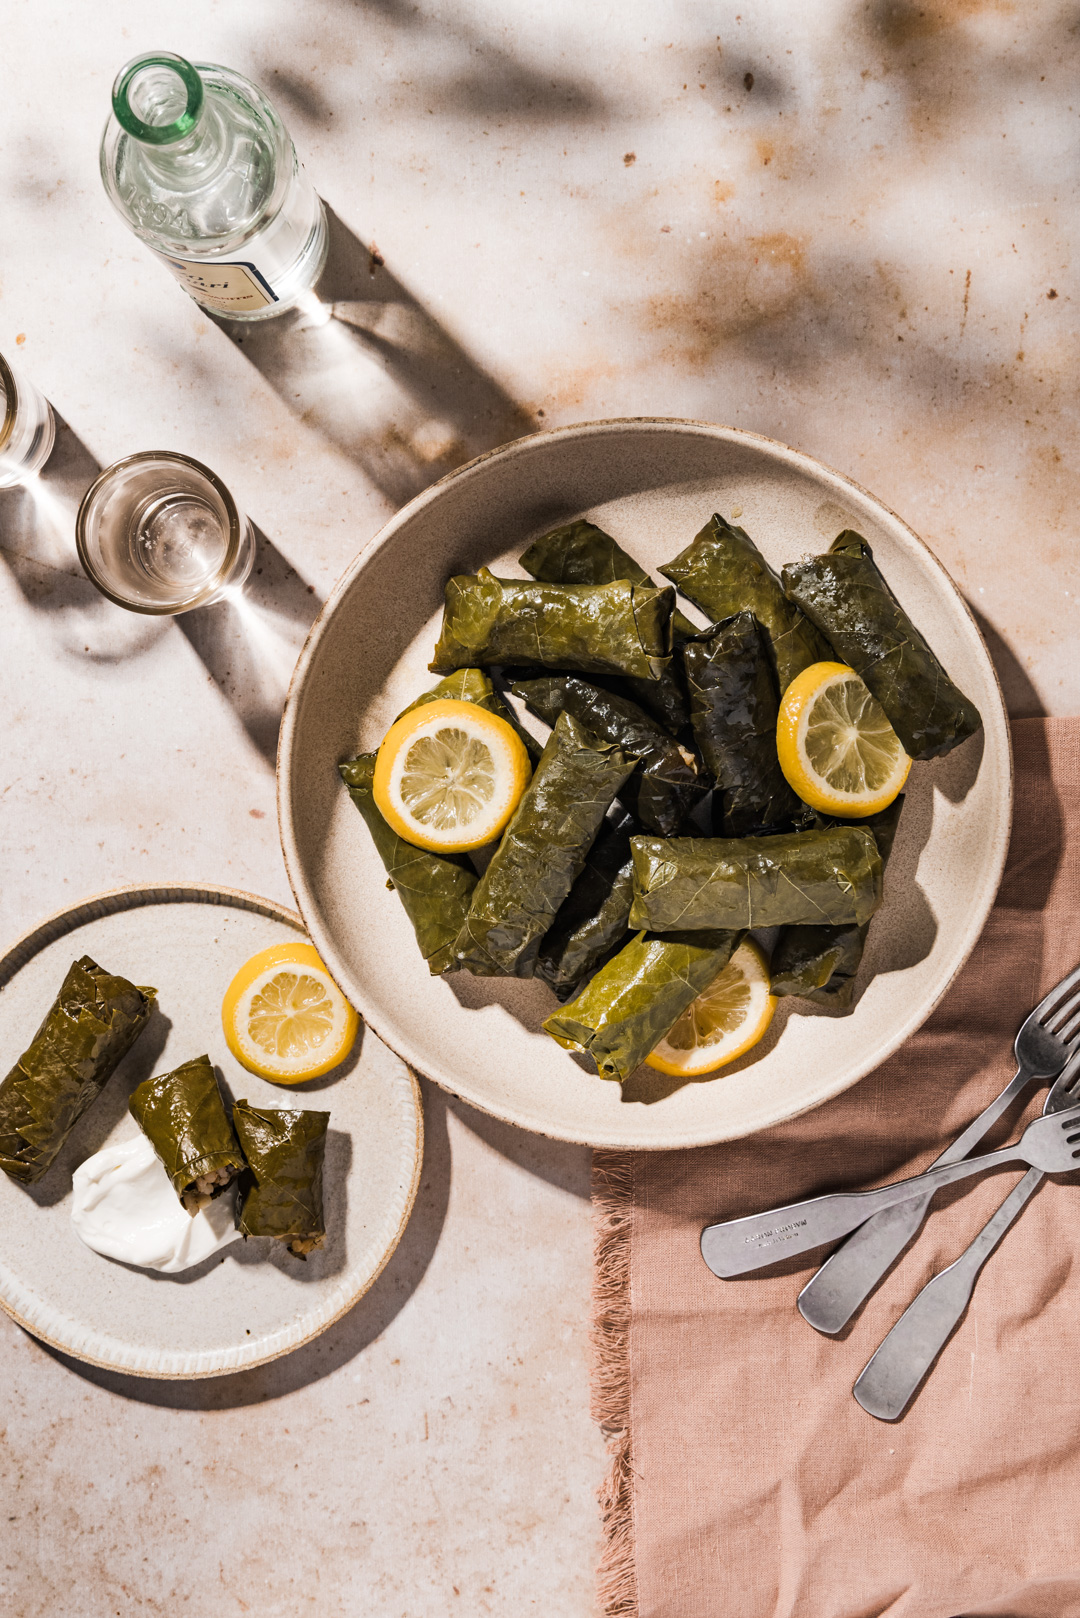
Dolmades (pronounced: dohl-MAH-thes) are the Greek version of stuffed grape leaves. Stuffed grape leaves are a beloved food consumed all throughout Greece, the Balkans and the Middle East. This recipe for dolmades gialantzi is from my friend Peter Minaki a.k.a. Kalófagas. I first discovered Peter's Greek food blog many years ago while learning more about my hubby's culture. My in-laws were not initially accepting of me when I married their son (because I am not Greek). In an effort to prove to them that I was, in fact, committed to preserving their heritage, I studied their language, culture, and cuisine every day. Kalofagas.ca became a vital resource for me as I cooked my way into my in-laws' hearts.
I am forever grateful to Peter for the incredible archive of recipes he has shared over the years. And I am truly honored that he has allowed me to share his recipe for these delicious dolmades gialantzi – stuffed grape leaves from his first cookbook Everything Meditteranean.


A BRIEF HISTORY OF STUFFED GRAPE LEAVES:
The first known stuffed leaf recipe was recorded circa 350 BC. It was known to the ancient Greeks asthrion which were made using fig leaves rather than grape leaves. Fig leaves were pickled and stored in much the same way as grape leaves are today and were commonly filled with cheese or fish. Τhe first written mention of a dish similar to dolmades actually appears in the diaries of a symposiast at one of the banquets of Iranian King Khusrow II at the start of the 7th century. The widespread use of the Turkish term dolma in the Mediterranean basin is a testament to the fact that the dish known as dolma was spread through the Ottoman conquests during the 15th and 16th centuries.
"There in short is the long and winding history of one of our favorite foods. We might claim it as our own, as every one of our neighbors does, but the dolma followed its own fateful path through history and time. It is a dish that belongs both to everyone and, alas, to no one."
On dolmades from gourmed.gr via foodtimeline.org
WHAT MAKES DOLMADES GIALANTZI SPECIAL?
"Dolmades" is the Greek plural form of the word dolma. Gialantzi is the Greek spelling for the Turkish word "yalancı" which translates to "fake." So dolmades gialantzi technically translates to "fake dolmas" because there is no meat in the filling (lol)! Dolmades gialantzi are filled with a blend of rice, fresh herbs, onion, tomato & pine nuts (and they are actually vegan)!
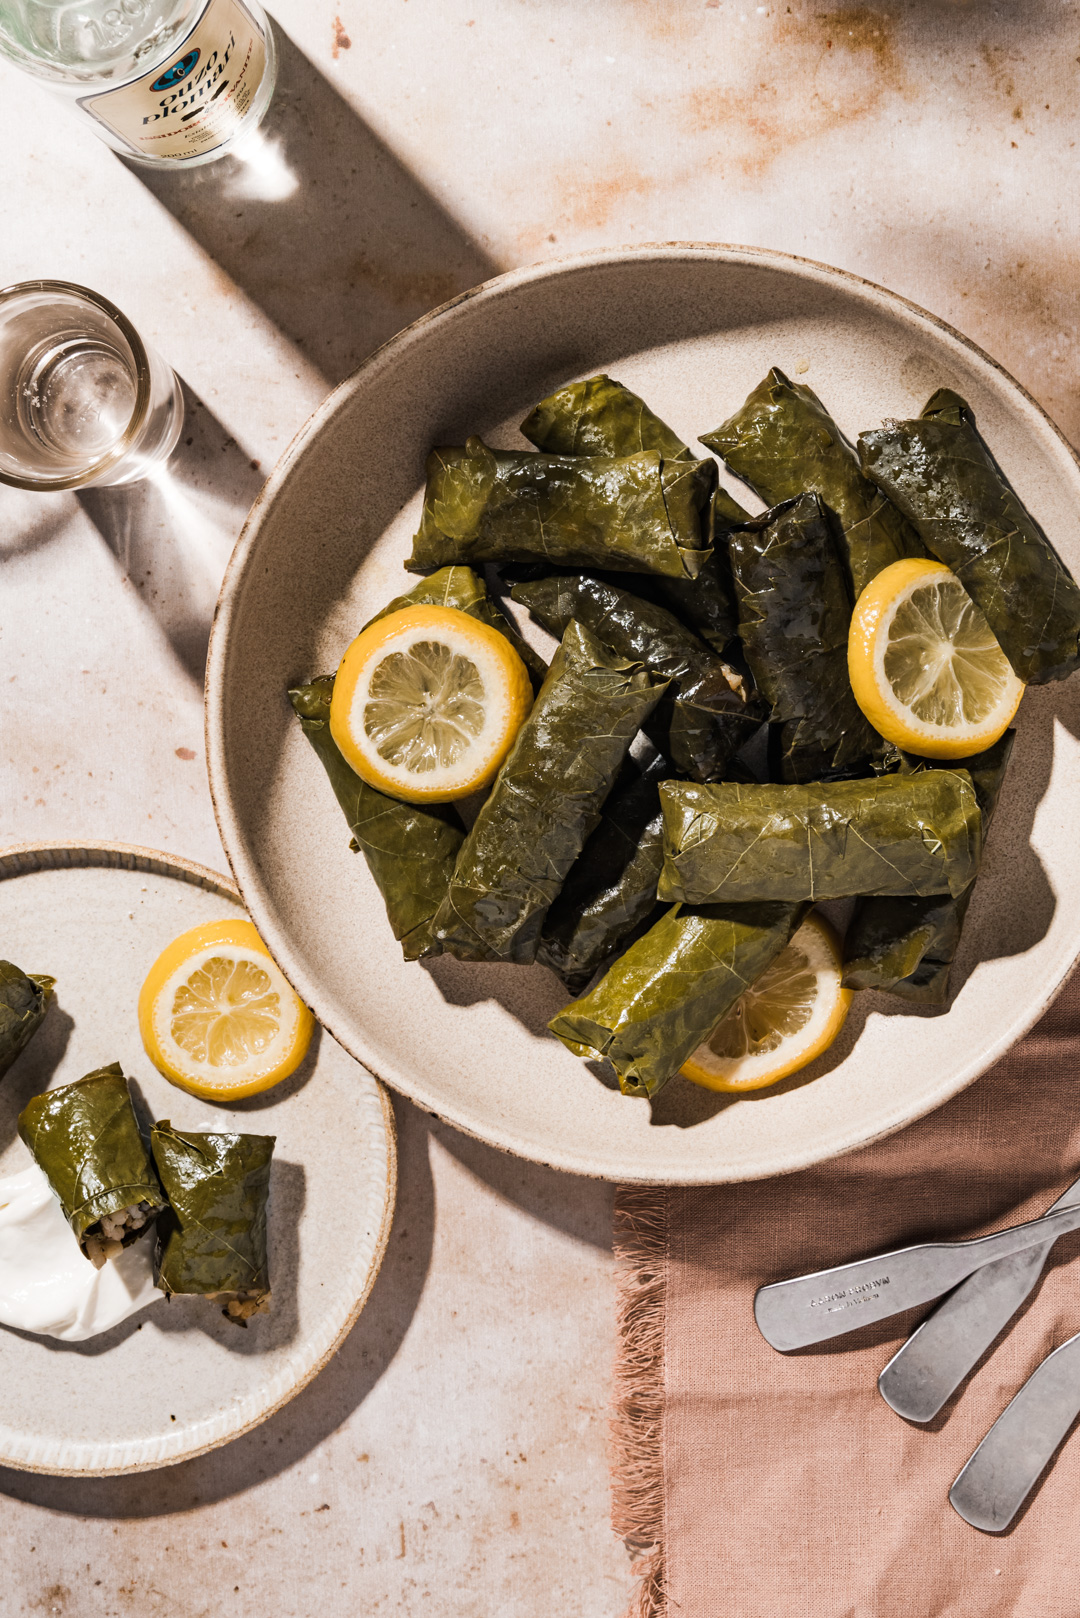
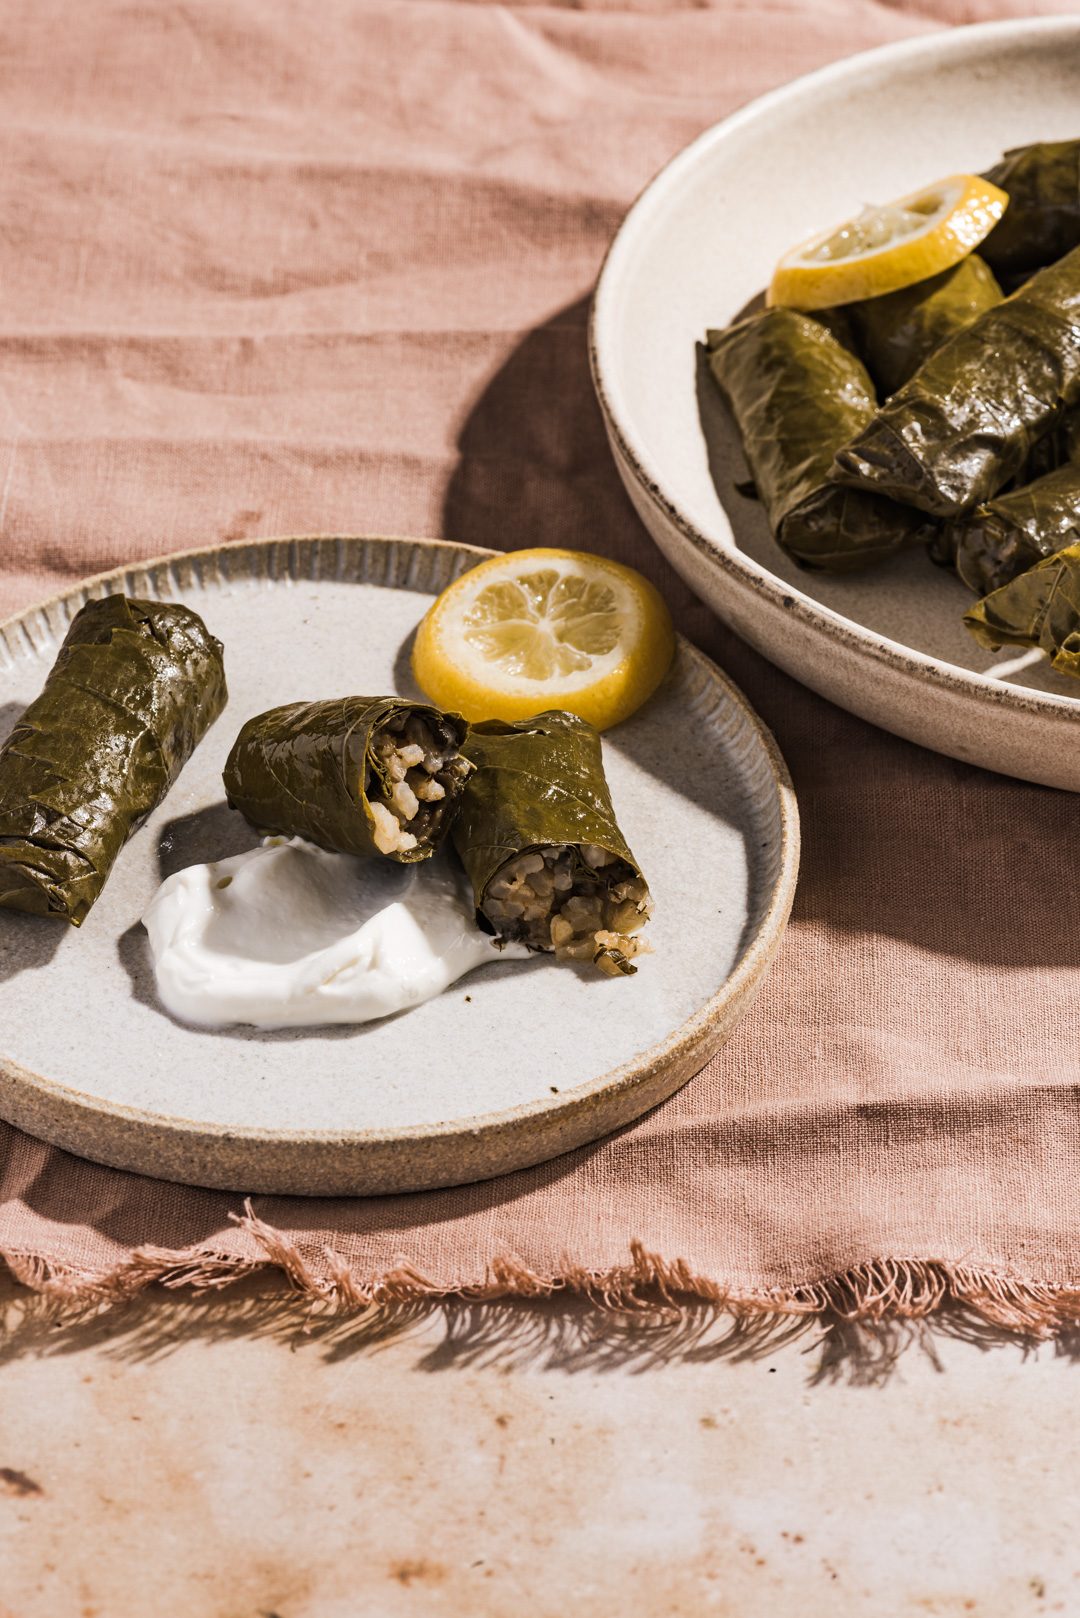
If you have never tried a meatless dolma then you are in for a real treat! The flavors of the ingredients in the filling really shine in the absence of meat. And the texture is smooth and creamy thanks to the use of arborio rice in place of the typical long grain rice. Dolmades gialantzi, like any meatless dolma, are best enjoyed slightly warm or at room temperature with yogurt and lemon.
HOW TO MAKE DOLMADES – STUFFED GRAPE LEAVES
Making these glorious parcels is definitely a labor of love, but they are so worth it! Once you get the hang of how to wrap them, they actually start to come together pretty quickly.
Now that you know how to wrap a dolma, the next step is to layer them in a large oven safe covered vessel. Then they get topped off with olive oil, lemons & vegetable stock. The final step is to place an inverted plate over the dolmades. This acts as a weight to keep the dolmades fully submerged while they bake.
Dolmades may not be the most visually appetizing of foods, but they are beloved the world over for good reason. There is something so special and satisfying about food in a parcel! They are like little bundles of love. Maybe it's the fact that they must be made by hand that makes them so memorable <3
Another huge thank you to Peter Minaki | Kalofagas.ca for allowing me to share this recipe from his cookbook Everything Meditteranean
DOLMADES GIALANTZI - STUFFED GRAPE LEAVES
April 30, 2021
by Peter Minaki
Total Time
1 hour, 35 minutes
Ingredients
- 40-50 grape vine leaves (if from a jar, rinsed and pat dry or blanche for 5 minutes if fresh)
- 2 Tbsp. of cup extra-virgin olive oil + 1/4 cup
- 1 medium onion, finely diced
- 1 cup arborio rice
- 1 tsp. of tomato paste diluted in 1/2 cup of warm water
- 1/2 cup chopped fresh parsley
- 1/2 cup chopped fresh dill
- 1/4 cup chopped fresh mint
- 1/3 cup pine nuts
- juice of half lemon
- salt and pepper to taste
- 1 1/2 cups of low-sodium vegetable stock
- slices of lemon
Instructions
- Take the leaves out of the jar, snip the stems off the leaves and discard. Rinse leaves under cold water and and drain. Set aside. IF you have fresh grape vine leaves, rinse and then place in boiling salted water for five minutes. Drain and place in an ice-cold water bath, drain. Snip the stems off and set the grape leaves aside.
- In the meantime, place a skillet on your stove-top and add the 2 tbsp olive oil along with the onions and sauté over medium-low heat for 5-7 minutes or until translucent.
- Add the rice to the skillet and stir for a couple of minutes to toast. Now add the diluted tomato paste and stir until most of the liquid has been absorbed by the rice. Remove skillet from heat, add the parsley, dill, mint, pine nuts, lemon juice and stir. Season lightly with salt and pepper, stir & taste and adjust seasoning once again. Allow to cool.
- Pre-heat your oven to 325F.
- Place your grape vine leaves on a work surface with the skillet full of the rice filling nearby. Place a grape leaf on your work surface (seam side up) and place a tsp of the rice mixture on the middle bottom of the leaf. Fold the bottom of the leaf up, then tuck in the sides of the leaf. Now roll up the leaf to make a cigar containing your rice filling.
- Place a layer of grape vine leaves on the bottom of an oven-safe pot/cooking vessel. Place your rolled dolma in the vessel. Continue rolling the rice filling in the grape vine leaves (as instructed above) and arrange the dolmades in the cooking vessel in a circular fashion.
- Pour the remaining 1/4 cup of olive oil over the pot of dolmades, add some lemon slices on top and then add the hot stock (enough to just cover the dolmades). Cover and place vessel in the oven for 30-35 minutes.
- Remove the vessel from the oven and allow to cool (keep it covered) to room temperature.
- Serve dolmades with yogurt and lemon.
MORE GREEK RECIPE INSPIRATION:
- AVGA ME DOMATES
- DAKOS
- AVGOLEMONO
The post DOLMADES GIALANTZI – STUFFED GRAPE LEAVES appeared first on ful-filled.
]]>The post EASY GREEK CHEESE TRIANGLES | <span style=''font-size:12px;'>TIROPITÁKIA</span> appeared first on ful-filled.
]]>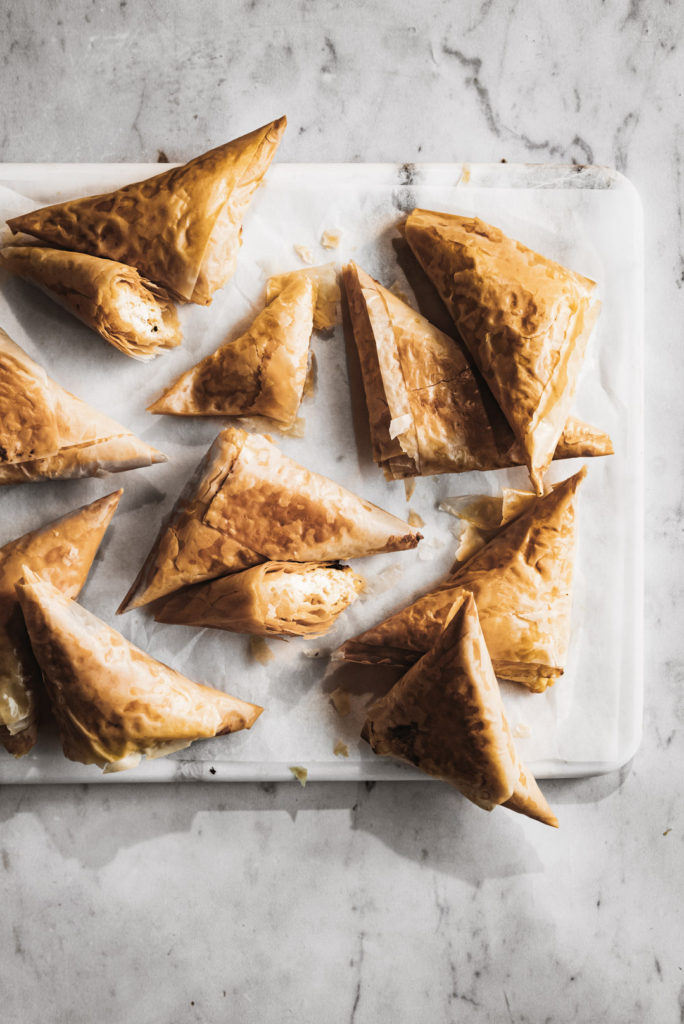
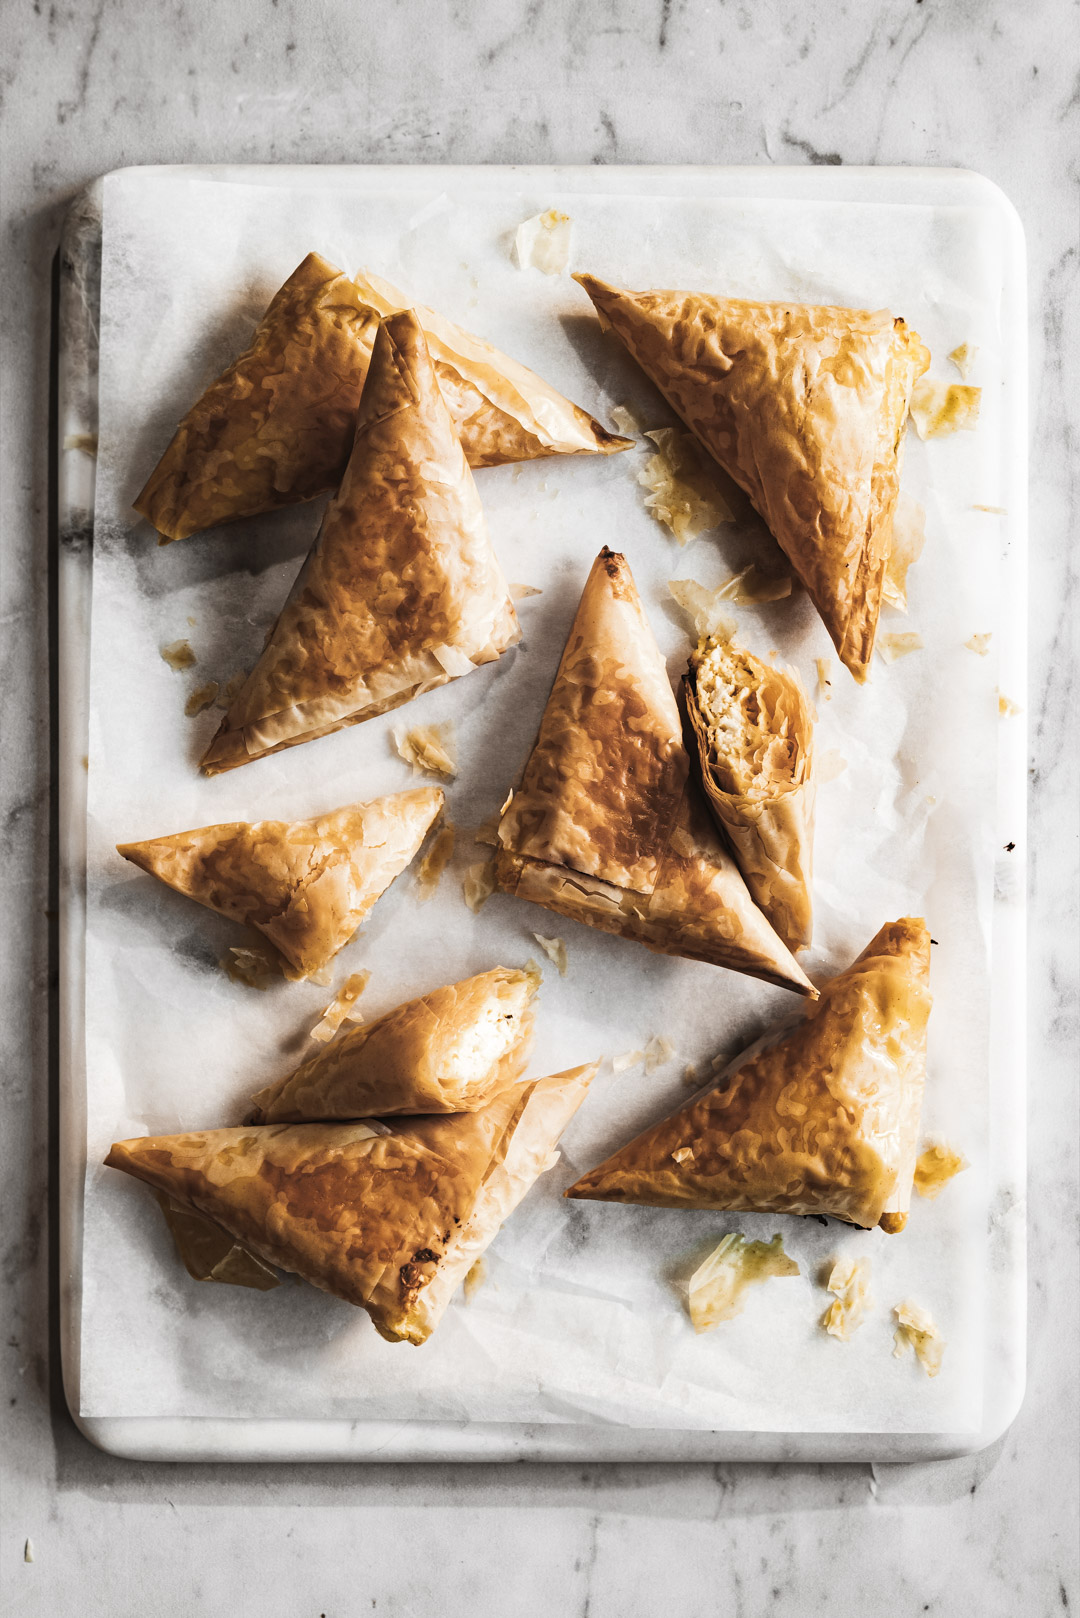
The world of 'pita' in the Greek cooking culture is vast. Pita is most commonly known as "pita bread." Which is a flatbread used for things like gyros. Then there are the pitas that are essentially phyllo encased pies. Which are filled with savory or sweet fillings. There are so many variations of pita in Greek cuisine! One of the most popular pitas is filled with Greek cheese, which is called tirópita in Greek. The recipe I am sharing with you all is for the mini version – our easy Greek cheese triangles (known as tiropitákia).

WHAT YOU NEED FOR EASY GREEK CHEESE TRIANGLES:
Even within the realm of tiropitákia, there are SO many versions! Each region of Greece has its own way of making these small cheese pies. For these easy Greek cheese triangles, we are going to keep things simple and traditional:
- FETA CHEESE: I highly recommend using a whole milk feta cheese for this recipe. In order to have a creamy filling, you need to use creamy feta cheese. Here in America, our favorite feta is the Valbreso sheep's milk feta.
- SOFT NEUTRAL CHEESE: In Greece, the typical soft cheese for cheese pies is anthótyro. It is a difficult cheese to find here in America, so we recommend using whole milk ricotta or whole milk farmer's cheese.
- FRAGRANT HERB: The two most common herbs used in tiropitákia are either fresh spearmint or fresh dill. We personally use fresh spearmint because that is the traditional addition in Crete, where my hubby's mom is from.
- EGG: This is a necessary addition to keep the texture of your filling from being too loose or runny once cooked.
- PHYLLO DOUGH: Do not be intimidated by phyllo dough! It is so much easier to handle and work with than it seems! The most readily available phyllo doughs are #4 or #7. Either of these thickness phyllo doughs will be good for these easy Greek cheese triangles.
- OLIVE OIL: It is important to use a good amount of olive oil when you are brushing your phyllo dough. This will ensure a super crispy and golden finish on your phyllo dough. We love Greek extra virgin olive oil for its low acid content and golden, buttery flavor. g
This is the basic formula for a traditional Greek cheese pie. Many people like to add a little grated melty cheese to the mixture and/or some grated hard cheese as well. The possibilities are really endless and as long as you use the basic formula above as your foundation for making Greek cheese pies.
A FAMILY AFFAIR…
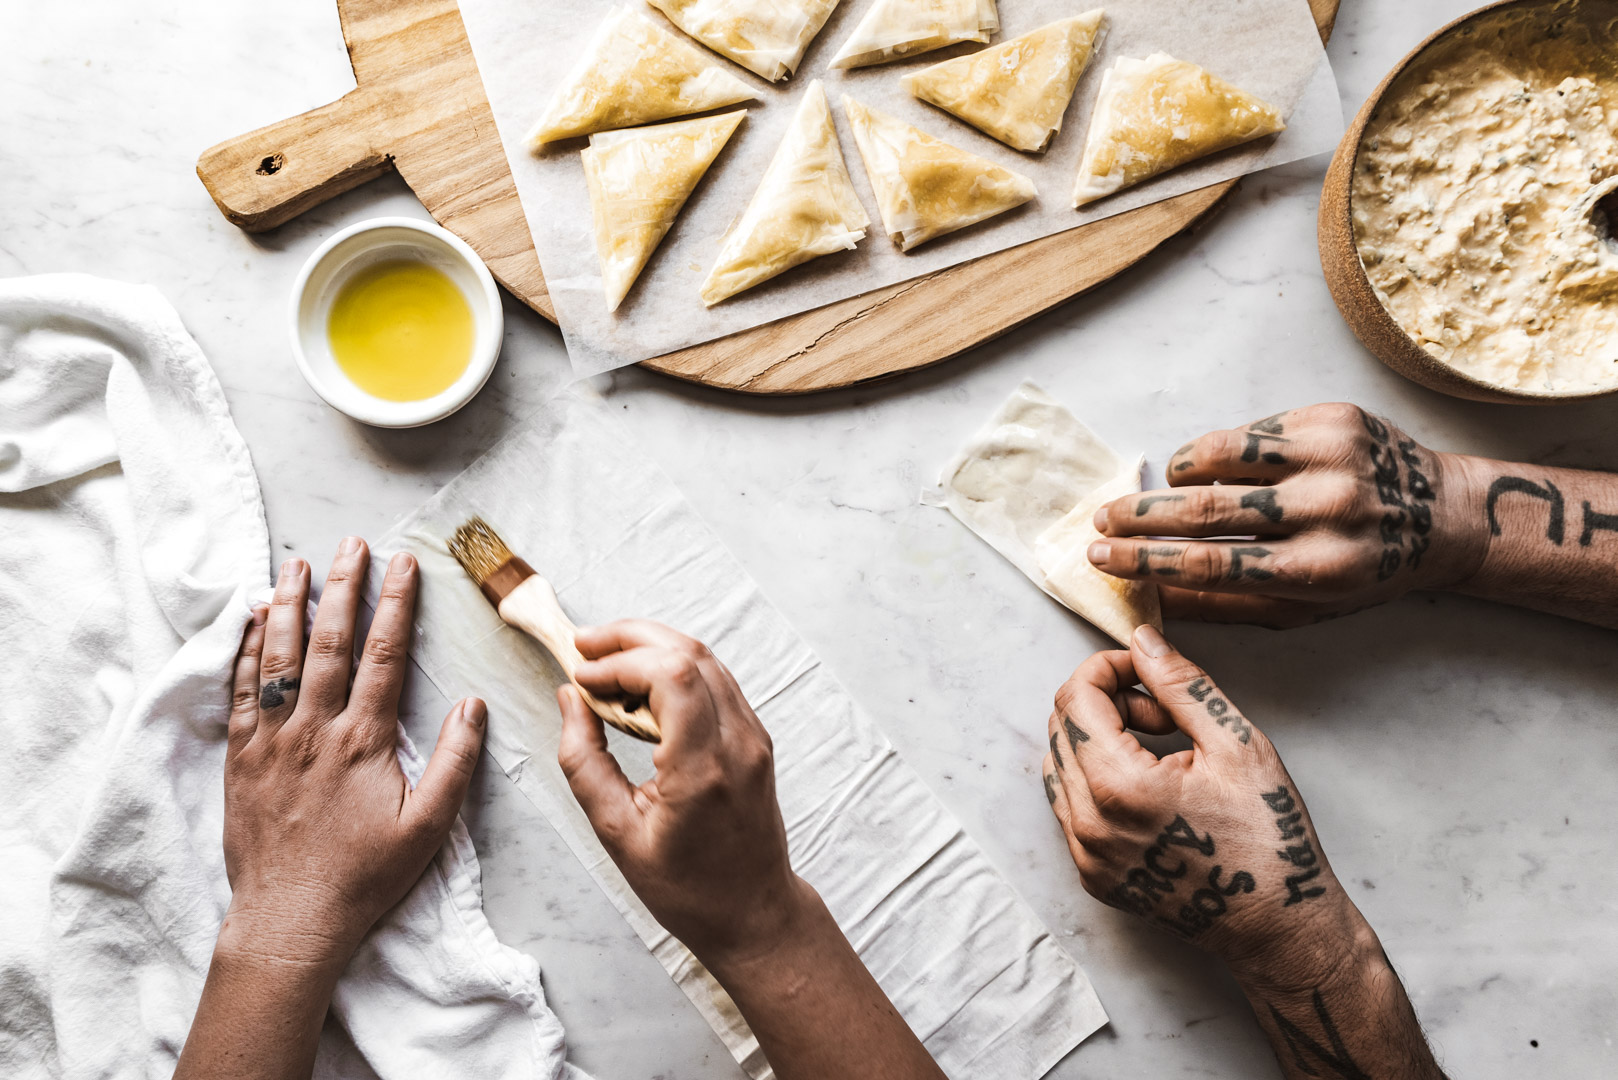
My long-time readers know that assimilating into my hubby's Greek family was no easy feat for me. I had to earn my way into my Greek in-laws' hearts. And one of the main ways that I accomplished this feat was through learning how to cook Greek. My hubby was my first Greek cooking teacher. And tiropitákia was the first Greek food he taught me to make. We would make a big bowl of cheese filling and then fold an endless amount of phyllo into pitákia. Freezing our bounty to be easily baked for future meals. It's actually a great dish to make with the family. Folding the phyllo into triangles is an especially great task for kids :)
My hubby considers himself a cheese pie expert ;). He actually has an un-traditional version that he wants me to share here on the blog. I let him know that we will share his special version after I have shared these traditional easy Greek cheese triangles, lol!
WHAT TO EAT WITH EASY GREEK CHEESE TRIANGLES:
These easy Greek cheese triangles are the perfect accompaniment to SO many meals. They make an incredible appetizer or side dish! Enjoy them with a hot bowl of soup or grilled meat & salad. There is one Greek recipe in particular that we cannot eat without tiropitákia on the side; fakés. Fakés is the traditional Greek lentil soup. While it is traditionally served with feta cheese, my hubby and I discovered years ago that tiropitákia pair incredibly well with this comforting lentil soup. As you are reading this I am working on getting our fakés recipe ready for the blog! So stay tuned ;)

In closing, I truly hope that you give these easy Greek cheese triangles a try! They are such a tasty treat that pair well with so many meals. They may be simple, but these tiropitákia will always hold a special place in my heart. And I hope they do the same for you <3
EASY GREEK CHEESE TRIANGLES
January 25, 2021
by Bella Karragiannidis
Ingredients
- 200g (7oz.) feta cheese, crumbled (we recommend sheep's milk feta)
- 185g (6oz.) whole fat ricotta cheese (or use anthótyro if you can source it)
- 2 tsp fresh spearmint, finely chopped
- 1 egg
- 10 sheets frozen phyllo dough (thawed per package instructions)
- 1/2 cup olive oil, plus more if needed
Instructions
- Crumble your feta into small crumbles. Combine the crumbled feta with the ricotta cheese, fresh chopped spearmint and the egg in a bowl. Stir until the mixture is well combined and homogenous.
- Prepare your phyllo dough by carefully removing 10 sheets from the stack of dough (roll up any leftover phyllo and freeze to use another time). With the phyllo dough sheets in an even stack, cut them in half lengthwise to create two long rectangular strips of phyllo. Combine these strips into one stack and keep covered with a barely damp linen towel (I use a spray bottle of water to barely moisten the linen).
TO ASSEMBLE:
- Carefully remove one sheet of phyllo from the stack (cover the remaining phyllo to keep it from drying out). Use a pastry brush to brush 1/2 the sheet of phyllo lengthwise with olive oil. Fold the phyllo over itself lengthwise in half and press to seal. You now have a long, narrow double-layered strip of phyllo.
- Brush the phyllo dough again with olive oil. Use a spoon to scoop about 1 tbsp of cheese filling onto the bottom of the phyllo dough strip.
- Starting with one of the bottom corners of the phyllo dough, gently fold up at a 45° angle to create a triangle (see the video above for a visual). Continue folding from the opposing corner to encase the cheese filling with phyllo.
- Once the phyllo dough has been folded completely into a triangle, brush both sides of the triangle with a bit of olive oil and set it aside on a parchment-lined baking sheet.
- Repeat this process until you have used all of the filling. (At this point you can freeze the cheese triangles for future use: simply freeze them while still on the parchment-lined baking tray until solid. Then layer the frozen triangles in an airtight container with sheets of parchment or wax paper in between layers to prevent them from sticking together).
TO BAKE:
- Pre-heat oven to 375°F. Bake triangles until they are nicely golden, about 20-25 minutes. (If baking from frozen add an extra 5 minutes of bake time). Enjoy!
MORE TRADITIONAL GREEK RECIPE INSPIRATION:
- TZATZIKI
- CLASSIC GREEK BAKLAVA
- AVGOLEMONO
- FASOLADA
The post EASY GREEK CHEESE TRIANGLES | <span style=''font-size:12px;'>TIROPITÁKIA</span> appeared first on ful-filled.
]]>The post FASOLADA – GREEK WHITE BEAN SOUP appeared first on ful-filled.
]]>
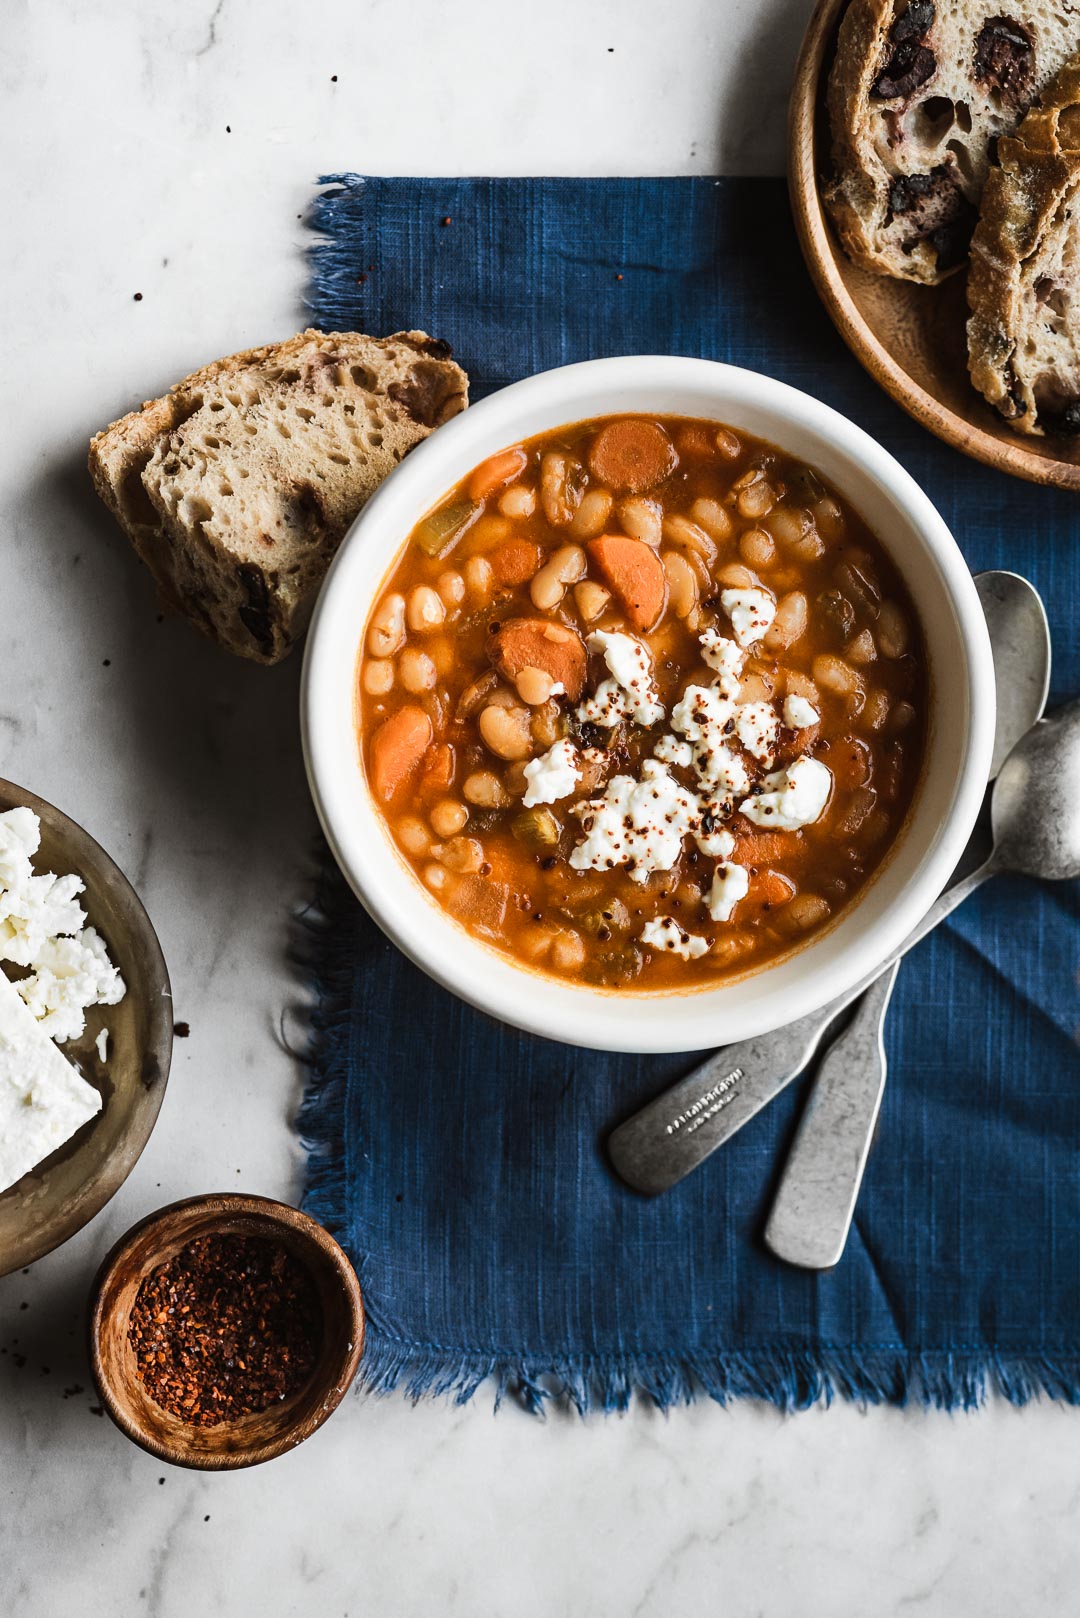
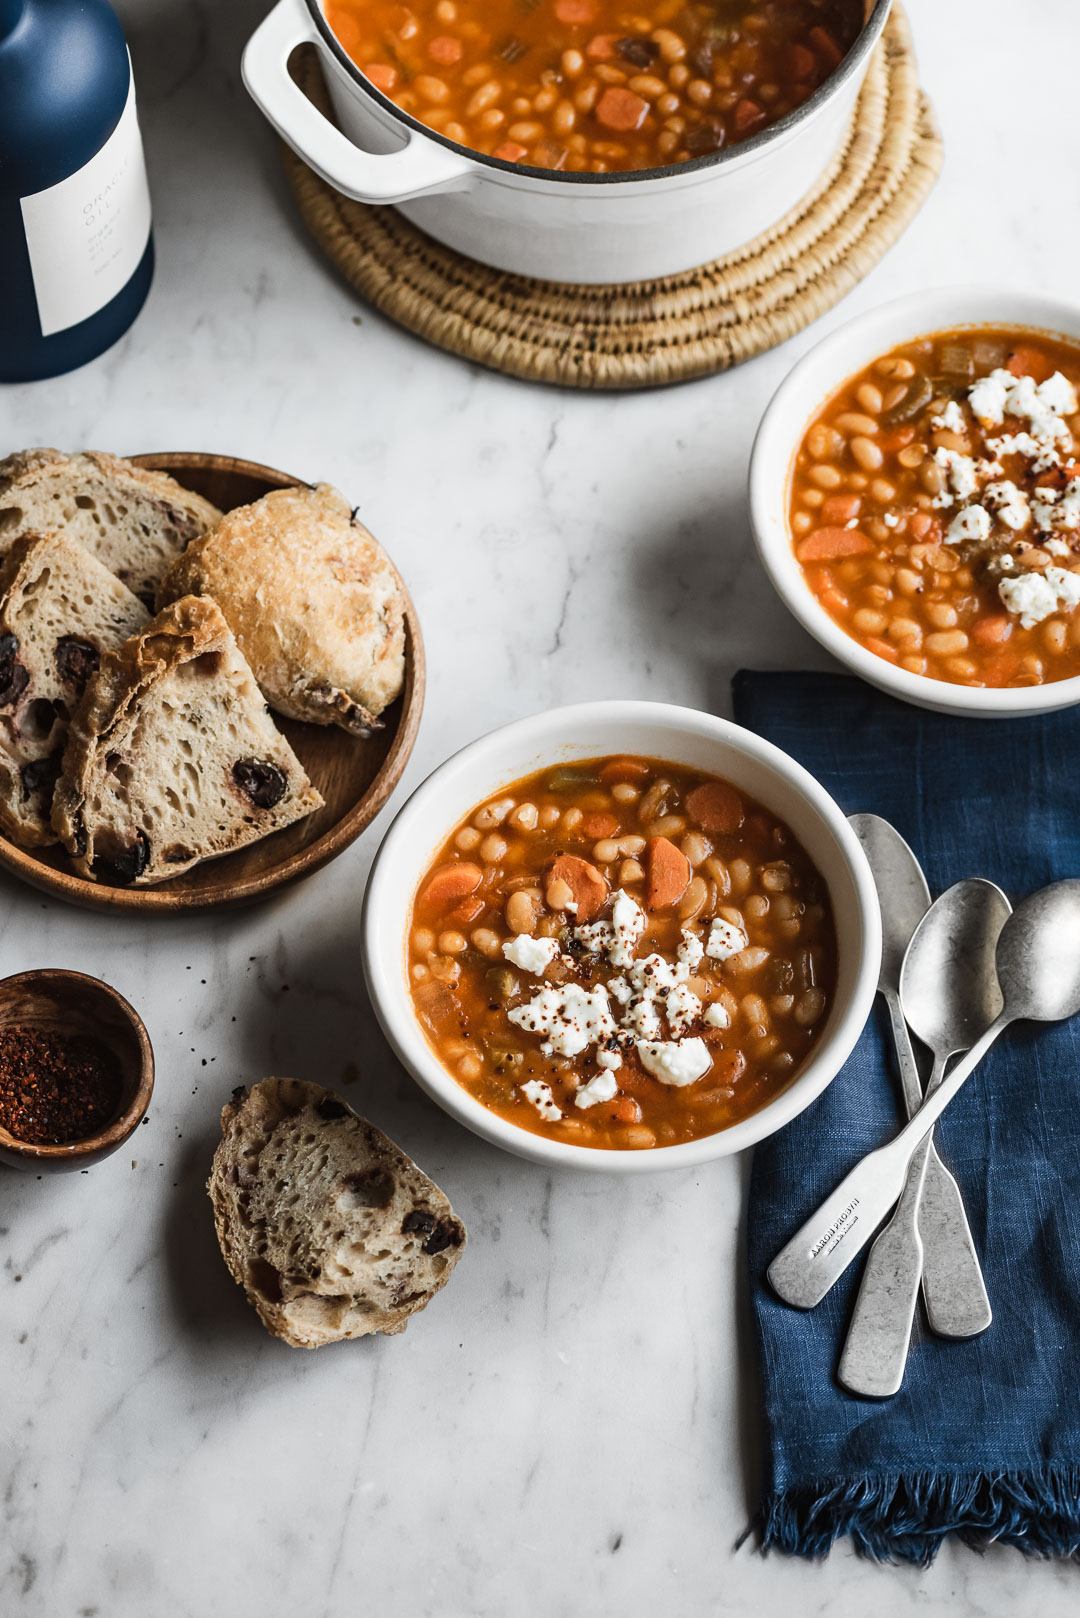
If there is any dish that should be considered the true national dish of Greece, it would be fasolada – Greek white bean soup. Fasolada (pronounced: fah-so-LAH-tha) is a simple white bean soup that consists of just a handful of basic ingredients. But these seemingly plain ingredients transform into one of the most comforting and delicious meals in Greek cuisine.
Take a stroll through any Greek village in the winter and you are sure to smell fasolada wafting from people's homes. My hubby and I were talking about our most beloved Greek soups the other day and we both agree, that fasolada is the Greek soup that we could eat the most often.
TIPS FOR MAKING THE PERFECT FASOLADA – GREEK WHITE BEAN SOUP
Every Greek family believes that their recipe for fasolada is the best. And because fasolada is such a cherished meal, every family is entitled to that opinion if you ask me! No matter what variation of fasolada you make, there are a few key factors that every version shares:
- USE DRIED WHITE BEANS: If you are at all familiar with the Greek diet, then you know that legumes are a way of life for Greeks. When Greeks make bean soup, they always, always use dried beans. For best results, make sure your beans are fresh. Meaning, you don't want to use beans that are old and stale, or they may never soften.
- SLOW COOKING IS SUPERIOR TO QUICK METHODS: The earmark of a perfect fasolada is a creamy texture. When you cook dried beans for upwards of 2 hours or longer, they almost start to melt. Thickening the broth just enough to yield a luscious consistency. Using a pressure cooker or an instant pot just can't compare to the result you get with slow cooking.
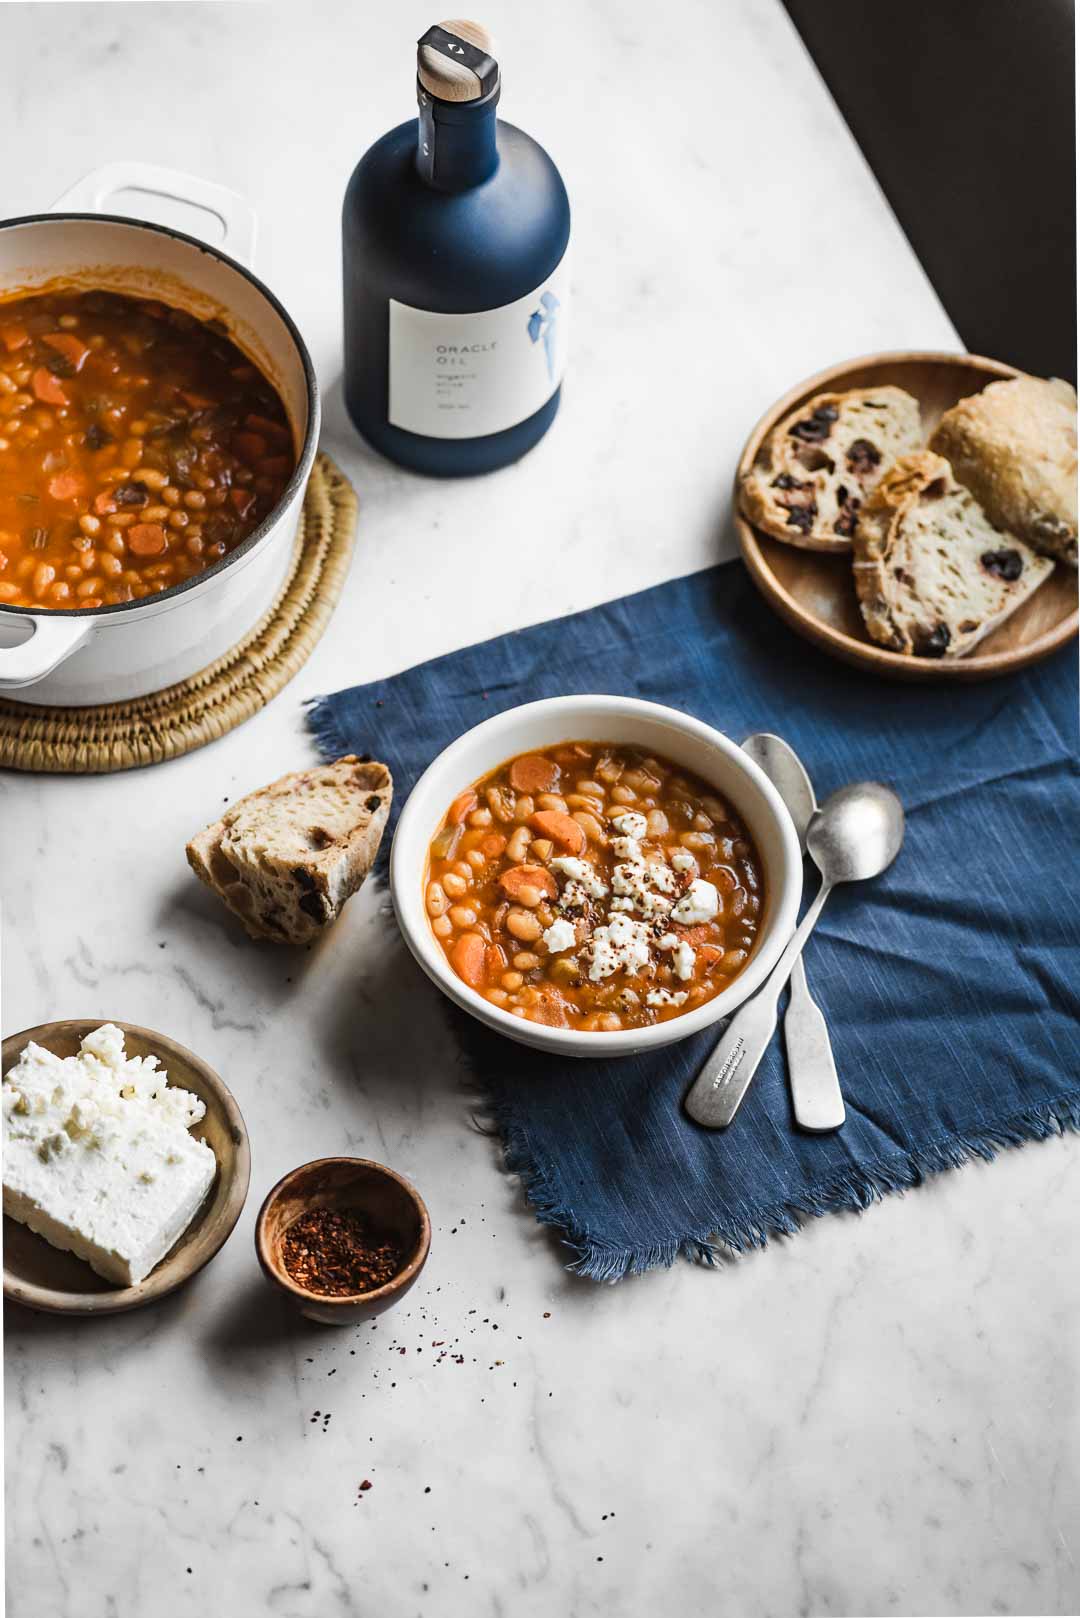
- FINISH WITH OLIVE OIL: It is a common practice in Greek cooking to add a generous amount of olive oil to a dish just before it is done cooking. The olive oil you add at the end of the cooking process cooks into the soup and contributes not only to the flavor of the soup but to the texture as well. Using genuine Greek olive oil is important because it is not acidic, spicy, or bitter in any way.
WHAT TO SERVE WITH FASOLADA:
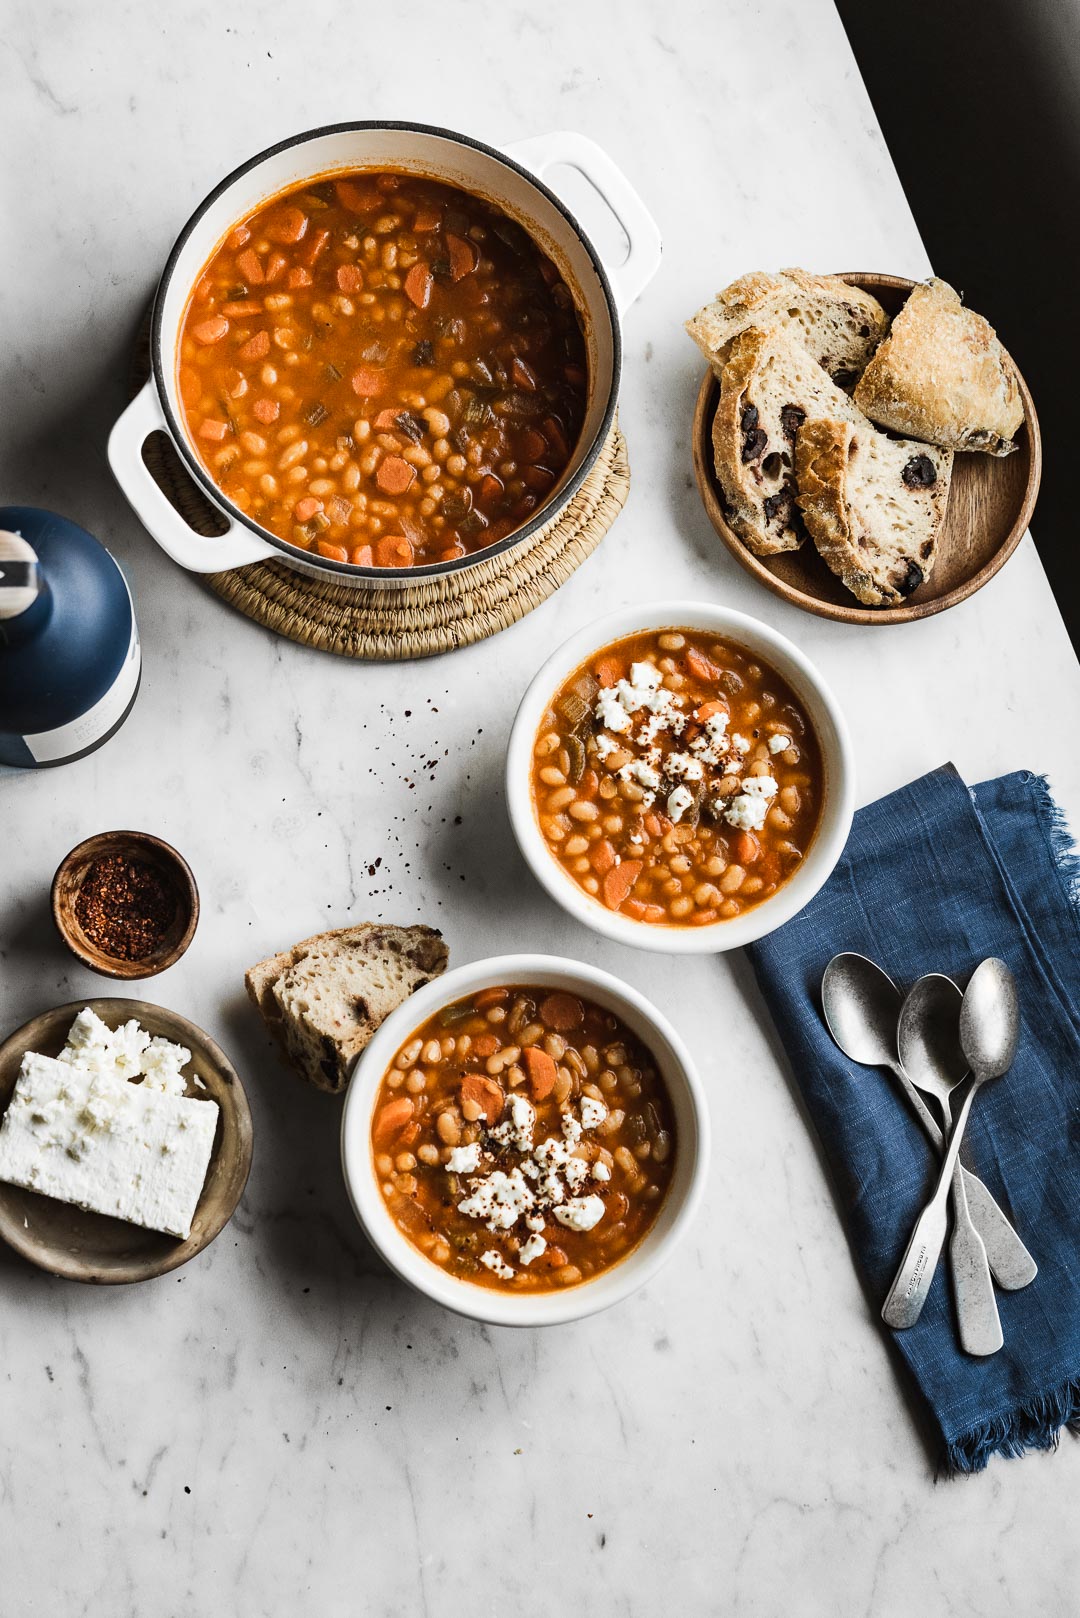
A simple soup like fasolada requires simple accompaniments. Traditionally fasolada is paired with salt-cured fish, a tradition that dates back to Ancient Greece. Other common pairings are feta cheese, a touch of smoked chili flakes (boukovo), crusty bread, and olives. I love to make a fresh loaf of my no-knead Greek olive bread to pair with our fasolada. It combines the olives and crusty bread into each bite and it is perfect for dipping!
If you can't tell by now, fasolada is a quintessential Greek meal. While many people associate Greek cuisine with foods like gyros or spanakopita, fasolada is, in fact, one of the most eaten foods across Greece. Fasolada – Greek white bean soup is a humble, homely meal that you are sure to fall in love with once you try it.
FASOLADA - GREEK WHITE BEAN SOUP
January 13, 2021
by Bella Karragiannidis
Cook Time
2 hours, 30 minutes
Total Time
2 hours, 40 minutes
Ingredients
- 500g small dried white beans (we use navy beans)
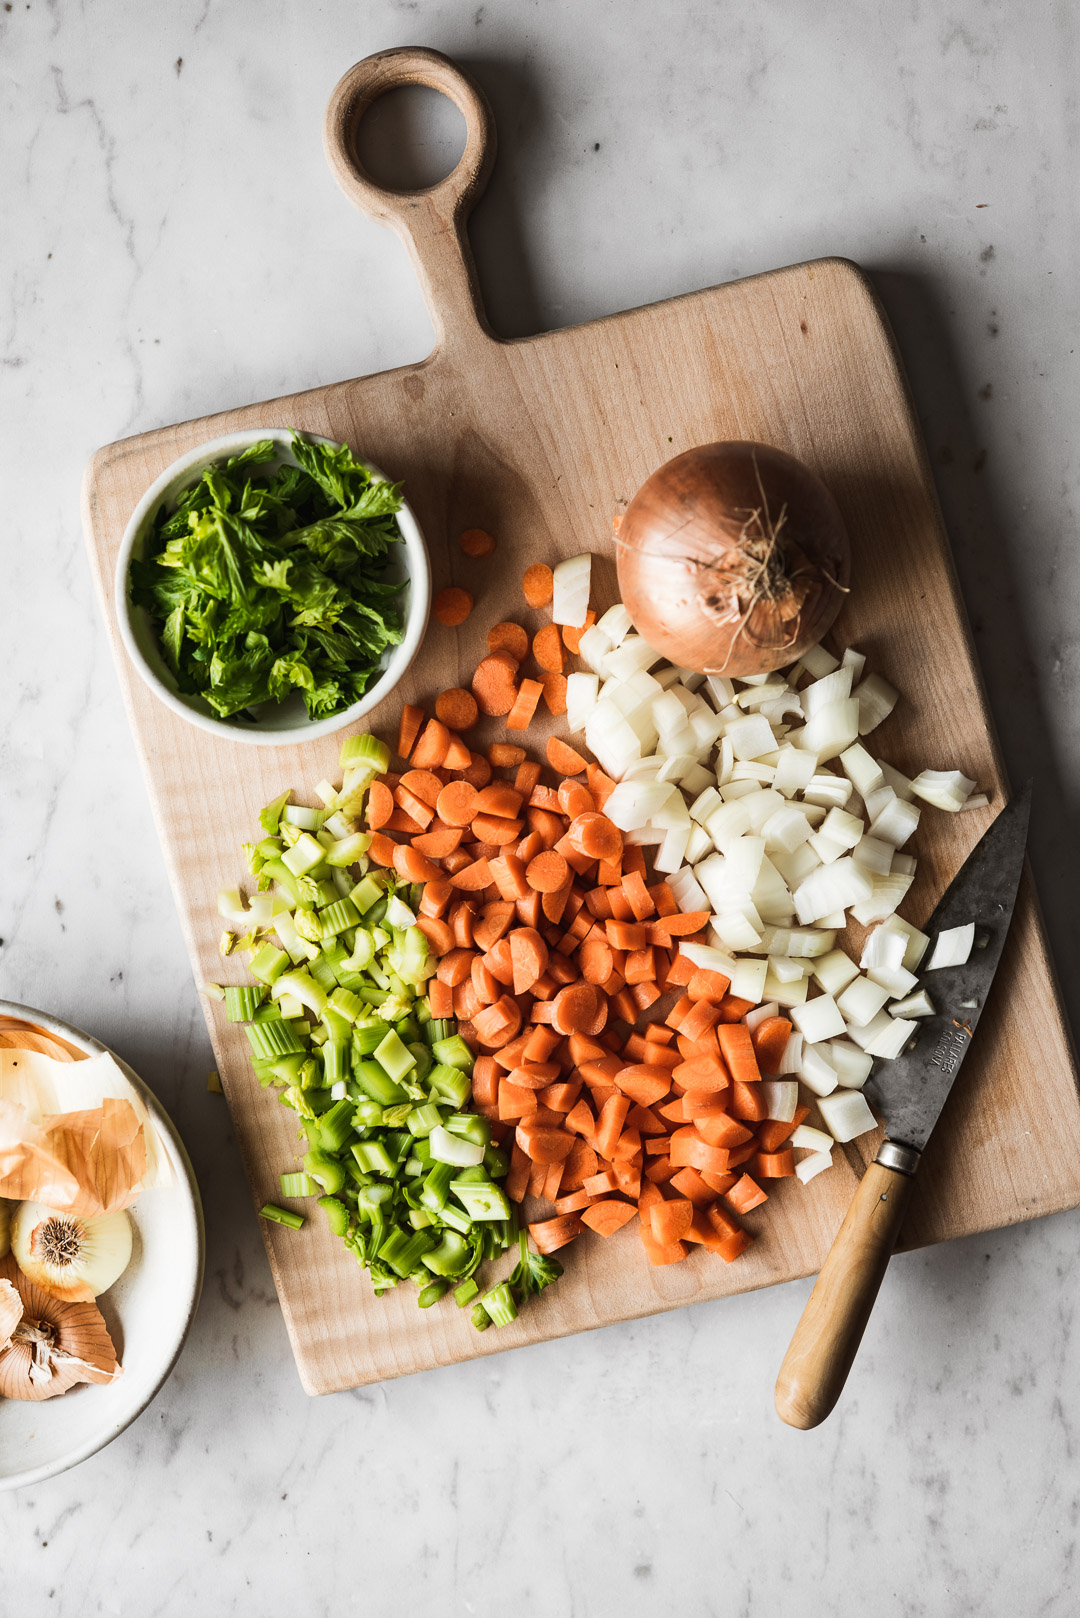
- 2 yellow onions, chopped
- 3 carrots, finely chopped
- 2 large celery stalks, finely chopped (reserve the green celery leaves if your stalk has them)
- 2 tbsp. tomato paste
- 8-10 cups of water
- 1/2 cup olive oil
- salt
- freshly ground pepper
- for serving: feta cheese & chili flakes (we love to garnish with these smoked chili flakes: boukovo)
Instructions
- Soak your beans in a large bowl with enough water to cover them by a few inches the night before you are going to make your fasolada. (This step is crucial if you want to ensure your beans cook all the way through in a uniform manner)
- The next day, drain the beans, add them to a large pot along with 2-3 liters of water. Cook over high heat just until the water comes to a boil and foam has started rising to the top of the pot. Drain the beans and reserve.
- In a medium sized pot or dutch oven set over medium heat, add 1/4 cup of olive oil along with the chopped onion, carrots and celery. Cook, stirring often, just until the vegetables have softened, about 10 minutes.
- Stir in the tomato paste and cook for a few minutes to bring out the flavor of the tomato.
- Add in the par-boiled beans & 8 cups of water, turn the heat up to high and cook until the soup has come to a boil. Lower the heat to medium low and simmer, with a lid left slightly ajar, for 1 - 1.5 hours, stirring occasionally.
- Test the beans after 1 - 1.5 hours, once they are adequately soft you can season the soup with salt & pepper to taste (some beans may need more cooking time, just make sure they are relatively soft before adding the salt because salt can inhibit the cooking process of the beans) Once you have seasoned the soup, add in chopped green celery leaves if you have them)
- Continue cooking the soup over medium low heat for another 30 minutes to 1 hour. The broth should have started to thicken and the beans should be on the verge of almost melting. When the fasolada has reached this stage, stir in the remainder of the olive oil and cook for about 10 minutes. Adding the olive oil will thicken the broth to just the right consistency and lend a beautiful flavor to the soup.
- Serve with feta cheese and chili flakes if desired. Enjoy with crusty bread and olives (or my [no-knead Greek olive bread|https://www.ful-filled.com/2021/01/10/no-knead-greek-olive-bread/)
MORE BELOVED GREEK RECIPES:
- AVGOLEMONO – GREEK EGG & LEMON SOUP
- LAHANODOLMADES – GREEK CABBAGE ROLLS
- WINTER GREEK SALAD
- MELITZANOSALATA – GREEK EGGPLANT SPREAD
- HARISSA ROASTED RED PEPPER FETA SPREAD – HTIPITI
- CLASSIC GREEK BAKLAVA
The post FASOLADA – GREEK WHITE BEAN SOUP appeared first on ful-filled.
]]>The post NO-KNEAD GREEK OLIVE BREAD | <span style=''font-size:12px;'>ELIÓPSOMO</span> appeared first on ful-filled.
]]>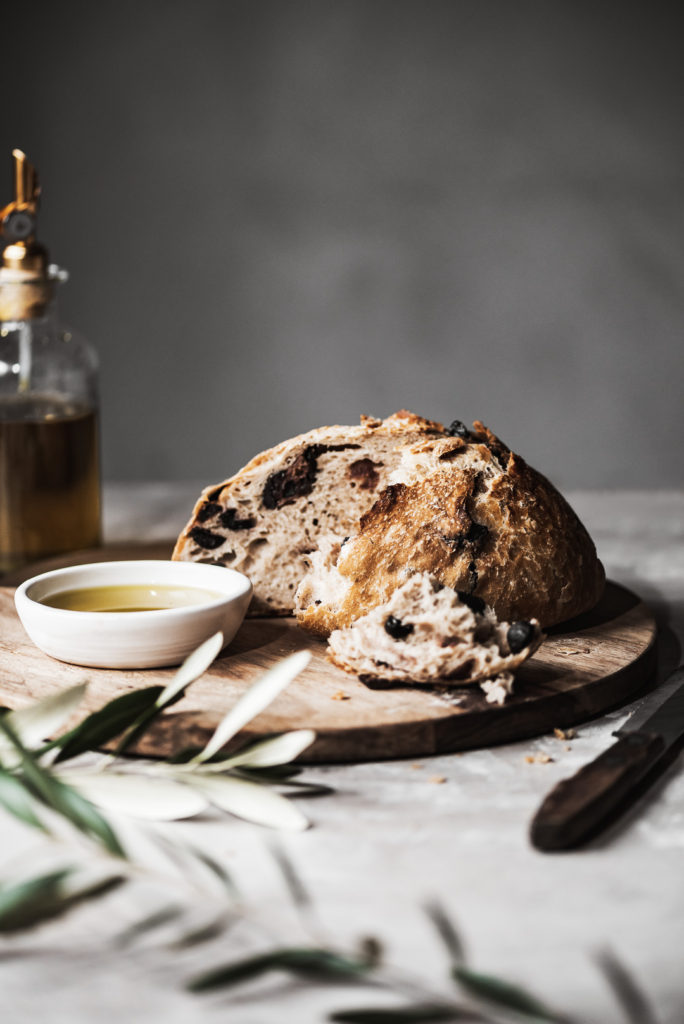
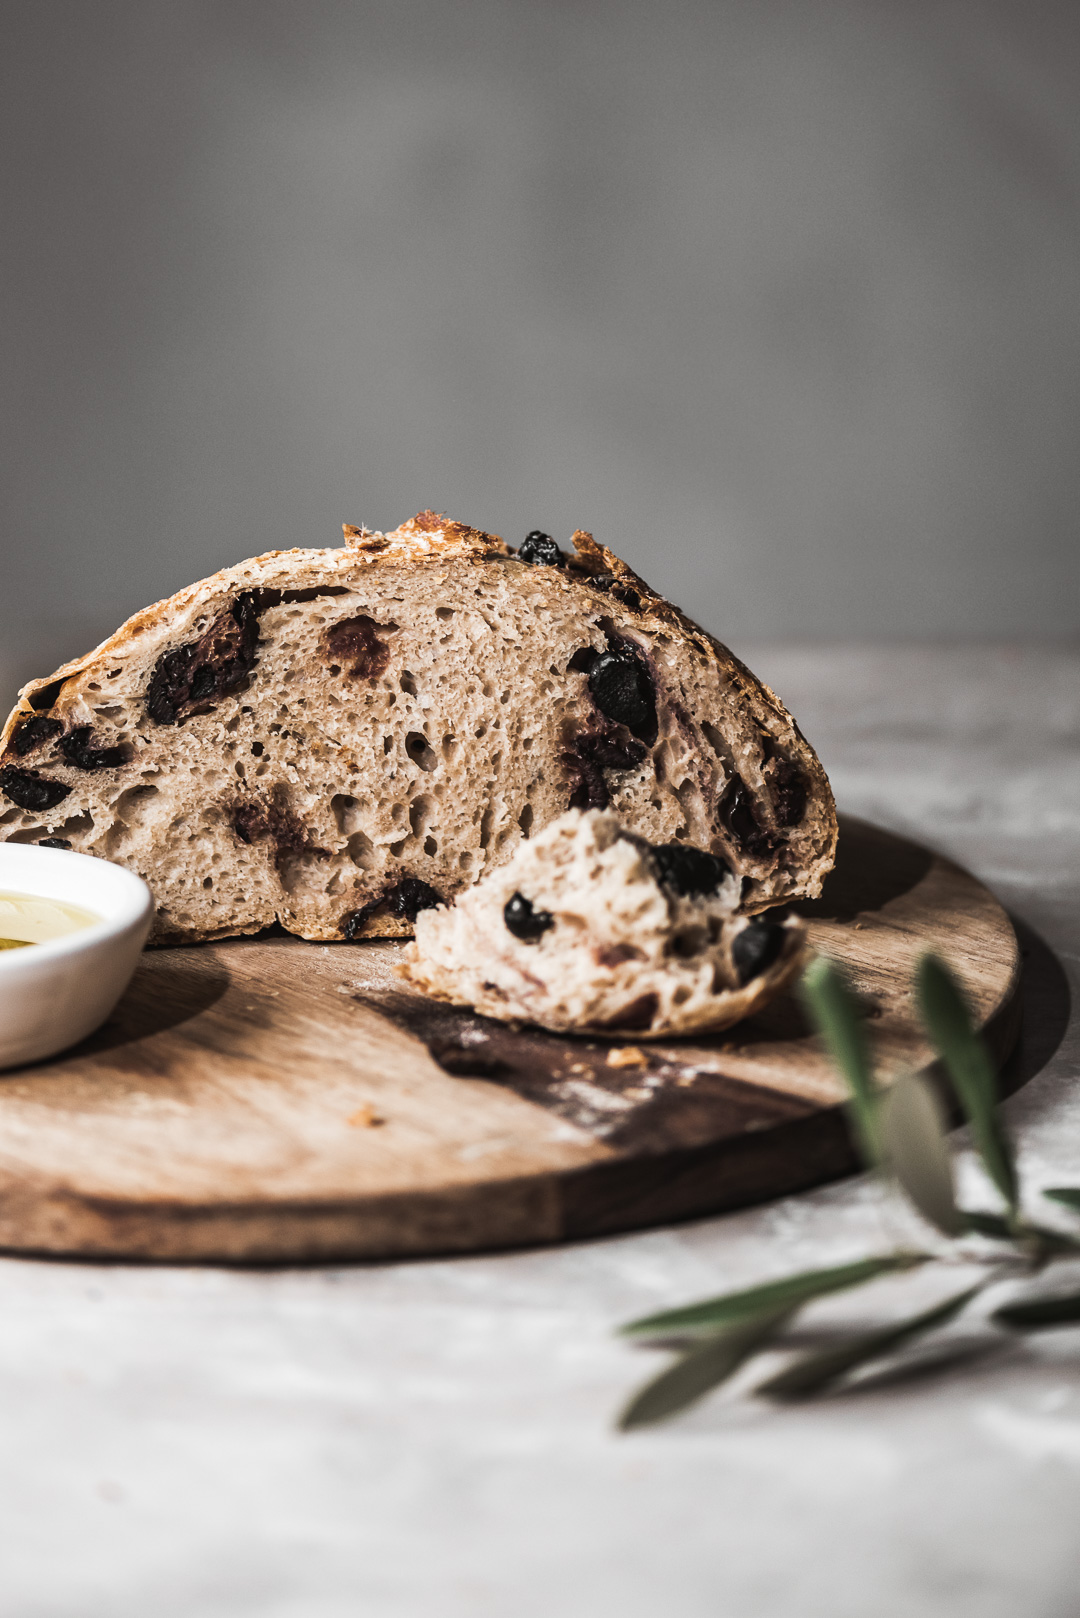
An impossibly simple rendition of the classic Greek olive bread. With a crisp crust and a tender interior flavored with Greek oregano and salt-cured Greek olives, this no-knead Greek olive bread is a comforting companion to some of our most beloved Greek meals.
GREEK OLIVE BREAD INGREDIENTS:
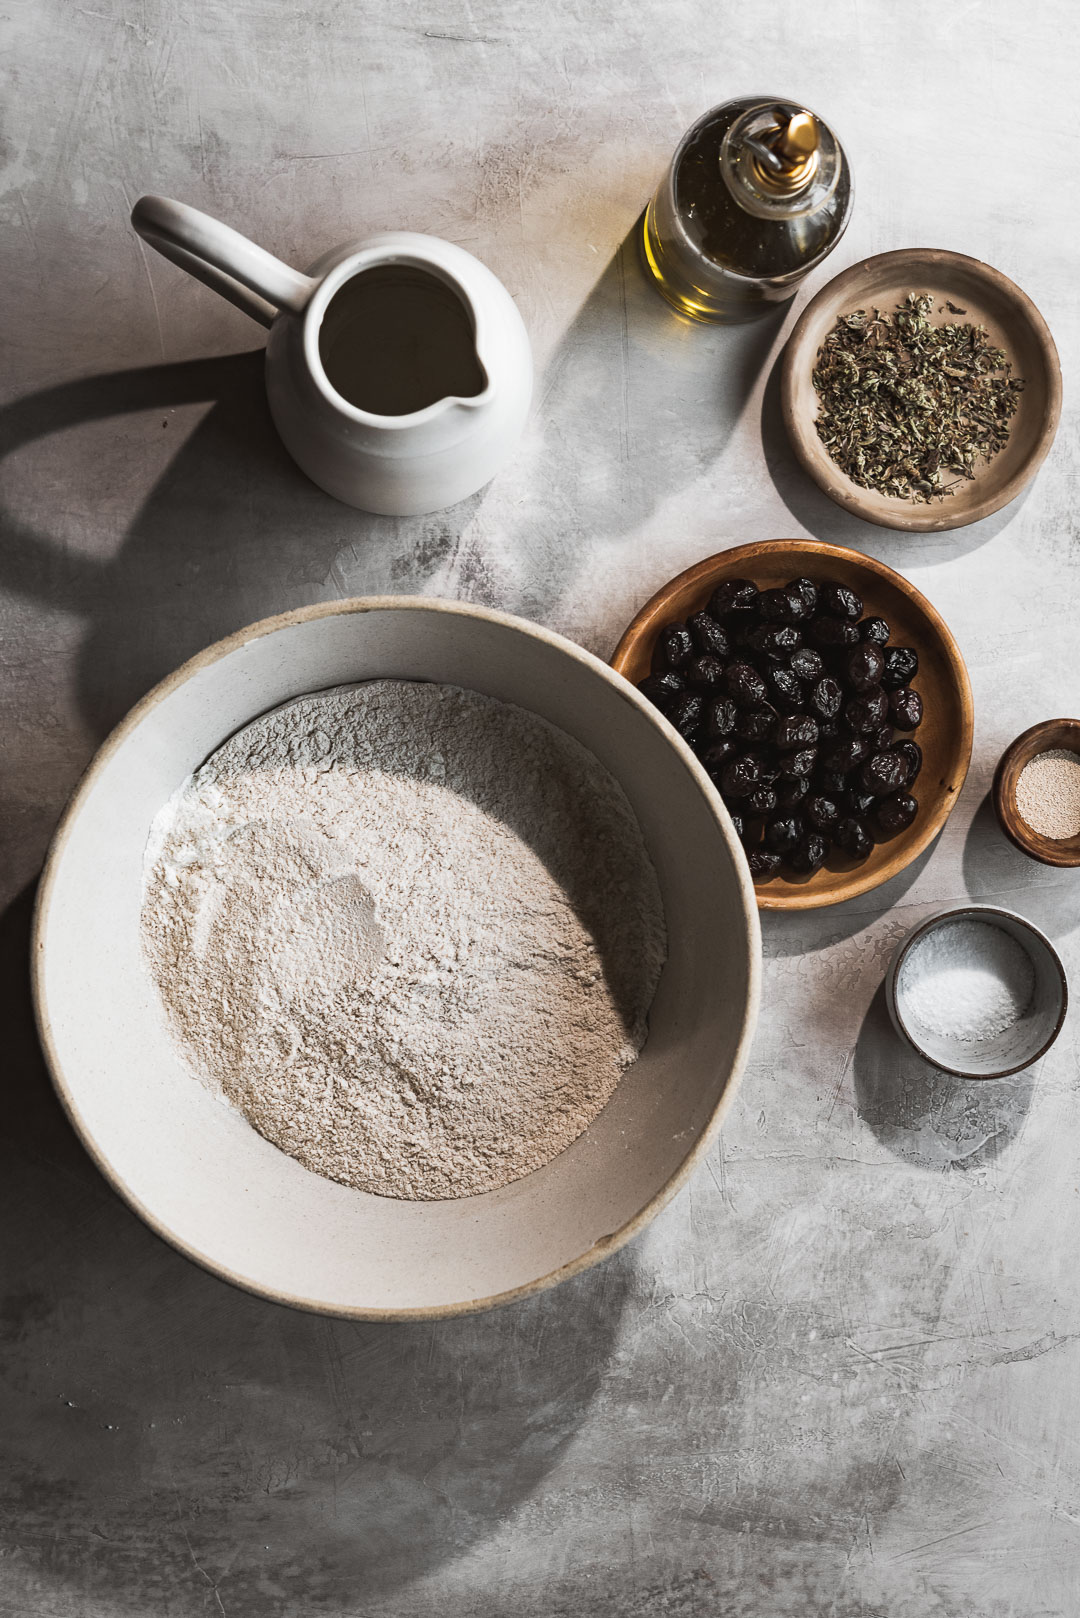
Just seven ingredients make up this simple, artisan-style loaf of bread. The quality of the ingredients you use is paramount in simulating the delicious simplicity that Greek cuisine is famously known for.
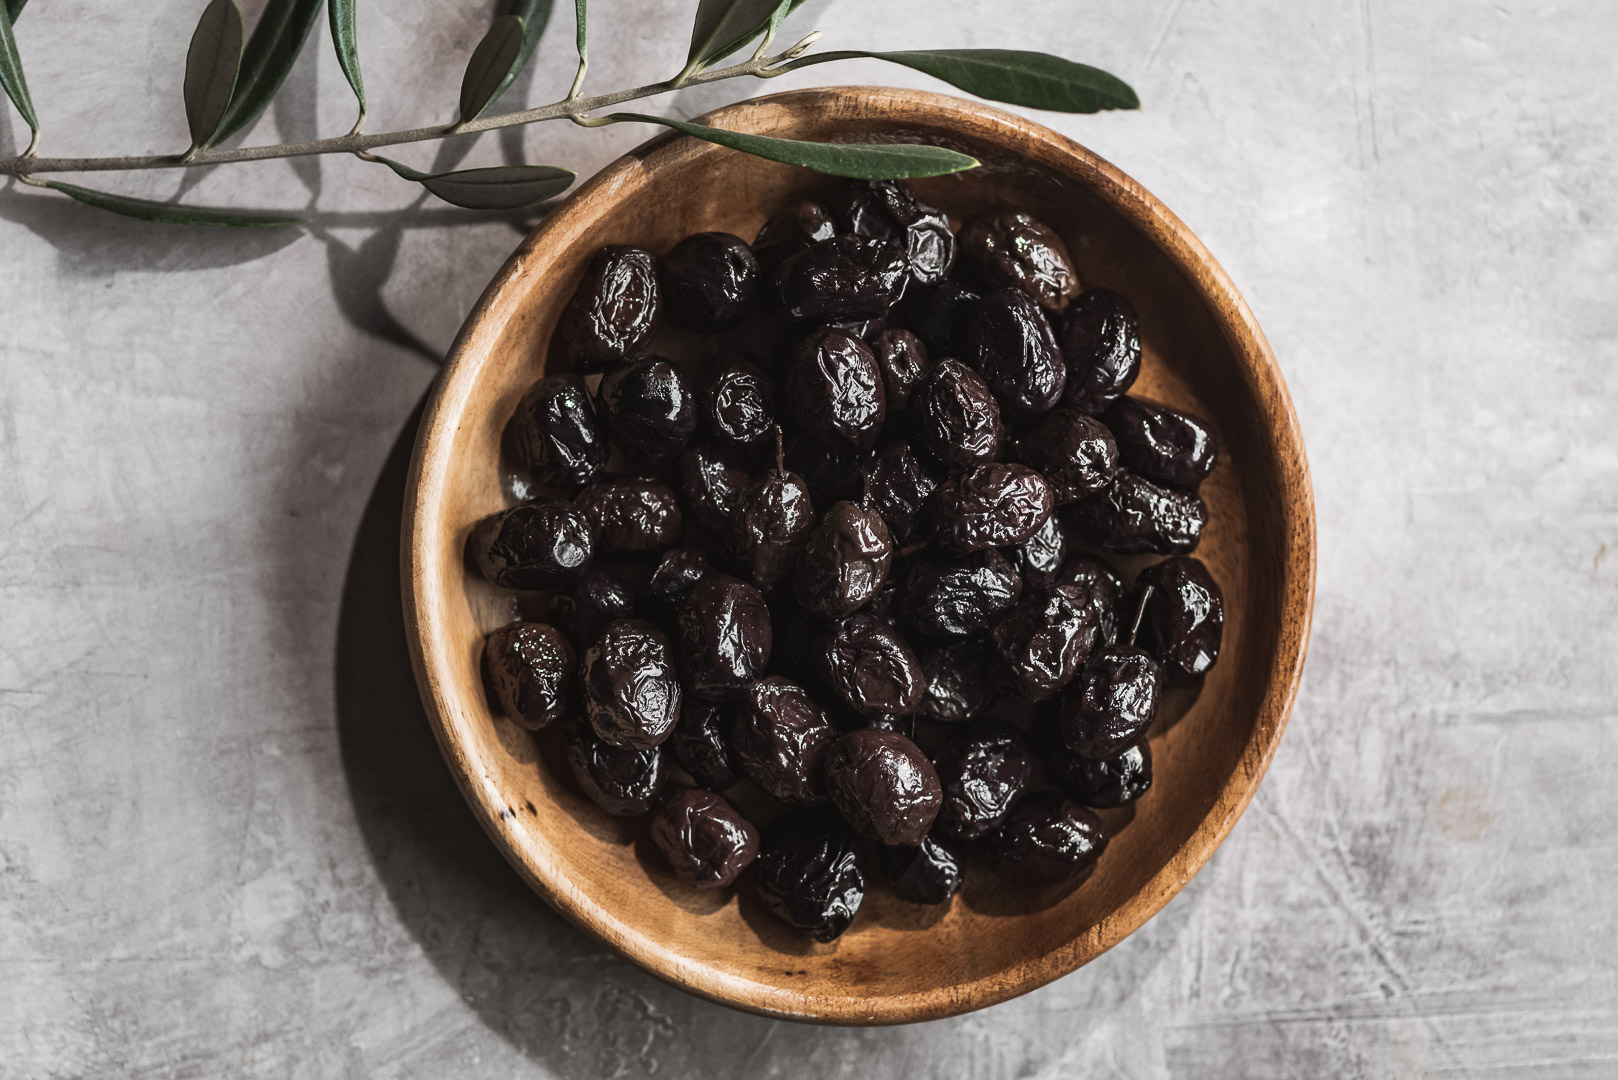
OLIVES:
There is one particular olive that we love most and that is the unique throumba olive from the Greek island of Thassos. My hubby's paternal yiayia was from the island of Thassos which is renowned for their special olive curing process. Throumba (θρούμπα) olives are small and black, with a very thin skin. They are left on the trees until winter, where they are naturally cured when picked. They require only supplementary dry curing on a bed of coarse salt to create a wrinkled, succulent table olive. With an exceptionally mellow flavor that is dense, fruity & savory. Because they are not vinegar cured you get more of the beautiful, deep olive flavor with a raisin-like texture. Their pits pop right out when you squeeze them at one end. Making them super easy to prep for using in this no-knead Greek olive bread.
If you are not able to procure Thassos throumba olives, I highly recommend looking for naturally cured olives from Turkey or Italy. (we like THESE widely available olives from Turkey). I tend to just tear the olives into halves or quarters while I am pitting them. But you can also give them a rough chop if you want the olives to be smaller in the bread.
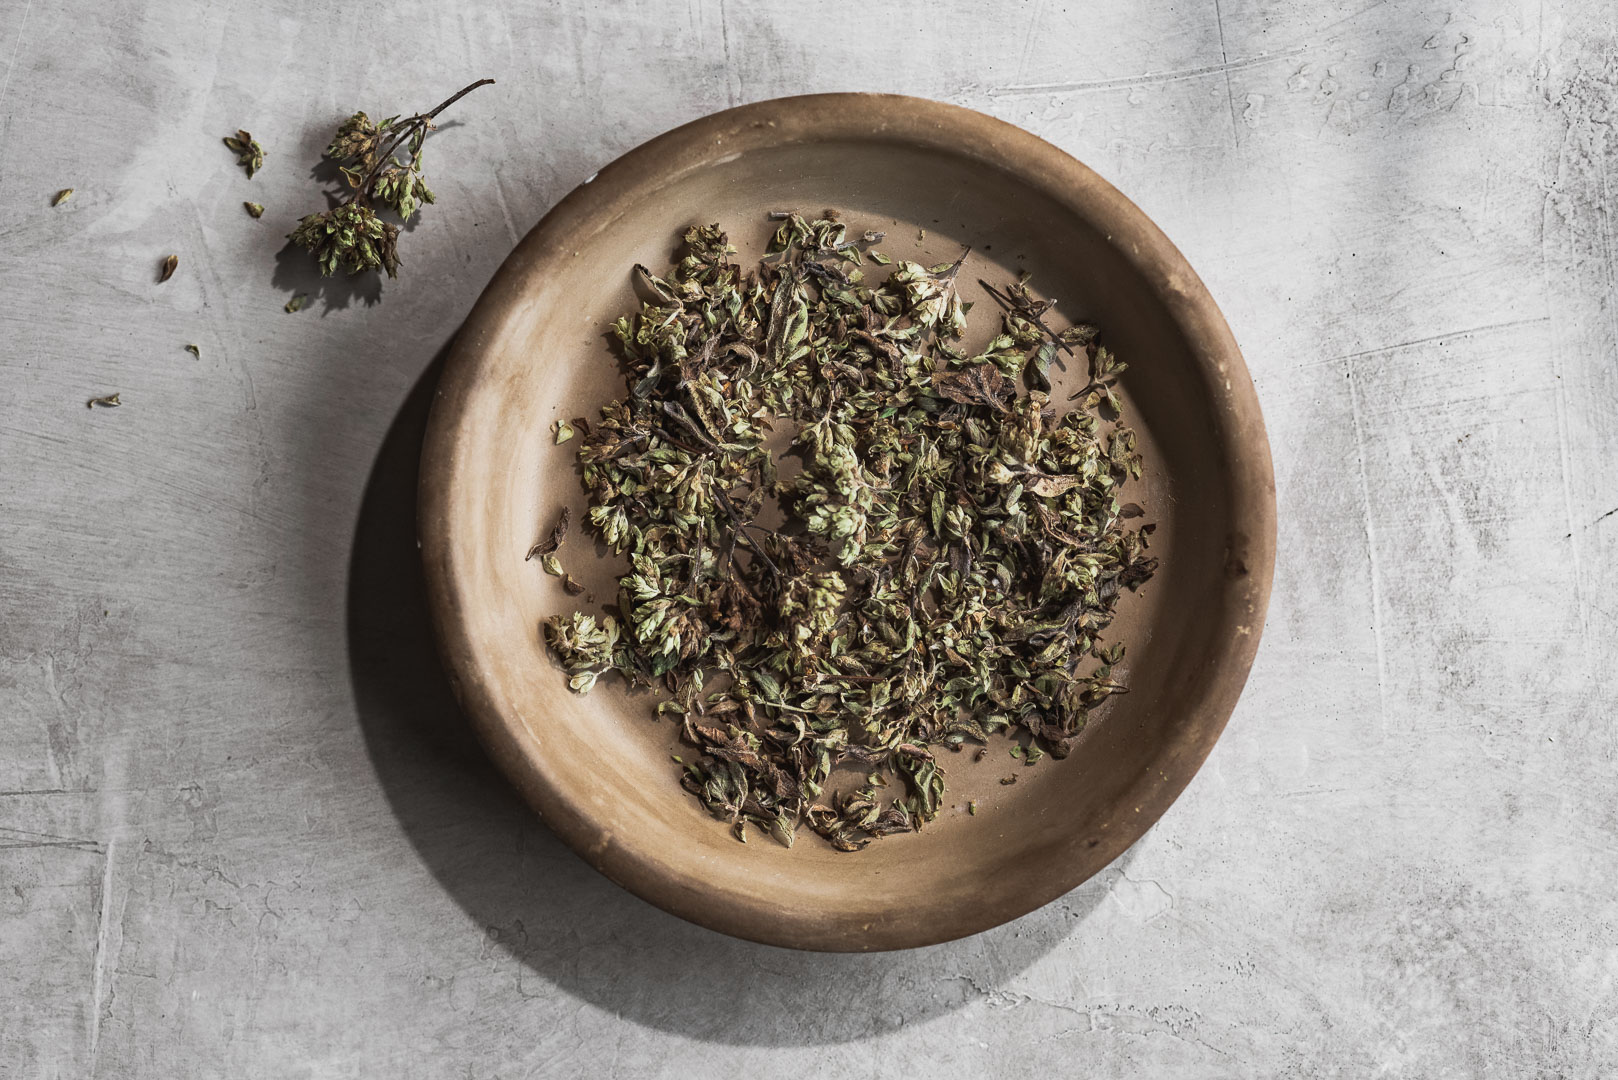
GREEK OREGANO:
After the olives, the next distinguishing feature of Greek olive bread is the inclusion of an herb. Different regions in Greece use different herbs for their olive bread. The main herbs used are oregano, thyme or mint. Our favorite herb to use is oregano. But not just any oregano, it must be Greek oregano. Known as "true oregano" – Greek oregano is one of the most incredible herbs in the world. Savory and earthy, the flavor of Greek oregano is the best when it is harvested just before blossoming. One distinguishing element to look for when you are procuring authentic Greek oregano is to look for the little clusters of unopened flower buds. This is a sign that the oregano was harvested at the perfect time and it will have the very best flavor. (we love THIS oregano from Chloe & Daphnis)
MAKING NO-KNEAD GREEK OLIVE BREAD:
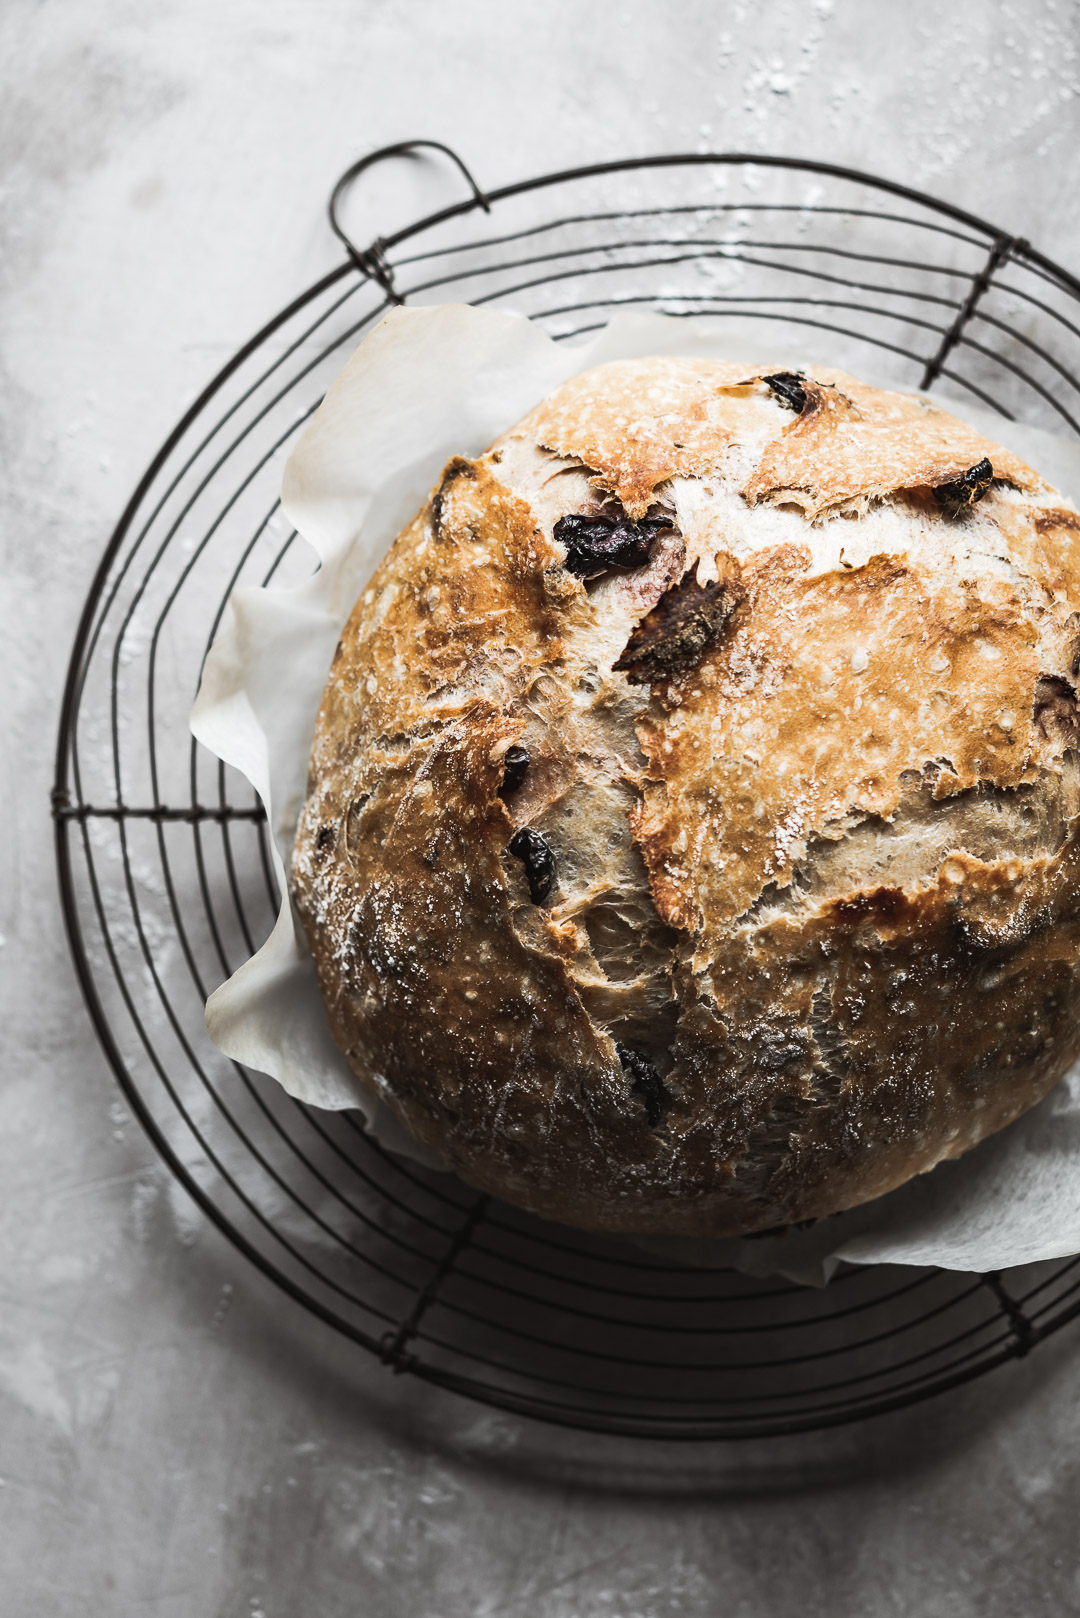
The process of making this bread is incredibly simple. On day one, you mix the ingredients into a shaggy dough. Then you cover the bowl and leave the dough to slowly rise for 18 hours. The next day, you pre-heat a dutch oven in a 450°F oven, quickly shape your dough into a round, and bake. I made a process video to example just how easy it is to make our no-knead Greek olive bread:
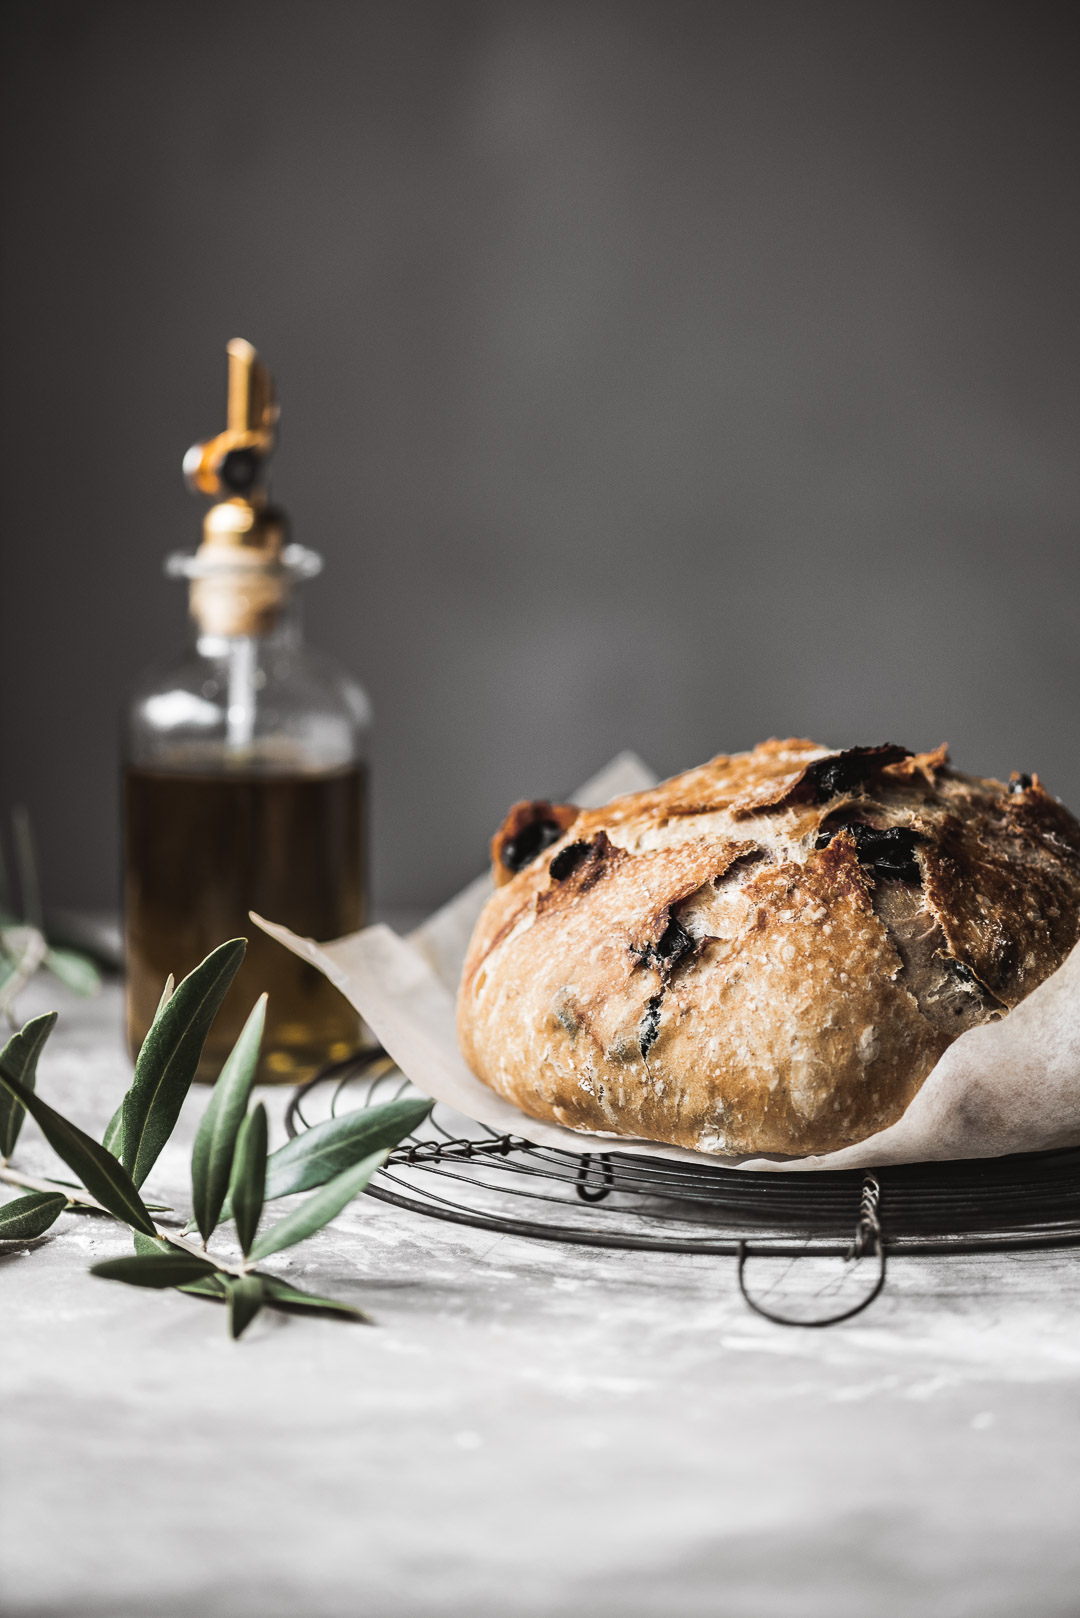
While I am kind of infamous for my sourdough bread recipes, I really wanted to share a recipe for an artisan-style bread that does not require a sourdough starter. In the end result of this impossibly simple loaf is remarkable! A golden crisp crust encases the soft, olive, and oregano laced interior of this most delicious loaf. My favorite thing about this no-knead Greek olive bread is the big reward you get for so little effort.
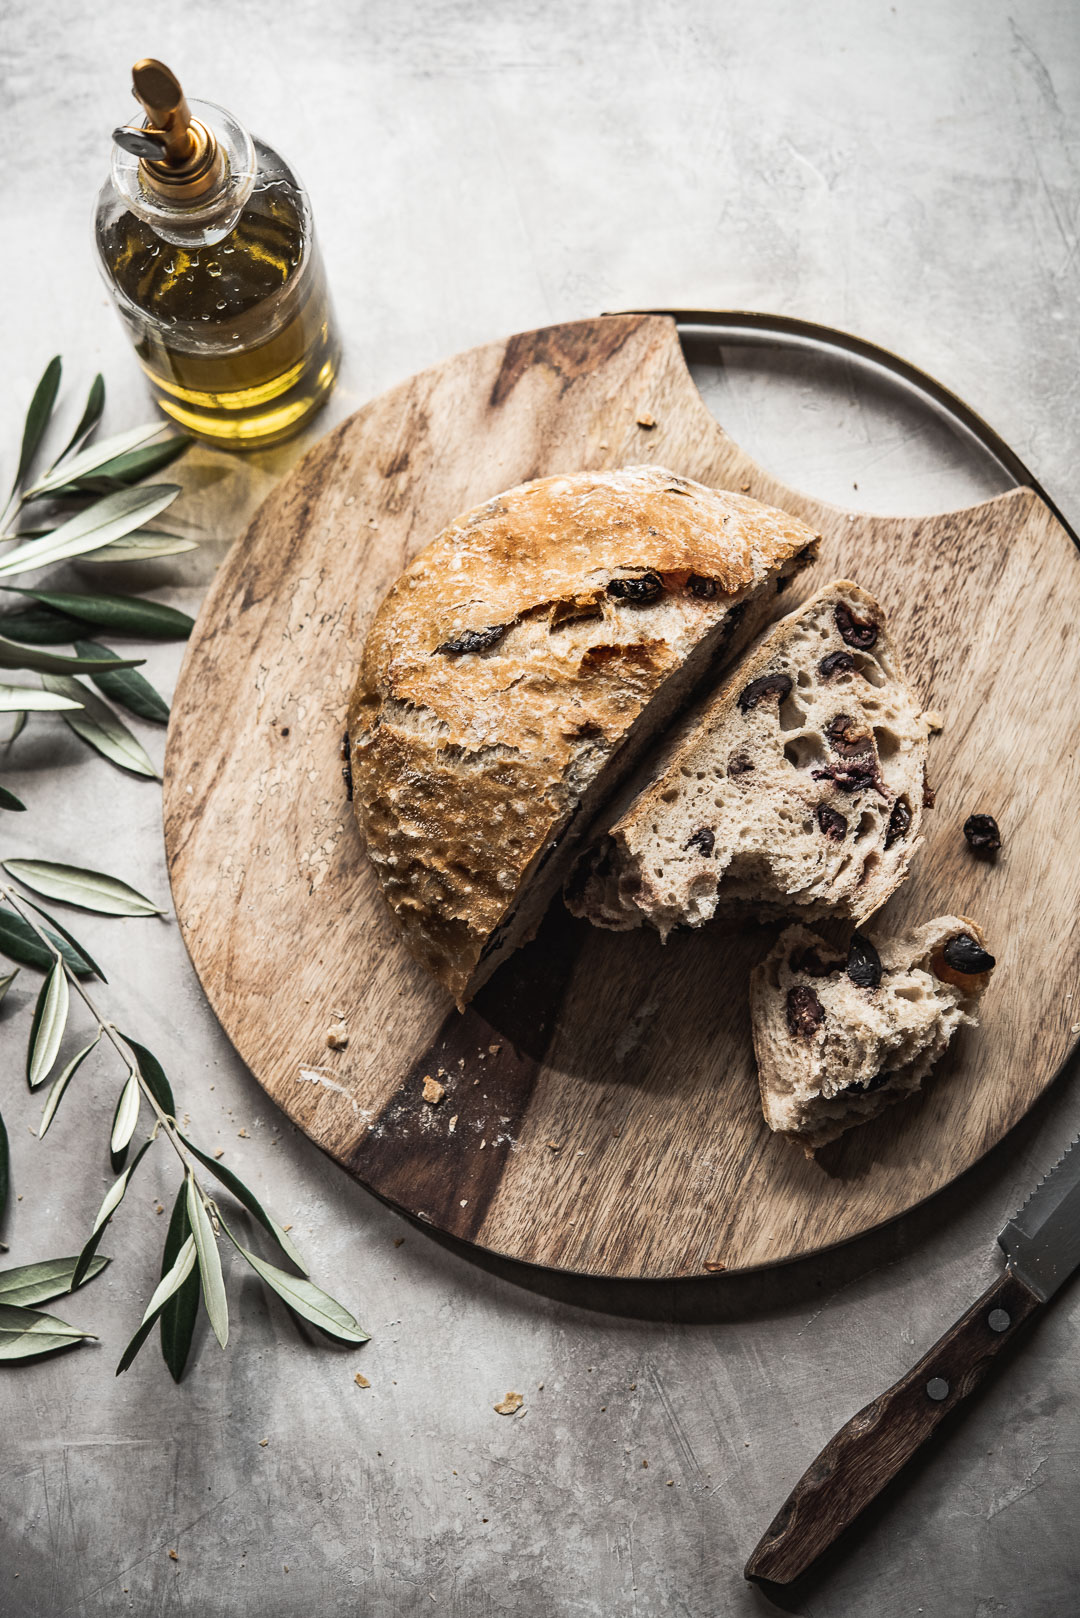
There's nothing quite like breaking into a fresh-baked loaf of bread. And breaking into a warm loaf to reveal an oregano scented & olive studded artisanal masterpiece is an incredible experience! A true feast for all of your senses…
NO-KNEAD GREEK OLIVE BREAD
January 10, 2021
by Bella Karragiannidis
Total Time
1 hour, 10 minutes
Ingredients
- 4 cups (500g) unbleached bread flour or all-purpose flour ( I like to use 375g bread flour + 125g white whole wheat flour)
- 3/4 tsp dry active yeast or instant yeast
- 1 tsp kosher salt
- 2 tbsp dried Greek oregano
- *optional: 2 tsp sugar (adding a touch of sugar accentuates the flavors of the olives)
- 2 cups room temperature water (*if you live in an especially humid region, you may want to withhold 1/4 cup water)
- 1 tbsp Greek olive oil
- 1 cup naturally cured Greek olives, pitted & roughly chopped (if you are using olives with pits, measure your olives before pitting them)
Instructions
- In a large mixing bowl, combine the flour, salt, yeast, and dried oregano (add sugar now if using). Mix the dry ingredients with a wooden spoon or spatula (I like to use a Danish dough whisk) until well combined. Add in the water & olive oil and stir until a shaggy dough has formed. (The dough may seem wet at this stage, but trust the process, it will firm up a bit during fermentation).
- Add in the prepared olives and stir to evenly distribute the olives throughout the dough.
- Cover your bowl with plastic wrap, followed by a kitchen towel. Leave the dough to rest for 18 hours at room temperature (70°F/21°C is ideal)
- Preheat your oven to 450°F/230°C. Place a dutch oven with a lid in the oven on the center rack to preheat while the oven heats. Leave the Dutch oven to heat for at least 20 minutes once the oven reaches 450°F.
- Once the dutch oven is adequately pre-heated, generously flour a work surface and gently let the dough slide out of the bowl onto the prepared surface.
- Lightly sprinkle the top of the dough with flour, and gently fold the edges of the dough toward the center, overlapping each flap of dough with the following fold.
- Flip the dough ball over, so the folds are facing down. Sprinkle the dough with a bit more flour, and gently shape the dough into a ball by rotating and pulling it towards you a few times. Do not knead the dough, just gently coax it until a round shape is formed.
- Transfer the dough round, seam side down, onto a sheet of parchment paper. Use oven-proof gloves/mitts to carefully remove the pre-heated Dutch oven from the oven, and place it on a trivet or on your stovetop. Remove the lid, pick up the parchment paper with the dough on it, and carefully place it in the dutch oven. Put the lid back on and bake, covered for 25 minutes. Remove the lid, and continue to bake for another 30-35 minutes until the crust is deeply golden brown. Let cool on a baking rack & enjoy!
MORE GREEK RECIPE INSPIRATION:
- AVGOLEMONO – GREEK EGG & LEMON SOUP
- LAHANODOLMADES – GREEK CABBAGE ROLLS
- WINTER GREEK SALAD
- MELITZANOSALATA – GREEK EGGPLANT SPREAD
- HARISSA ROASTED RED PEPPER FETA SPREAD – HTIPITI
- CLASSIC GREEK BAKLAVA
The post NO-KNEAD GREEK OLIVE BREAD | <span style=''font-size:12px;'>ELIÓPSOMO</span> appeared first on ful-filled.
]]>The post TSOUREKI – GREEK PASCHA BREAD appeared first on ful-filled.
]]>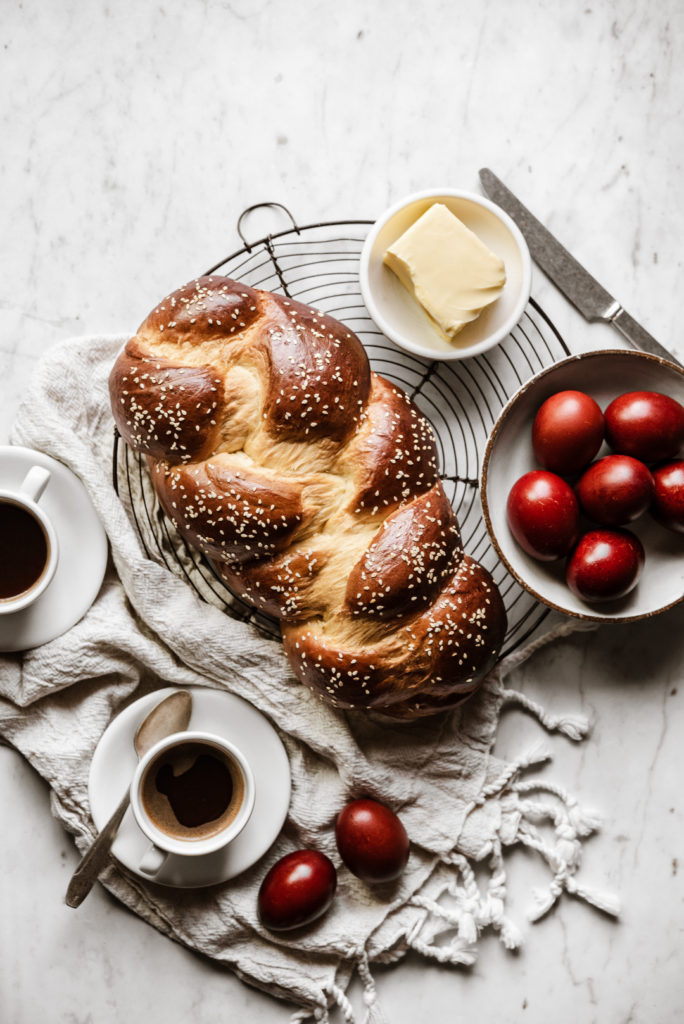
Pascha ( Πάσχα ) is the most revered holy day in the Greek culture. The preparations and customs that take place leading up to Pascha, including traditional foods and large feasts, are an important part of modern Greek life. The remembrance and celebration of Christ's life & death span over a week-long period called Megali Evdomada ( Μεγάλη Εβδομάδα) or Holy Week. There are many traditions and preparations that take place during this week, but there is one day that we especially look forward to, Holy Thursday, which is the day that we get to make Tsoureki – Greek Pascha Bread.
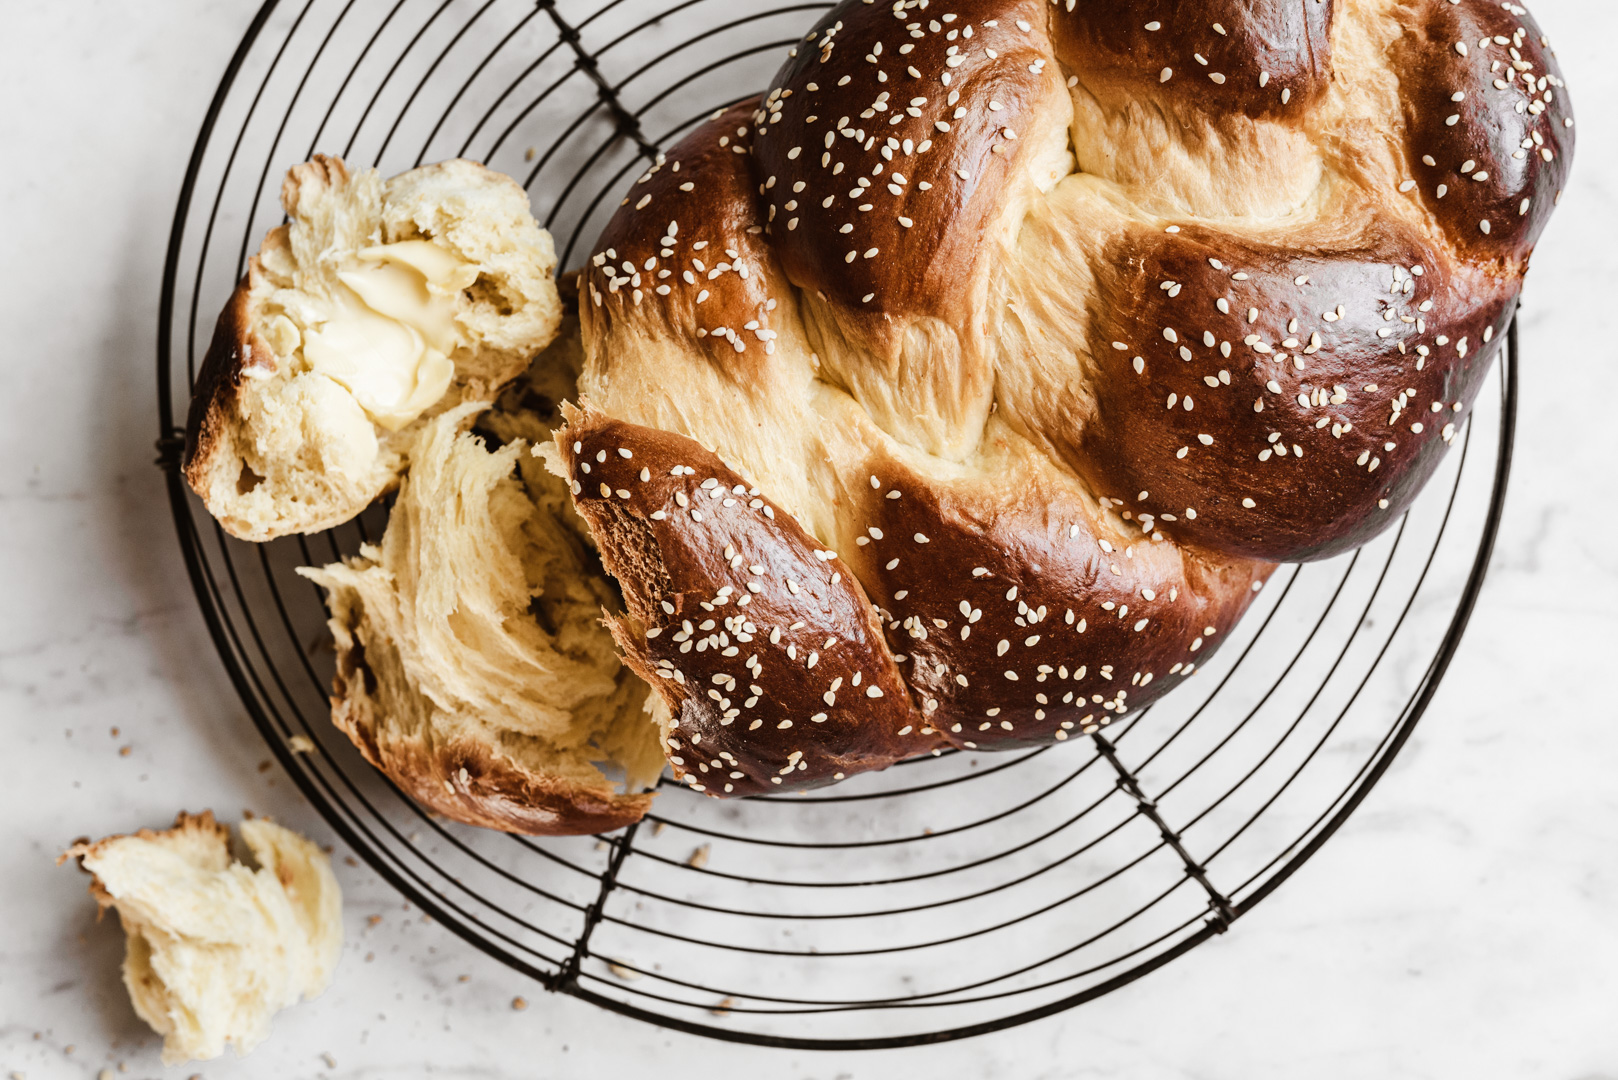
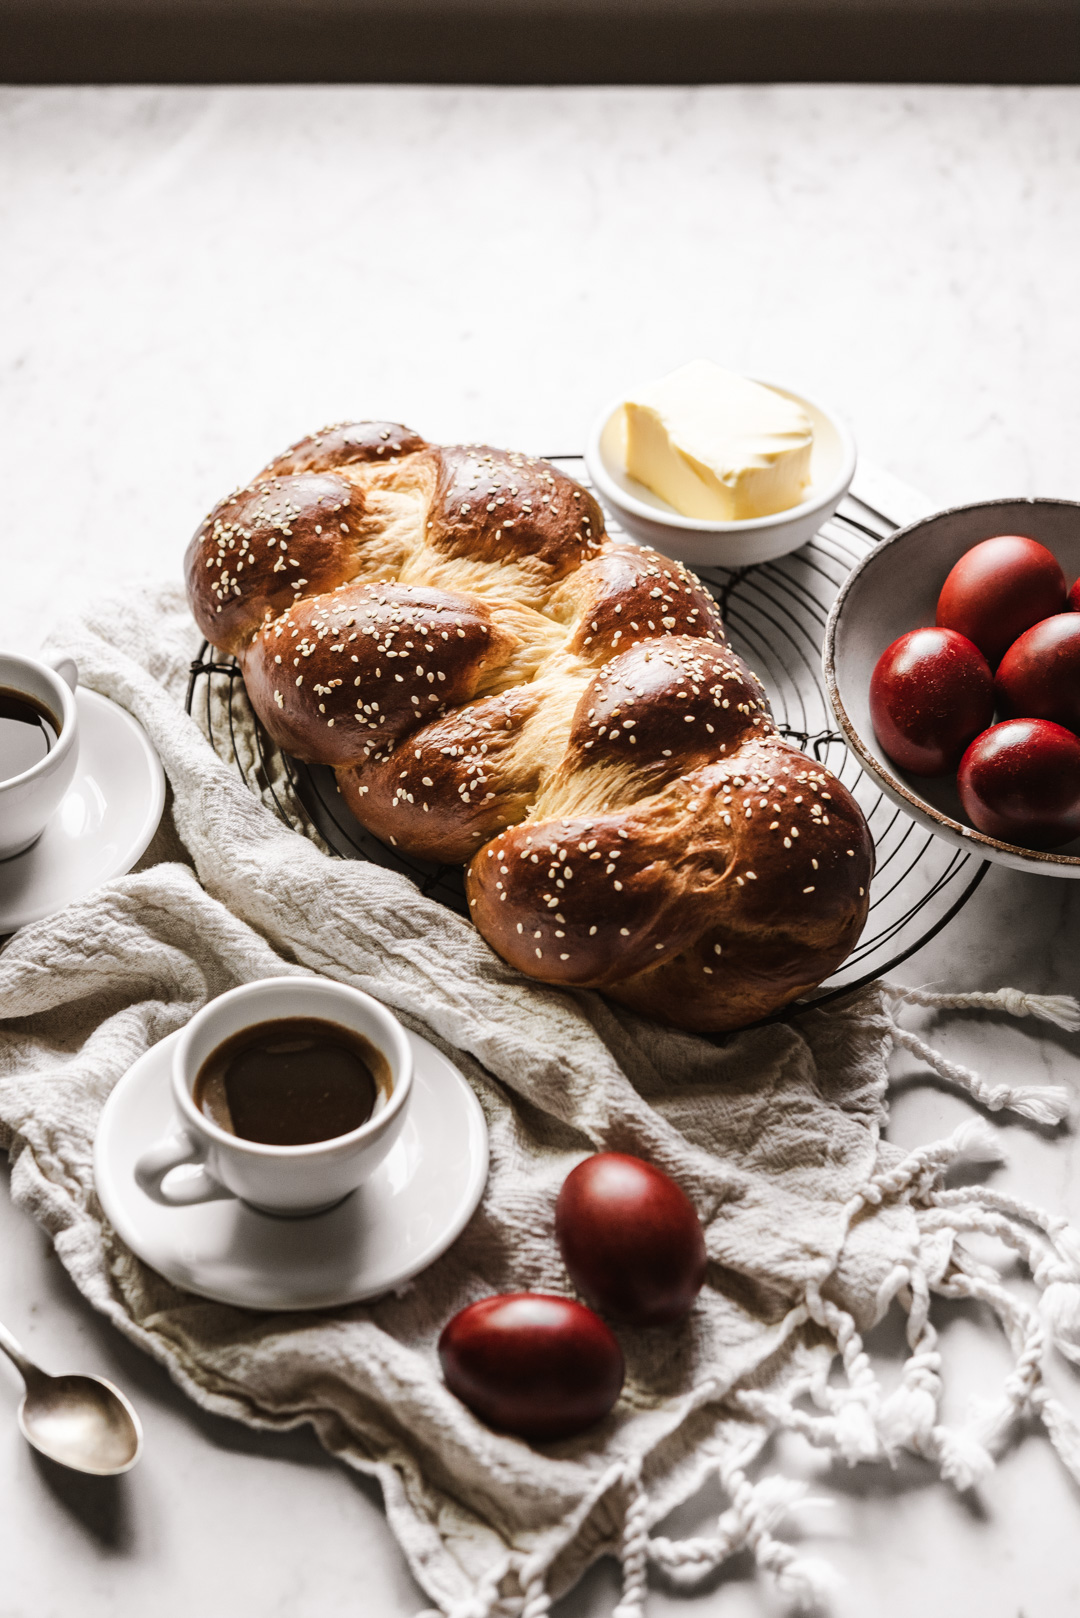
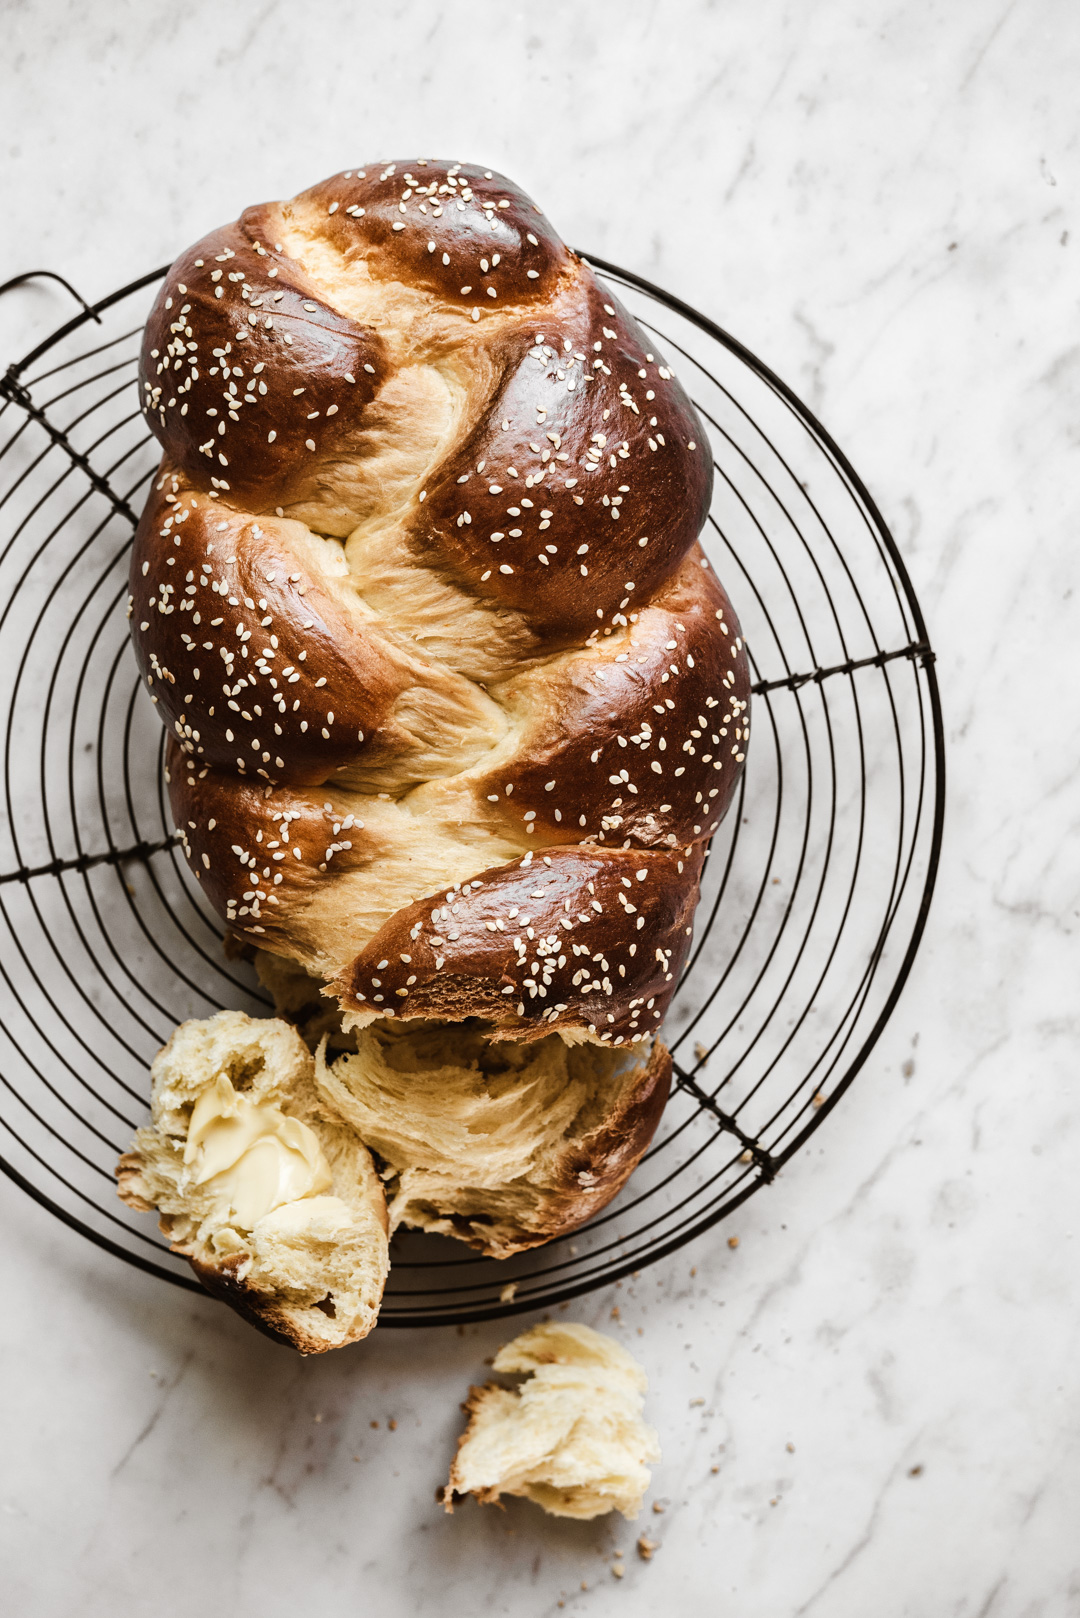
Tsoureki ( pronounced: tsou-REH-key ) is the food we look most forward to making every year for Pascha. Tsoureki is a sweet braided loaf of bread that is infused with some of our most beloved Greek flavors: mastiha, mahlepi & orange. The aroma of tsoureki baking in the oven is one of the greatest smells on earth!
If you have followed along here on ful-filled for some time, then you know that I have a recipe for gluten-free tsoureki here on the blog. Although my hubby and I do not have gluten issues, I have done a lot of gluten-free baking over the years and wanted people with gluten intolerances to be able to experience our most treasured Greek bread recipe. As Pascha approached this year, I knew that it was time for me to finally share our recipe for traditional tsoureki! And I could not be more excited for you to experience this incredible Greek Pascha bread!
what makes tsoureki so special:
Tsoureki – Greek Pascha bread is very similar to other sweet braided breads, but there are three elements that define tsoureki – Greek Pascha bread:
- MASTIHA: (a.k.a. mastic) is the resin that comes from the Pistacia Lentiscus tree, which is grown on the Greek island of Chios in the Northern Aegean sea. The flavor of mastiha is hard to pinpoint, most would describe it as a combination of pine and vanilla, with maybe a touch of fennel or anise. Mastiha is subtle but adds an unexpected complexity to whatever you use it with.
- MAHLEPI: (a.k.a. mahlab) is the aromatic spice that comes from the kernel of the black or mahaleb cherry (Prunus mahaleb). The kernels have to be ground or boiled in order to extract the most flavor. The flavor of mahlepi is a combination of cherry, rose, and almond – with a hint of vanilla and something quite floral.
- ORANGE ZEST & JUICE: orange is probably the most prominent flavor used in Greek baking. For tsoureki, we like to incorporate both orange zest and juice, but not too much, just enough for it to gently fragrance the loaf.
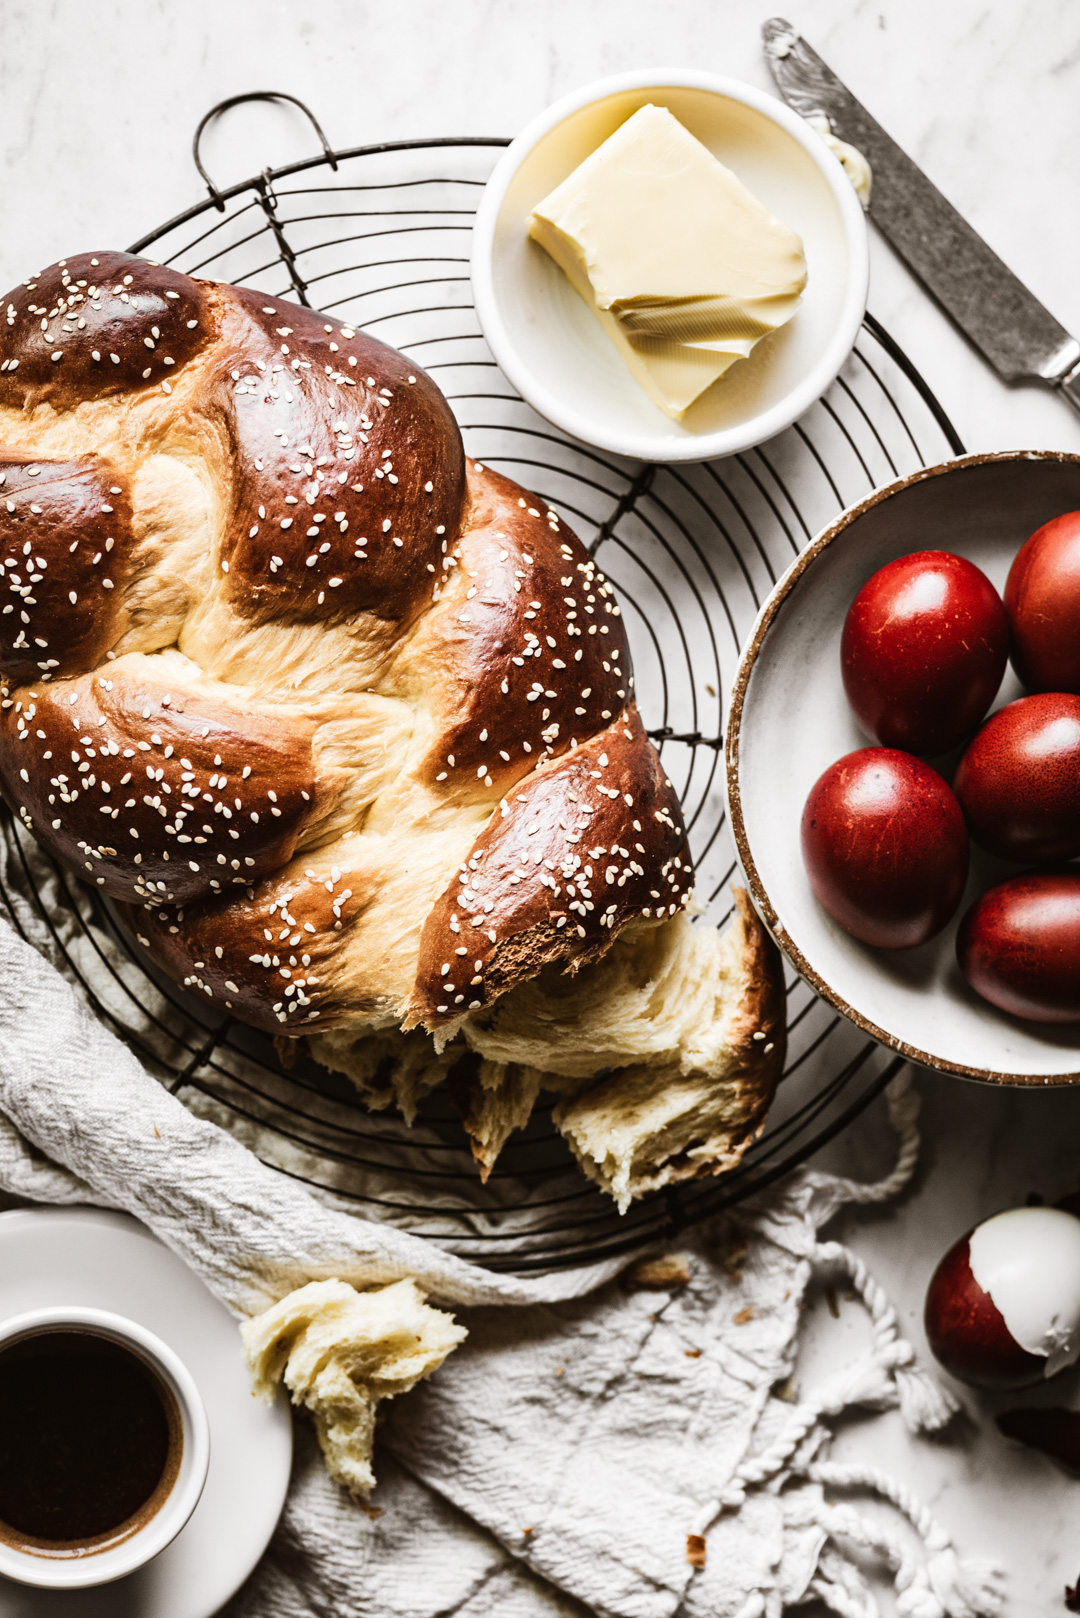
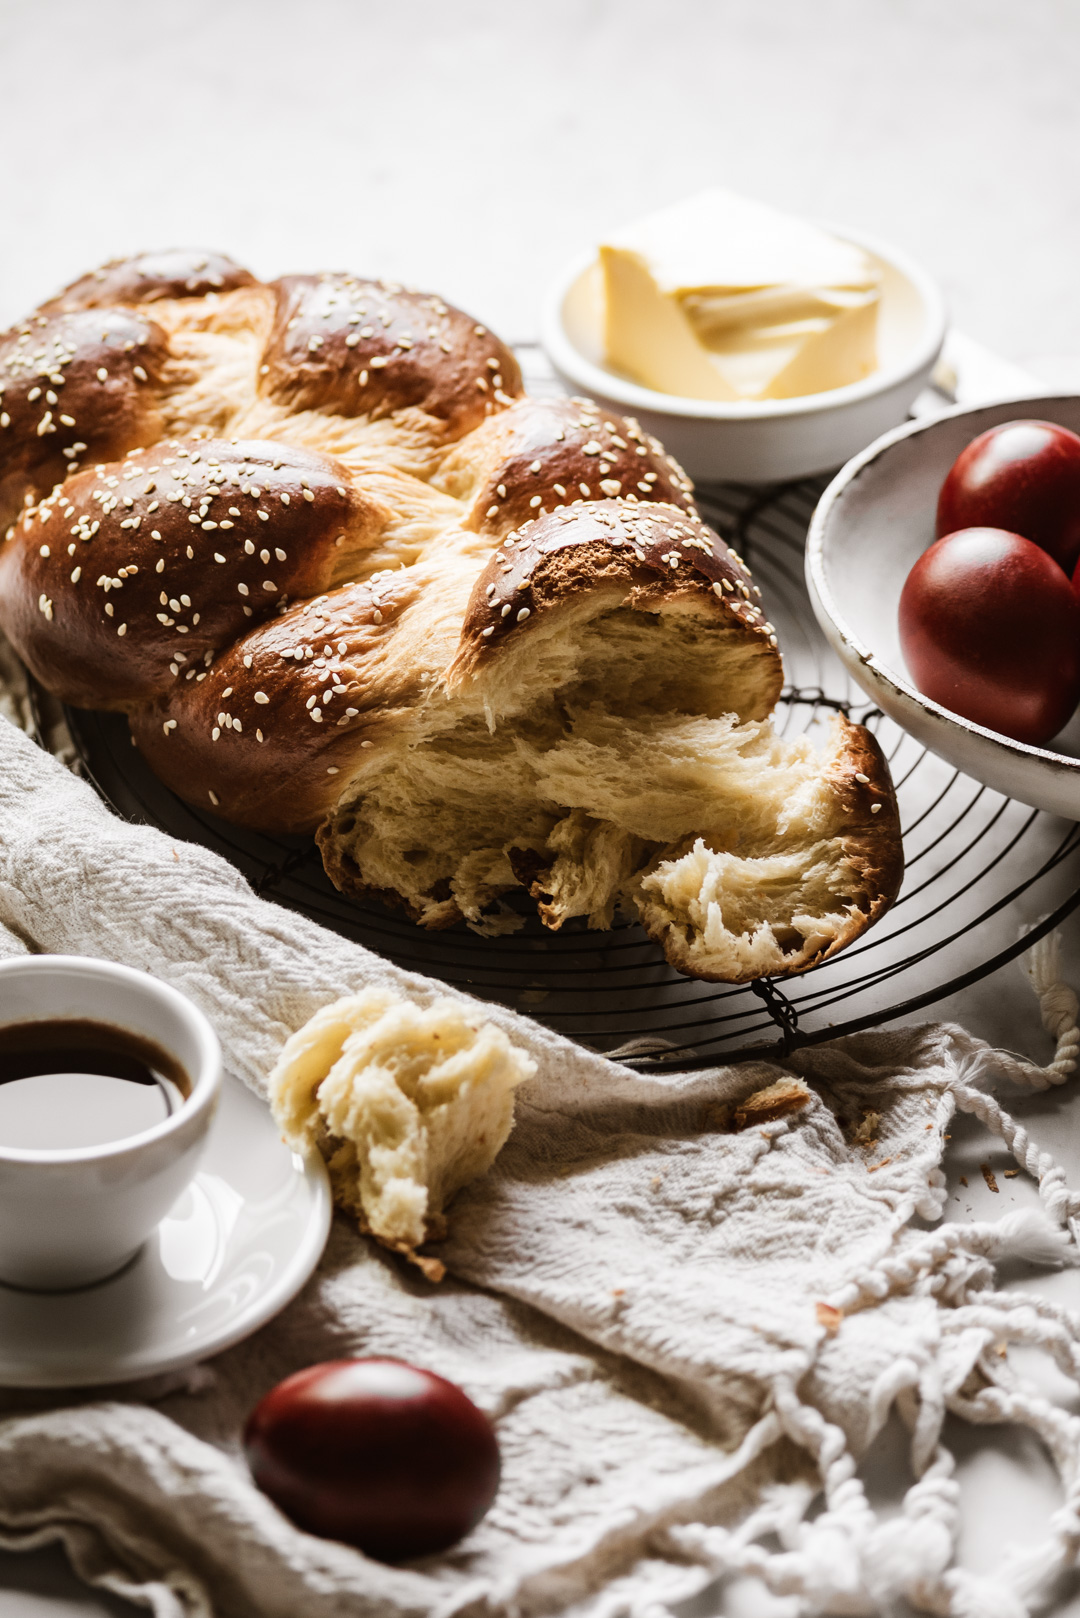
Another reason that tsoureki is so special and greatly anticipated is due to the fact that most Greeks have been fasting from dairy & animal products for 46 days of Lent preceding Pascha. So this sweet braided bread is especially treasured after fasting! We also prepare red-dyed eggs on Holy Thursday, which will be enjoyed with tsoureki on Pascha (you can see a tutorial of how I make them HERE). Their deep red color symbolizes the blood of Christ. We crack these dyed eggs together on Pascha in the traditional game of ' tsougrisma .' Cracking the eggs symbolizes Christ's resurrection from the dead and as we play we say "Xristos Anesti!" (Christ is Risen!)

As I write about these traditions and what they mean to us, I cannot help but become emotional. Pascha is a very sacred holy remembrance in the Greek culture and especially so in Greece. When my hubby and I moved to Greece back in 2018, our first day there was Μεγαλή Παρασκευή (Good Friday). The whole country is in a state of mourning, remembering Christ's death – flags are at half-mast and church bells solemnly ring throughout the day. It is a deeply emotional day that was really incredible to experience upon arriving in our new homeland.
Tsoureki – Greek Pascha bread is a recipe that I truly hope you experience at some point in your life. And it can be enjoyed at any time of year, not just during Pascha.
TSOUREKI - GREEK PASCHA BREAD
April 15, 2020
by Bella Karragiannidis
Total Time
4 hours, 35 minutes
Notes
While I have shared instructions for mixing this dough by hand, if you have a stand mixer you can simply use your stand mixer bowl for whisking the eggs and sugar. Then move forward with the rest of the instructions but using your stand mixer to mix and knead.
Ingredients
FOR THE FLOUR ROUX:
- 25g (3 tbsp) bread flour
- 100g (7 tbsp) milk
FOR THE YEAST MIXTURE:
- 100g (7 tbsp) warm milk
- 100g (7 tbsp) warm water
- 9g (3 tsp) active dry yeast (instant will work too)
- 12g (1 tbsp) sugar
- 100g (7/8 cup) bread flour
FOR THE DOUGH:
- 3g mastiha tears + 12g (1 tbsp) sugar
- yeast mixture
- flour roux
- 3 eggs
- 300g (1 1/2 cups) sugar
- 5g (2 tsp) mahlepi
- zest of one orange (about 1 tbsp)
- 100g (4 oz) orange juice
- 114g (4 oz) melted butter, cooled
- 1 tsp kosher salt
- 875g (7 cups) bread flour
- 1/4 cup flour for dusting hands & surface
- egg wash: 1 egg beaten with a splash of milk
- 2 tbsp sesame seeds for garnish
Instructions
FOR THE FLOUR ROUX:
- Add flour and milk to a saucepan set over medium-high heat. Cook the mixture, whisking constantly until it starts to thicken. Once the mixture is a thick slurry, remove pan from heat and scoop roux into a small dish. Cover with plastic wrap to prevent a skin from forming and set aside to cool.
FOR THE YEAST MIXTURE:
- Add warm milk & water to a large bowl, whisk in the yeast, followed by the sugar & bread flour. Once mixture is relatively smooth, cover with a damp kitchen cloth and leave to rest in a warm place for 45 minutes.
FOR THE DOUGH:
- Once the yeast mixture is done resting, prepare your other ingredients. Add 1 tbsp sugar + 3g mastiha tears to a small mortar and pestle and grind until mastiha is as fine as the sugar.
- In a medium sized bowl, whisk 300g of sugar with 3 eggs until fluffy, about 2 minutes.
- To your large bowl with the yeast mixture, add the flour roux, whisked eggs & sugar, mastiha sugar, mahlepi, orange zest, orange juice & melted butter. Whisk until well combined.
- Slowly add the flour to the bowl, about 2 cups at a time, whisking between each addition. When the mixture, after 4 cups of flour has been whisked in, remove the whisk, add the remaining flour and start to mix by hand.
- Once all of the flour is well incorporated, dust your surface with flour, remove the dough from the bowl and begin kneading with floured hands. The dough will seem sticky at first, but resist the urge to add more flour.
- After 15 minutes of kneading, the dough will feel nice and smooth.
- Place dough back in the bowl, cover with a damp kitchen towel and leave in a warm place to rise until doubled - it should take about 2 hours.
- Once the dough is doubled, punch it down and divide it into three evenly sized pieces (you can use a kitchen scale to ensure your pieces are all the same weight).
- Cover & reserve two of the portions. Divide the remaining portion into three evenly sized pieces and begin to shape into roughly 14" long ropes. Bring the three rope ends together and pinch to seal. Braid the loaf by gently wrapping alternating ropes over the middle rope until you reach the other end. Press, fold & tuck the rope ends under each end of the loaf. Move to a parchment lined baking sheet and loosely cover with plastic wrap or a damp kitchen towel. Repeat the above process with the reserved dough portions.
- Leave your braided loaves to rise in a warm place until doubled, about 1 hour. Pre-heat your to oven to 350°F 30 minutes into your loaves rise time.
- Once your loaves have risen, brush them with egg wash & sprinkle with sesame seeds. Bake in the center of the oven for 35-40 minutes (alternating baking sheets half way through). The loaves should be nicely browned and golden on top.
- Place finished loaves on a rack to cool before eating. Enjoy with softened salted butter, hard boiled eggs & coffee :)
more Greek Pascha recipes:
- GLUTEN-FREE TSOUREKI
- TZATZIKI
- AVGOLEMONO
The post TSOUREKI – GREEK PASCHA BREAD appeared first on ful-filled.
]]>The post WINTER GREEK SALAD | <span style=''font-size:12px;'>WITH CITRUS SHALLOT DRESSING</span> appeared first on ful-filled.
]]>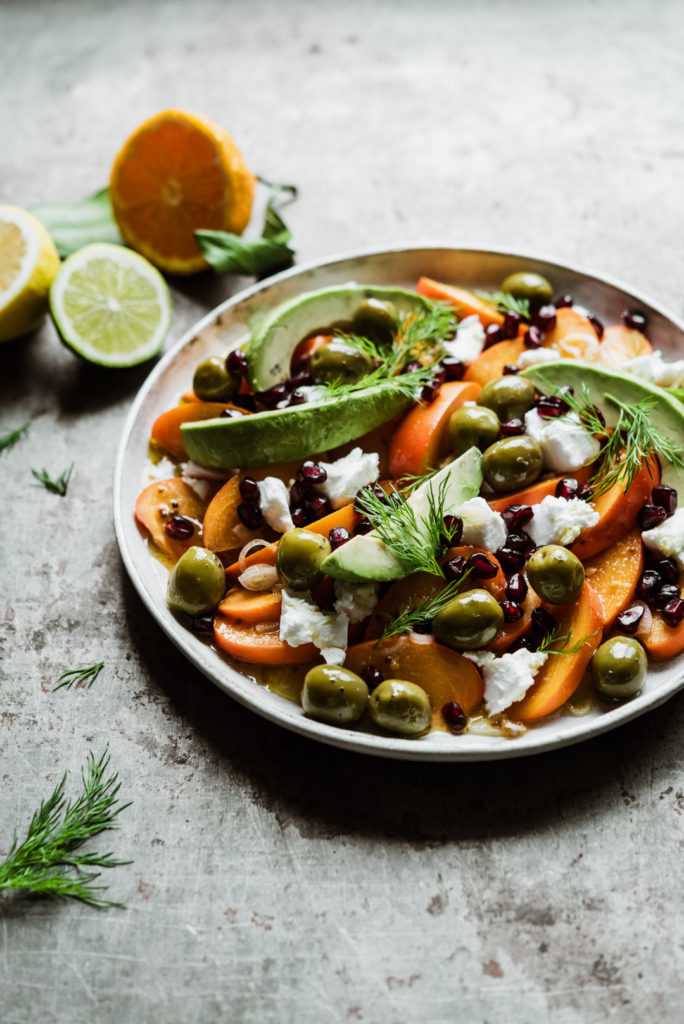
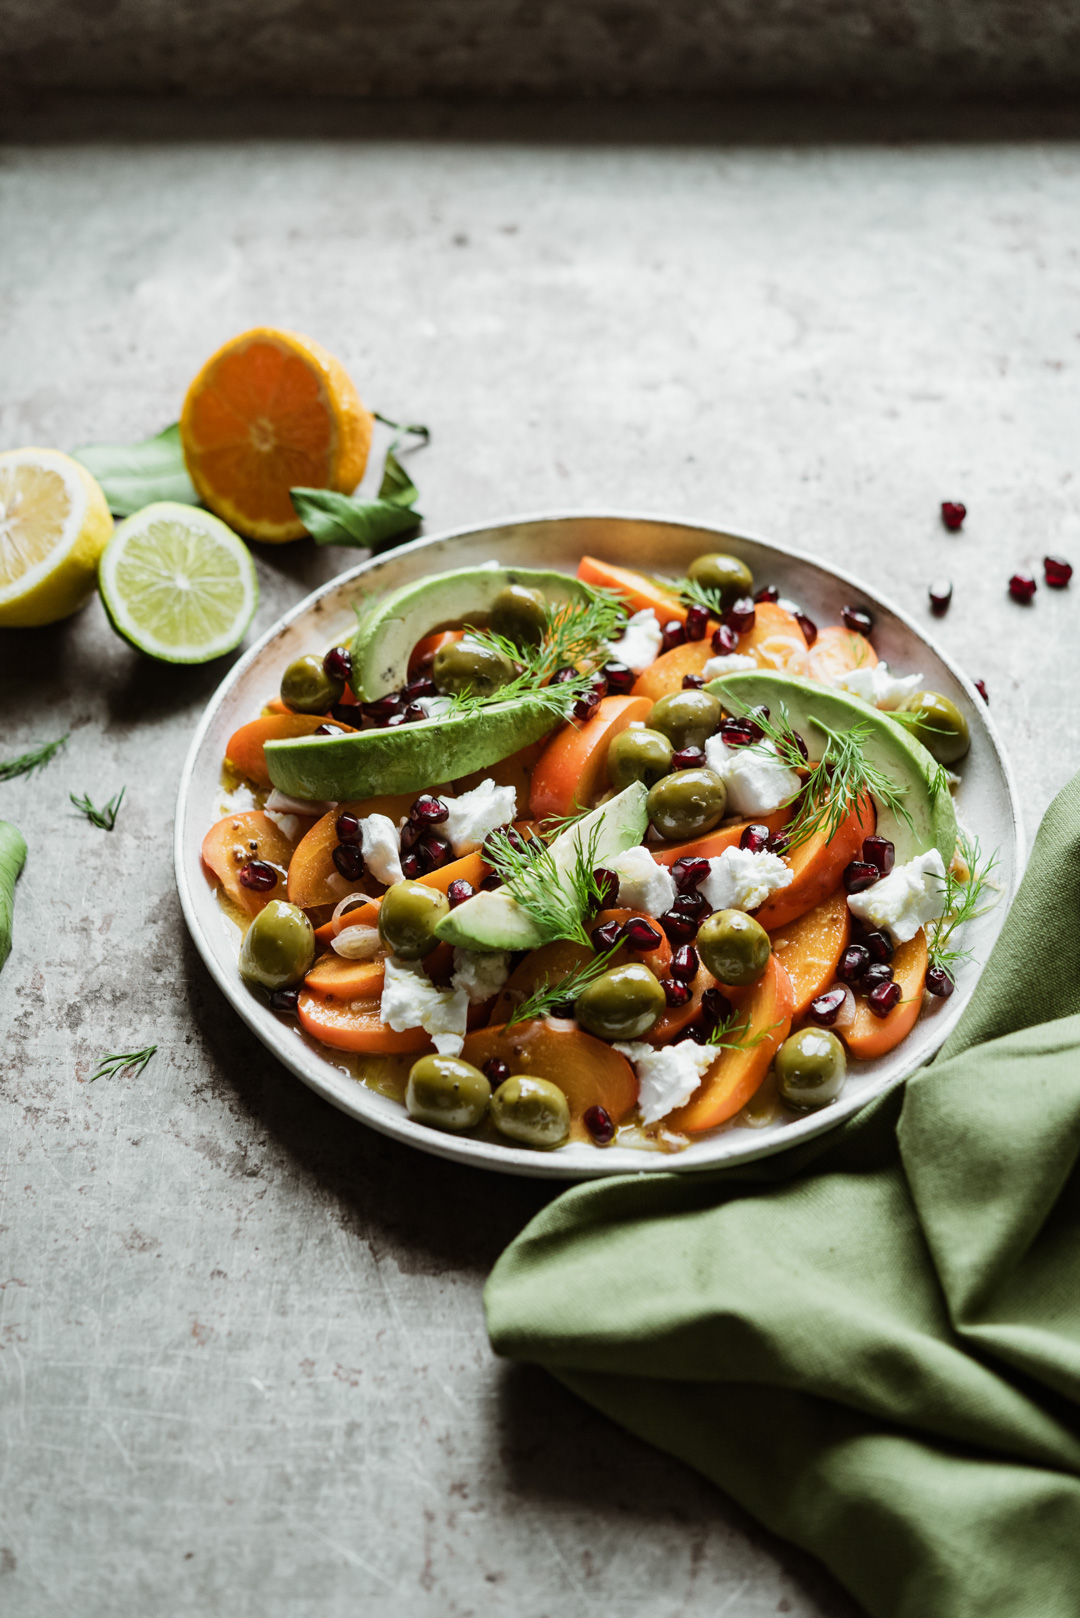
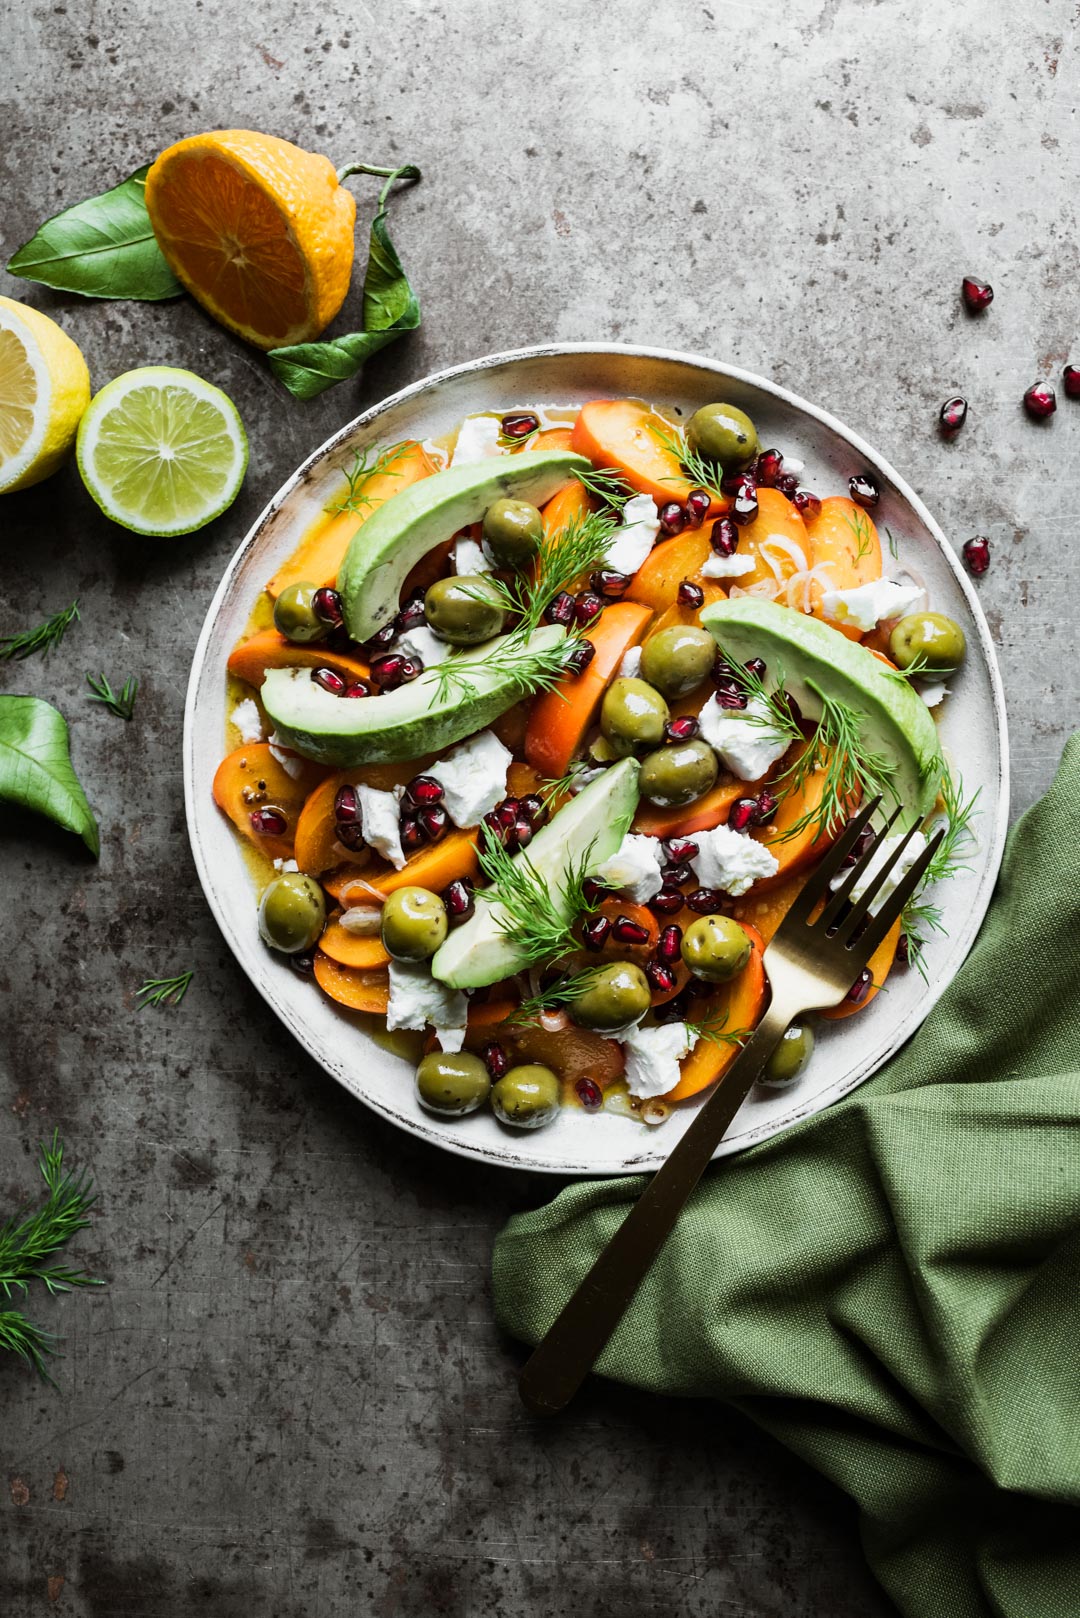
A traditional Greek salad comprising of tomatoes, cucumbers, onions & feta is one of the most iconic dishes of Greece. And for good reason! It is the perfect combination of flavors, textures, and freshness. When most people think of Greece, they picture whitewashed buildings against the vibrant blue sky & sea. People flock to Greece for its warm, sunny weather and seemingly endless summer days. But outside of the warm season, there is a whole other Greece to be experienced. Albeit cold and often gloomy, the cold season in Greece is actually my favorite time to be there. When tomatoes & cucumbers are no longer in season, markets fill with the fruits of fall and winter. Persimmons, citrus, and pomegranates are the mainstays of the cold season there and they are the inspiration behind my winter Greek salad.

While Greece may be a world away, it does not keep me from thinking about our life there every single day. My heart craves the simplicity of village life. Although there were times that I struggled with just how little there was to choose from when it came to food, I always found a way to make do with what was available. Produce is hyper-seasonal on our island and in most of Greece for that matter. You won't find cucumbers in winter, just as you won't find broccoli in the summer. So in turn, you relish in the harvest of each season. Inspired by the way we had no choice but to eat with the seasons in Greece, the concept of this winter Greek salad came to me the other day.
winter Greek salad breakdown:
PERSIMMONS: There are two varieties of persimmon: astringent & non-astringent. Astringent varieties, like hachiya, must be very soft before eating. Non-astringent varieties, like fuyu, can be eaten firm like an apple or allowed to ripen until the flesh is as soft as you like. Persimmons have a very sweet but clean taste with a semi-firm texture that is similar to a melon. Unripe persimmons will make you pucker from the tannins, while ripe ones are absolutely delicious and make the perfect winter substitute for tomatoes in our winter Greek salad.
CITRUS: By far and large, citrus is the most abundant fruit in the cold season in Greece. Oranges, lemons, mandarins & bergamot are amongst my favorite citrus that grows on our island. For this winter Greek salad, citrus is going to stand in as the acid for the dressing. I used mandarin, lemon & lime because that is what we have growing in our neighborhood here in California, but feel free to use whatever citrus you can get :)
POMEGRANATE: A fruit that has been revered by the Greeks as a fruit abundance since antiquity. If you have never tried one, pomegranate arils (the little pods that lie behind the hard shell) have a wonderful taste, both tart and sweet. The way that the arils kind of burst when you bite into them, lends a delightful texture and bright flavor to this Greek winter salad.

THE USUAL SUSPECTS: Olive oil, feta, olives, onion & herbs. A traditional summer Greek salad will consist of all of these things. The only difference with this winter Greek salad is the type of these ingredients that I chose. Green olives are my hubby's favorite, shallot has a gentler flavor and texture than red onion, and fresh dill stands in for the dried oregano.
*THE UNUSUAL SUSPECT: Avocado – most definitely not a traditional Greek ingredient. However, we have a HUGE avocado tree that grows in our village in Greece, so it is most definitely a wonderful addition to this winter Greek salad.
All of these flavors and textures combine to make a winter Greek salad that tastes nothing like the traditional Greek salad of summer but trust me when I tell you, that it is perfect in every way! Feel free to use this recipe as a basis with whatever winter produce you have available to make your own seasonally inspired Greek salad!
WINTER GREEK SALAD
December 20, 2019
by Bella Karragiannidis
Ingredients
FOR THE SALAD:
- 4 Non-astringent persimmons, such as fuyu or amagaki
- 1 avocado
- 8 oz. feta cheese (we used VioLife vegan feta)
- 1/2 cup green olives
- 1/4 cup pomegranate arils
- 2 tbsp dill sprigs, to garnish
FOR THE DRESSING:
- 1 tbsp, thinly sliced shallot
- 1/4 cup fresh mandarin or orange juice
- 1 tbsp lemon juice
- 1 tsp lime juice
- 1 tbsp honey, add more to taste
- 1 tbsp whole grain mustard
- 1/4 cup extra virgin olive oil
- salt, to taste
Instructions
- Start by making the dressing by whisking all of the ingredients together in a small bowl. Taste for seasoning and desired sweetness, adjust if necessary and set aside to allow flavors to mingle while you prepare the salad.
- Remove the stems of the persimmons and slice the persimmons into about 1/4 inch thick slices, removing any seeds you encounter. Arrange the sliced persimmons on a shallow bowl. Add slices of avocado and olives.
- Drizzle the citrus shallot dressing over the salad. Garnish with crumbled feta, pomegranate arils & dill sprigs.
*This salad is easily made vegan if you use a quality vegan feta cheese. While there are recipes to make it yourself, we absolutely love VioLife Foods Just Like Feta! This is not sponsored in any way, we just adore their feta and love supporting Greek companies like VioLife Foods!
more Greek recipe inspiration:
CREAMY SPANAKOPITA SOUP
CLASSIC GREEK BAKLAVA
HARISSA ROASTED RED PEPPER FETA SPREAD – HTIPITI
The post WINTER GREEK SALAD | <span style=''font-size:12px;'>WITH CITRUS SHALLOT DRESSING</span> appeared first on ful-filled.
]]>The post CLASSIC GREEK BAKLAVA | <span style=''font-size:12px;'>WITH WALNUTS & HONEY</span> appeared first on ful-filled.
]]>
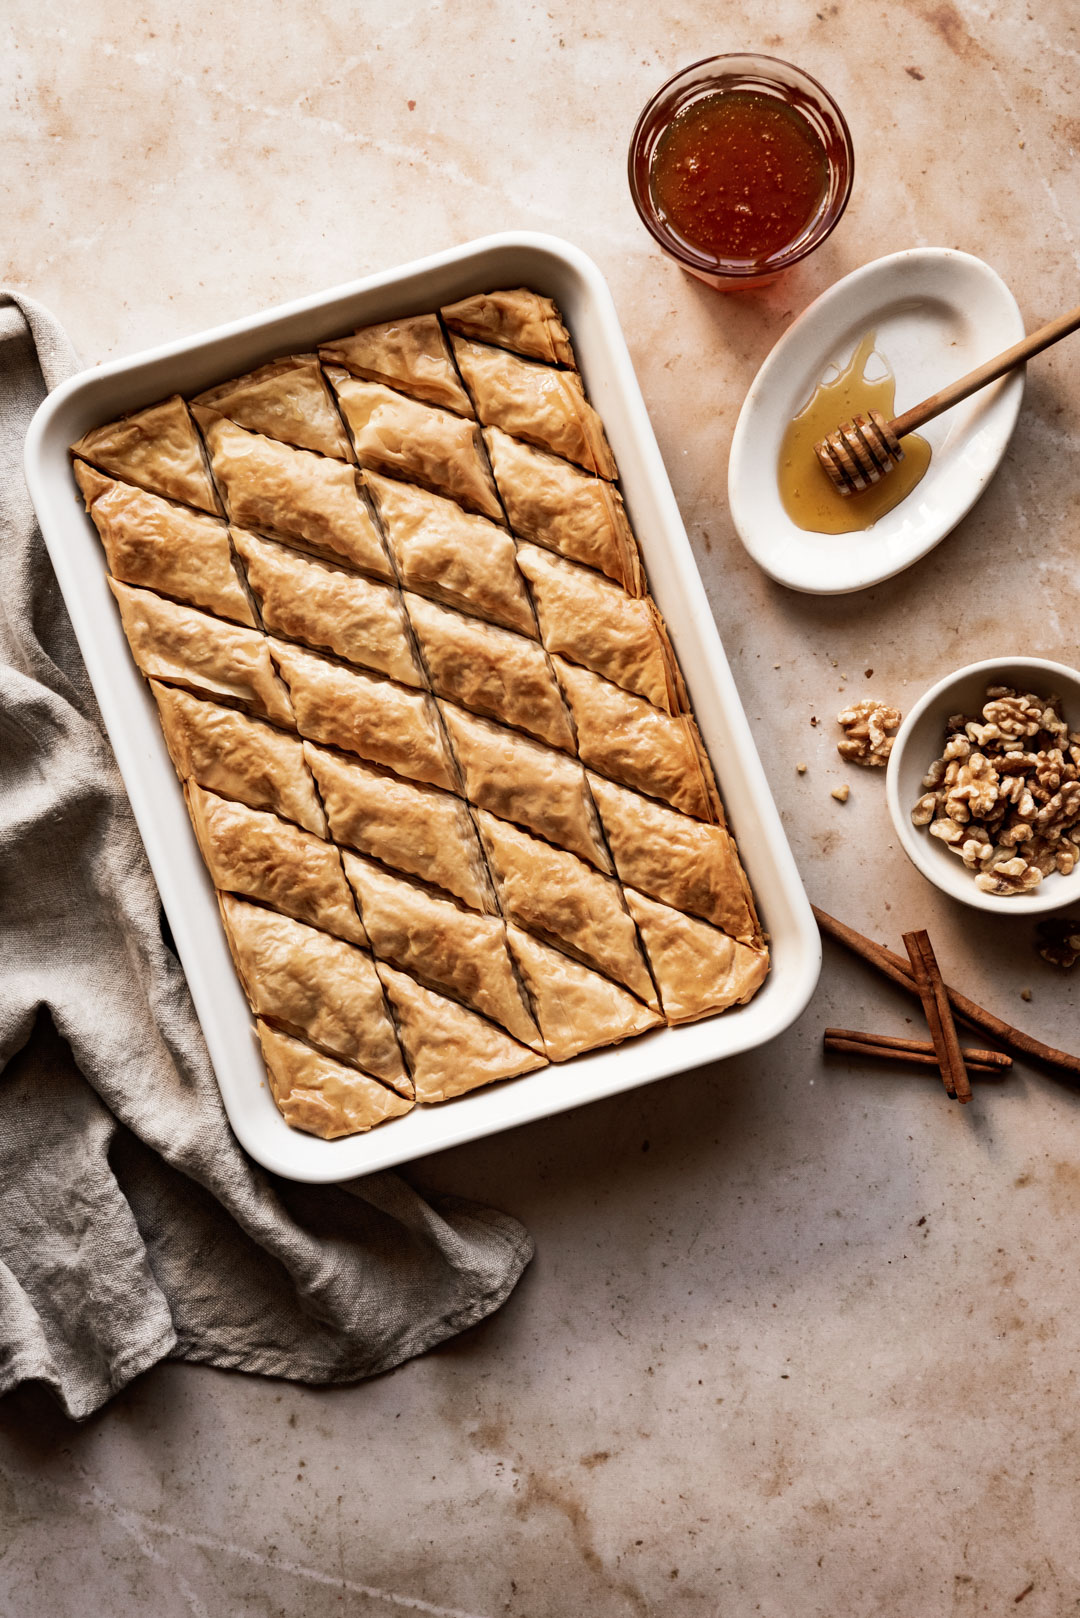
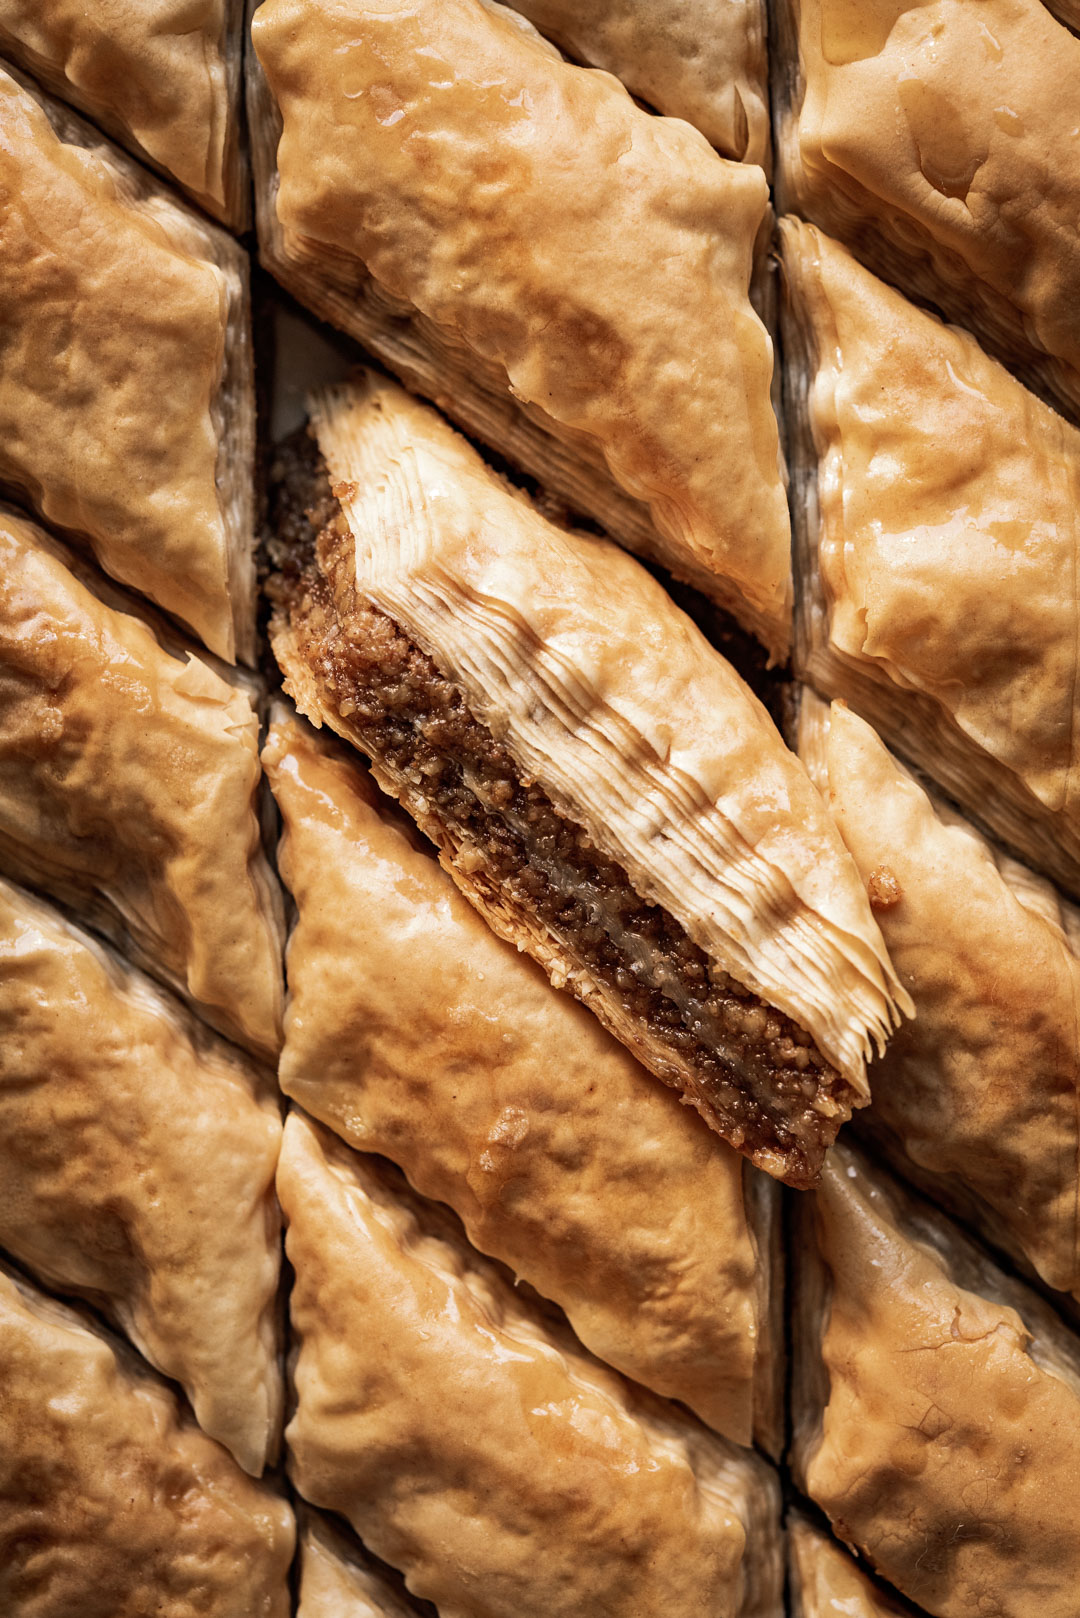
There is no dessert more associated with Greek cuisine than baklava. Sweet syrup-soaked layers of golden fillo dough filled with ground nuts & spices – baklava is loved by people the world over for good reason, it is absolutely delicious! There are so many cultures that make baklava, each with their own unique variations, and with its exact origins deeply disputed, I am not here to claim that baklava is Greek. I am simply here to share this classic Greek baklava recipe with you because I want you to be able to make & enjoy baklava with those you love!
Every year when the holiday season commences, I look forward to making and gifting our classic Greek baklava. There are a handful of Greek cookies that are specifically made during this time of year, but none of them quite compare to baklava in our opinion. And because my hubby's Greek family has always made baklava for the holidays, it is only natural that it became a part of my life when we got married.
about classic Greek baklava
There are three things that are specifically characteristic of classic Greek baklava. First; honey is a key ingredient in the syrup (if you are vegan, you can substitute with agave). Second; walnuts are most commonly used for the nut filling. And third, the nut filling is flavored with at least one spice. For this classic Greek baklava recipe, we will be using both honey & sugar to sweeten our syrup and walnuts & cinnamon will make up our filling.
do not fear fillo dough
The number one thing that keeps most people from making baklava at home is the fear of working with fillo dough. Thin, paper-like sheets of fillo dough are much more resilient and forgiving than you may imagine. But, there are two very simple steps that you need to take to ensure that your fillo dough will be easy to work with. (THIS is my favorite fillo dough)
- STEP 1: Thaw your frozen fillo dough by removing it from the freezer the night before you are going to make your baklava. Place the frozen fillo dough to defrost in the refrigerator overnight. 1 hour before using, remove your package of fillo dough from the refrigerator and leave it in the package at room temperature.
- STEP 2: When you are ready to start layering your fillo dough into your baking vessel, use a lightweight, damp kitchen towel to fully cover your stack of fillo sheets to keep them from drying out while you work.
baklava de-mystified
Now that you no longer fear working with fillo dough, let's de-mystify the baklava making process. Baklava is not a technical pastry. You cannot ruin it by messing up measurements for example. It is simply layers of fillo, butter, and spiced nuts that get baked until golden and then soaked in a sweet syrup. Here is a simple breakdown of the process:
- PROPERLY THAW YOUR FROZEN FILLO: *see above for explanation
- MAKE YOUR SYRUP: the syrup needs to be cool before it is poured over the hot baklava, therefore, we start by making this first.
- CLARIFY YOUR BUTTER: we remove the milk solids from our melted butter because they will negatively affect the flavor & aesthetic of our baklava
- PREPARE YOUR NUT FILLING: 4 cups of finely ground nuts of your choice – *walnuts are our favorite. Add spices like cinnamon, clove, or even cardamom to flavor the nut filling. A bit of sugar added to the ground nuts helps them bind together while baking. And a pinch of salt balances the overall sweetness of the baklava.
BAKLAVA ASSEMBLY BREAKDOWN:
- STEP 1: 14 layers of buttered fillo
- STEP 2: Half of nut filling
- STEP 3: 6 layers of buttered fillo
- STEP 4: Remaining half of nut filling
- STEP 5: 16 layers of buttered fillo
- STEP 6: Score top layers of fillo into pattern of choice before baking
- STEP 7: Bake at 325°f for 1 hour to 1 hour & 15 mintues
- STEP 8: spoon cooled syrup over hot baklava
- STEP 9: cool completely at room temperature to allow syrup to fully soak into baklava
- STEP 10: cut through all layers of baklava to create individual slices and ENJOY!
By breaking down the baklava making process into specific steps, hopefully, you can see that it actually is not that complicated after all! And to further encourage you to make baklava, I produced a very detailed video of the entire process and posted it to IGTV. You can watch PART 1 HERE and watch PART 2 HERE.
The greatest thing about baklava is that it is completely customizable! And because there is no baking chemistry involved, you have the freedom to really play with your flavor combinations, layering techniques, and scoring patterns! If you give my classic Greek baklava recipe a try, I would love to hear what you think in the comments! Your feedback means so much to me and helps me make sure I am providing you with everything you need to be successful in your kitchen endeavors!

CLASSIC GREEK BAKLAVA
December 14, 2019
by Bella Karragiannidis
Cook Time
1 hour, 15 minutes
Notes
The fillo brand that I use comes with 18 sheets of fillo that is 13x18" - this yields a total of 36 sheets of 13x9" fillo dough for my baklava. Depending on the brand of fillo that you use, your total number of sheets may vary. But if you have a little more or a bit less, you will be just fine. Just make sure to calculate approximately how many sheets you have before you start so that you will know how many sheets of fillo to use for each section of the baklava.
Ingredients
FOR THE SYRUP:
- 1 cup water
- 1 cup sugar
- 1 cup honey (substitute with agave for a vegan version)
- 2 tbsp fresh lemon juice
- 1 cinnamon stick
FOR THE BAKLAVA:
- 1 lb. (454g) frozen fillo dough, thawed
- 2 sticks (227g) unsalted butter, clarified (use plant based butter for a vegan version)
- 4 cups (500g) raw walnuts, finely ground
- 3 tbsp sugar
- 2 tsp ground cinnamon
- 1/2 tsp fine sea salt
Instructions
FOR THE SYRUP:
- Combine water, sugar, honey, lemon juice & cinnamon stick in a saucepan and cook over medium heat, stirring occasionally until simmering. Simmer for 5 minutes, turn off heat and leave syrup to cool completely.
FOR THE BAKLAVA:
- Pre-heat your oven to 325°F
- Butter a 9x13 baking dish with a pastry brush and some of your clarified butter.
- Start your layers by adding 1 sheet of fillo dough into the baking dish, gently smooth it with your hands & using a pastry brush, butter the fillo sheet thoroughly. Continue this process until you have 14 layers.
- Use a large spoon to evenly distribute 1/2 of the nut filling on top of your fillo layers, using the back of the spoon to smooth out the nut filling.
- Add 6 layers of buttered fillo over the top of the first layer of nut filling.
- Evenly distribute the remaining nut filling over the center layer of fillo.
- Add the final 14 layers of fillo over the 2nd layer of nut filling.
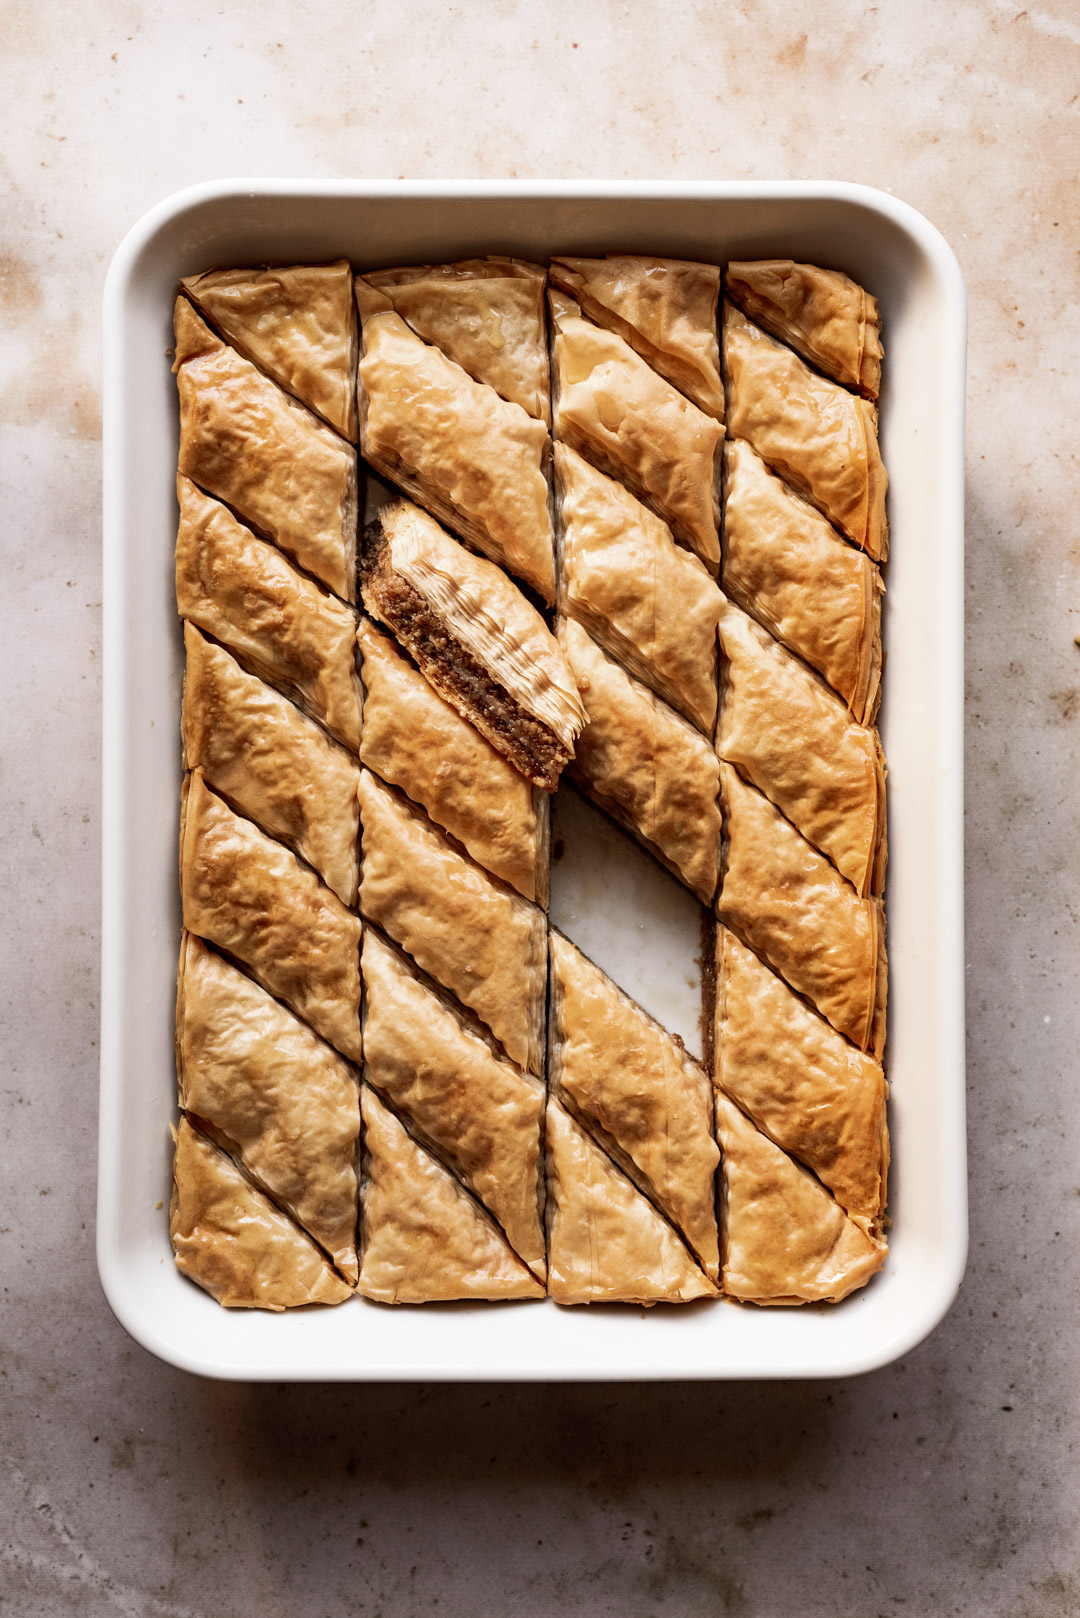
- Score the top layer of buttered fillo dough with a sharp knife. I typically score into diamond shapes or squares, but you can choose whichever shape you like! You can use a ruler if you want your slices to be very precise.
- Bake scored baklava in the oven for 1 hour to 1 hour & 15 minutes until nice and golden in color.
- Once you have removed the baklava from the oven, use a large spoon to slowly pour the cooled syrup over the baklava, making sure to evenly distribute the syrup nice over every area of the baklava.
- Cool baklava completely at room temperature. Cut through all of the layers with a sharp knife before removing individual slices of baklava. Enjoy!
more recipes that feature fillo:
- APPLE BUTTER RUFFLED MILK PIE
- PUMPKIN SPICE RUFFLED MILK PIE
- EGGNOG RUFFLED MILK ROLLS
The post CLASSIC GREEK BAKLAVA | <span style=''font-size:12px;'>WITH WALNUTS & HONEY</span> appeared first on ful-filled.
]]>The post APPLE BUTTER RUFFLED MILK PIE | <span style=''font-size:12px;'>A GUEST POST FOR LOCAL MILK & A SPECIAL ANNOUNCEMENT</span> appeared first on ful-filled.
]]>
This last week has been one of the most incredible weeks of my blogging career. Today, a very special recipe that I created went live on the Local Milk blog. My eyes literally filled with tears as I typed that last sentence because Beth Kirby, the creator of Local Milk, has been one of my biggest inspirations as a photographer & blogger. From her writing to her recipes, to her iconic photography, the work Beth has done through her blog Local Milk has left such a huge imprint on not only me but an entire world of creatives. So it is with deep honor and joy, that I get to share my recipe for apple butter ruffled milk pie over on her blog. Click here to see my recipe over on Local Milk.

If being a guest contributor for Local Milk wasn't enough, I found out a week ago today, that I am a finalist for this year's Saveur Blog Awards in the category of Best Food Instagram! I have dreamed of receiving this honor for my entire little blogging career, so to actually become a finalist is absolutely mind-blowing to me! Of course, this would not have happened if it was not for all of you nominating me in the first place! And there are not enough ways that I could possibly thank all of you for supporting me & the work I do through Ful-filled! It truly means so much to me to know that my work has touched you all enough for you to nominate me to receive this incredible honor of recognition from Saveur Magazine!
Voting for the blog awards is open until October 18th and you can cast your vote every day until then! It only takes a few seconds to vote and every vote truly does count! Just click on the image below, scroll down to 'BEST FOOD INSTAGRAM' and you will find my Instagram handle: @ful.filled (!!!)

There is only one thing that I can think to say at this moment, after such a whirlwind this past week has been…a Greek term of speech that we use all of the time to express immense gratitude: χιλιά ευχαριστώ (xiliá efxaristó) which basically translates to 'a thousand thank you's.' Thank you to Beth Kirby for having me be a part of the new chapter of Local Milk, thank you to Saveur Magazine for recognizing me, & thank you to each and every one of you for all of your love and support <3

The post APPLE BUTTER RUFFLED MILK PIE | <span style=''font-size:12px;'>A GUEST POST FOR LOCAL MILK & A SPECIAL ANNOUNCEMENT</span> appeared first on ful-filled.
]]>When Is The Voting For 2019 Saveur Blog Awards
Source: https://www.ful-filled.com/category/greek/feed/
Posted by: hillsomprood.blogspot.com
0 Response to "When Is The Voting For 2019 Saveur Blog Awards"
Post a Comment